Hi everyone! I hope your weekend was good. We had a great weekend, with beautiful spring weather. The crocuses are now flowering and since we switched over to summer time, we have an extra hour of light in the evenings.
It is the first of April, and you might already have heard a couple of April's Fools jokes. I am still thinking of a funny joke for the kids tonight. Our theme at the Simon Says Stamp Monday Challenge Blog is Don't Be Fooled, Be Foiled. Fun! Since it is the first Monday of a new month, the team is showcasing the products of a specific designer/company and this week the turn has come to Gina K Designs. Here you can find all the wonderful stamps, dies, stencils, ink, foil, paper products and more by Gina K. You don't have to use Gina K products to join us, but it is always fun if you do.
Since it is a new month, we also have a new guest designer, and for April Sabrina Perna will be our guest. Stop by her blog It's Time To Create-my Mixed Media Corner and you will be treated with fantastic projects.

I made a set of two cards and a bookmark this week. Since I have been very much in a mood for yellow lately, these cards also feature yellow as the main color. The flowers were watercolor stamped, which is one of my all time favorite techniques. It is easy to do, and gives a slightly different result every time. No flower will look exactly like the other.

These are the Gina K products that I used: Crystalline Drops, Watercolor Flowers, and Artist's Choice cardstock.

Start by inking a flower with Mustard Seed Distress Ink. Add a darker shade towards the center with a Wild Honey marker and brown to the center with Gathered Twigs.

Here's a close up where you can better see the ink once it is applied to the stamp.

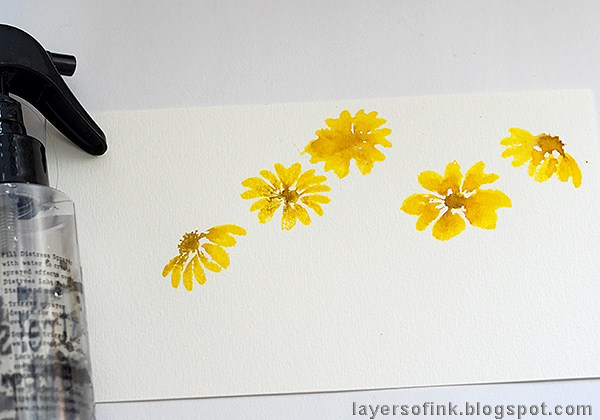
Mist with water about three times and stamp on watercolor paper.

Depending on how much water you mist on the stamp, you will get a different look to the flowers. Here I used slightly too much water for the stamp in the middle, but I will fix that later.

The Watercolor Flowers stamp set includes leafy stems, but I wanted my stems to be taller, so I painted them with watercolor paint instead. You can also use Distress Ink (smear on non-stick craft sheet, mist with water and pick up with the paint brush).

One of my favorite things with the Watercolor Flowers set is that it contains lose leaf stamps. Stamp these to the stems, again misting with water first. For variation, I also used some of the leave stamps attached to stems, but wiped off the ink from the stem before stamping.

Paint a grassy base with watercolor paint or Distress Inks. I used water to soften the edge on the left-hand card, while leaving a sharper edge on the right-hand card. Splatter some brown and green paint on the background for texture.

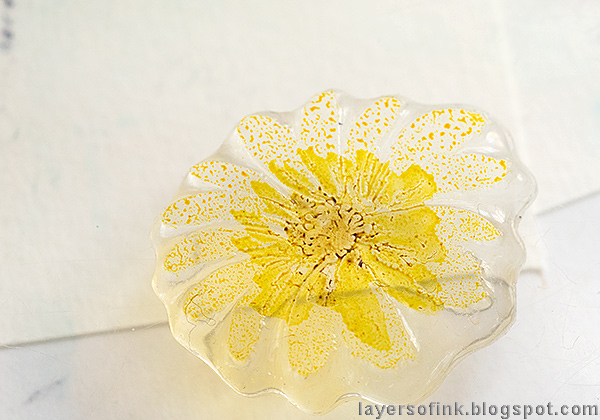
Stamp a sentiment with brown ink and distress the edges. Add dimension and shine with the Crystalline Drops. I hadn't used these before and was impressed with how easy it was to get perfectly round drops, even tiny ones.

Adhere Sizzix Permanent Adhesive to white card. Die cut words using the Tim Holtz Sizzix Celebration Words Script and Adventure Words Script sets.

Remove the adhesive covering and rub Ranger's Vintage Shiny Transfer Foil on top. I used soft vintage gold for one of the cards and a darker metallic brown for the other.

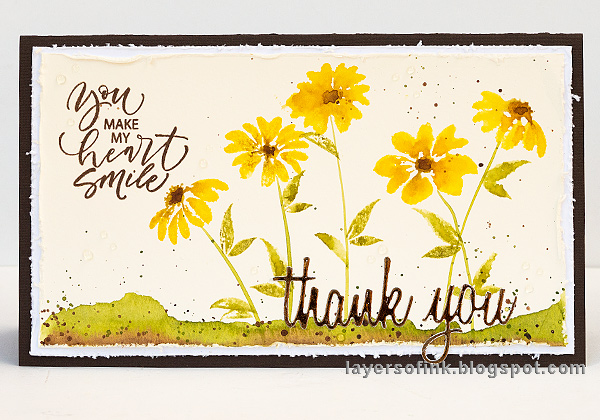
I made one horizontal thank you card, already having left space for the sentiment stamp.

You can always add more details with watercolor paint. I added some brown paint to the centers of some of the flowers, which made a difference especially to the flower that was stamped with too much water.

All the flowers and leaves will look different, which is one of the fun parts of the watercolor stamping technique.

The foil gives a great shine to the words, and has a lovely vintage look.

Here's a look at the harder, more defined, grassy edge of the horizontal card.

The second card was given a lighter look and feel and was mounted on white and green cardstock. I added foil around the edges of a white cardstock matte, to coordinate with the word. Simply apply adhesive along the edge and rub a foil sheet on top. I used my ATG gun and just applied a thin line of tape along the edge.

Here you can see the foil edge better. I wanted it to look a little distressed and scraped it here and there to reveal the white paper. On the second card, I used clean water to soften the edge of the grass, which gives a different look to the harder edge of the first card.

When stamping the two cards, I tried out how much water was needed on a couple of scrap papers, one of them was this tall paper, which I decided to turn into a bookmark. The panel was layered on brown and white cardstock and I used a We R Memory Keepers Angle Corner Chomper to cut the upper corners. The edges were not distressed, since I wanted the bookmark to be as flat as possible.
I hope you will join us this week in our Don't Be Fooled, Be Foiled challenge. As always, you have a chance to win a $50 gift voucher to do some fun shopping at Simon Says Stamp. You have until next Monday 8am Ohio time. 1pm UK time, 2 pm CET to join in.


This comment has been removed by the author.
ReplyDeleteI've been enjoying all of your yellow work lately, Anna-Karin! These flowers feel like a bit of sunshine and have a gorgeous watercolor feel. Maura
ReplyDeleteLove this set and the way you watercolor stamped the flowers. This gives such a soft and light look. Lovely colors, too. Hugs, Macarena
ReplyDeletethose beautiful flowers just shout springtime and the foiled sentiments are the perfect finishing touch. I too am loving that the days are getting longer and that Spring is finally here, hugs kath xxx
ReplyDeleteWhat gorgeous cards! Your work always has this classy touch to it and you incorporated the foil beautifully!
ReplyDeleteLove these fabulous flowers and beautiful bright colors! Anna-Karin. The sentiments are gorgeous! :)
ReplyDeleteLove this trio!!!! Fabulous watercoloring and thank you for the step by step about foil! So helpful! barbara
ReplyDeleteThese are fabulous, Anna-Karin! Love the watercolor look, so pretty! Hugs, Sandra
ReplyDeleteWhat a great set of stamps and your method of stamping makes them look like they were all watercolour painted from scratch. The extra little details you have added to each design finishes them off perfectly. I will have to try this technique with the foils.
ReplyDeleteThanks for sharing your work and the awesome tutorial. Cheers! :)
Loved your step-by-step tutorial !! And the results are stunning!
ReplyDelete