
The Sending Sunshine release is full of gorgeous stamps, dies, stencils and sequins. You can see the whole release here. It is a very versatile release and many of the products have a great summer feeling.
I made two projects for the blog hop, a card and an art journal layout, and both are tutorials. You can use the techniques for other types of projects too of course.
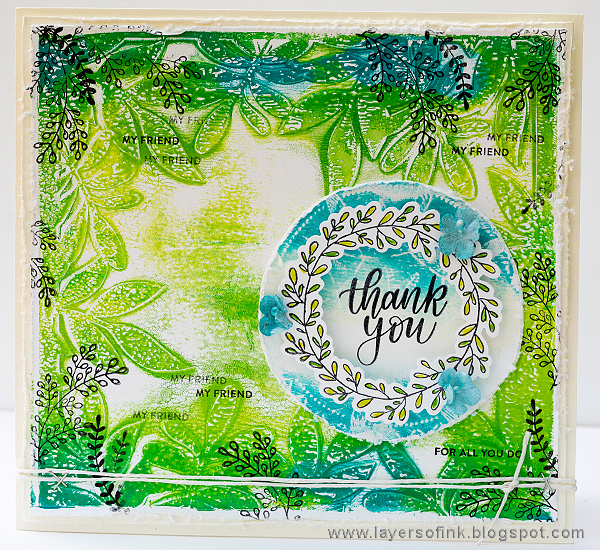
Let's start with the card, which is a spring time thank you card, but if you change the sentiments it could work for many themes. For the background, I used the Leafy Frame stencil, and the sentiments and wreath come from Wreath Greetings. I also used the Bohemian Lace stamp. The background and the circle were printed with my Ranger gel printing plate, and below you will see how easy it is to do.

I used these stamps from the Sending Sunshine release: Bohemian Lace and Wreath Greetings. And the Leafy Frame stencil.
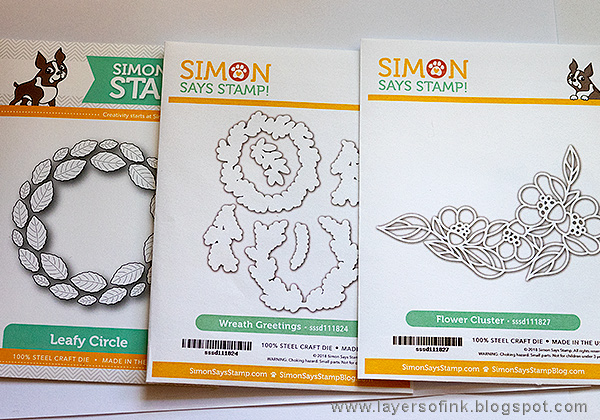
I used these three die sets for my projects: Leafy Circle, Wreath Greetings, and the Flower Cluster.

Start by adding a little bit of Dina Wakley's Lime, Evergreen and Ocean paint to the largest gel printing plate in the 3 Assorted Gel Printing Plates pack. I added the Ocean paint only to the edges. Roll out the paint with a brayer.

Press the Leafy Frame into the paint.
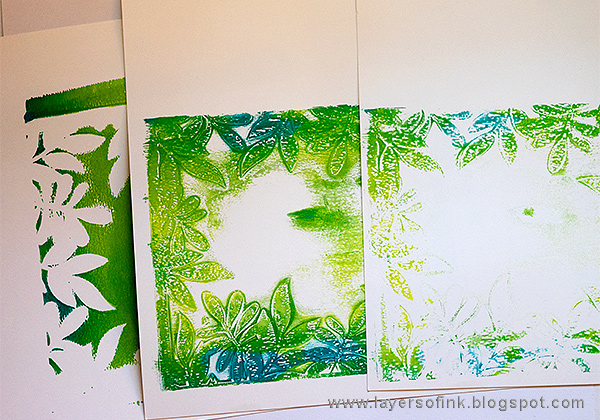
You can get lots of different prints from one application of paint. I used Neenah Solar White paper for the printing. First, I pressed a paper down on the plate without removing the stencil first - the paper to the far left. Secondly, I removed the stencil and pressed another paper on the plate - the print in the middle. Thirdly, I pressed a third paper to the plate - the print to the right. I actually liked the third print the best, but I wanted my card to have more color, so I used the middle one instead.
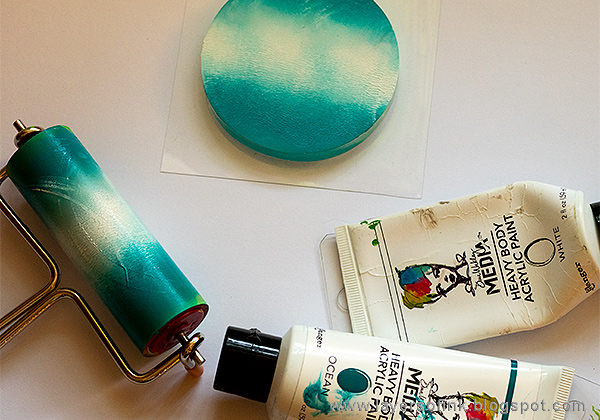
For the circle I added a little white in the middle and Ocean around it. I love the look of this yummy circle.

Then I pressed the Bohemian Lace stamp onto the circle and removed it before pressing the gel circle twice on white paper. I forgot to photograph this step, but here you see the first print (to the right), which I didn't use. I also stamped the stamp on paper before cleaning it. You need to clean acrylic paint off from stamps immediately.
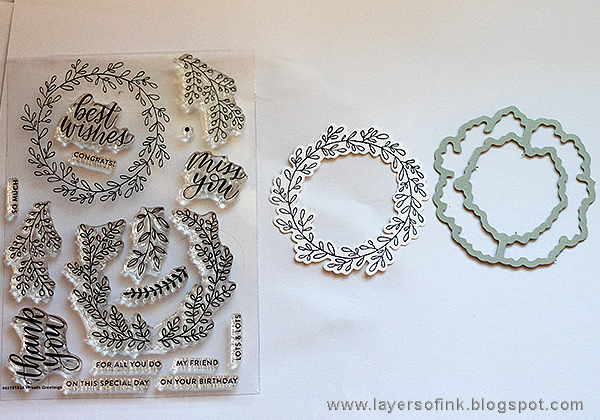
Stamp the wreath on white paper and die cut with the coordinating die. It is easiest to use the Sizzix Magnetic Platform for this.

Color with colored pencils. I used two shades of green on the leaves.
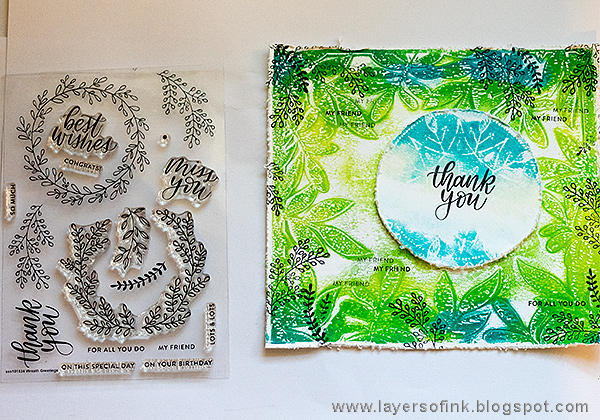
I stamped the main sentiment in the middle of my printed circle. Here you can also see the Bohemian Lace pattern on the circle. I also stamped more words on the background, as well as some leafy branches, all from Wreath Greetings.

The edges were distressed and I layered the print on a piece of cream cardstock. Don't worry if the stamping isn't perfect. I distressed my edges before I decided to stamp, so there are patches missing here and there.

Adhere the wreath with foam dots and tuck three dyed Tim Holtz flowers into the frame.
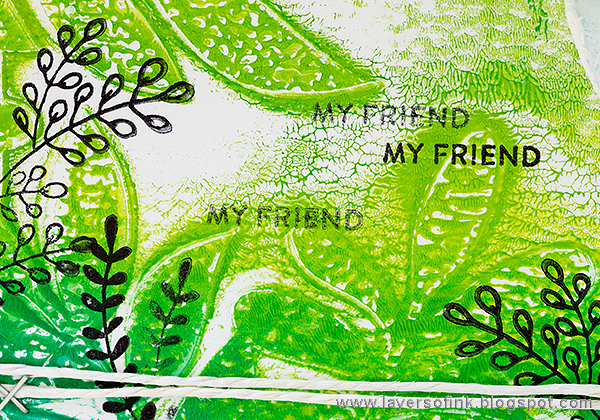
This is my favorite part of the print, the fine crackle pattern, which I hadn't planned for.
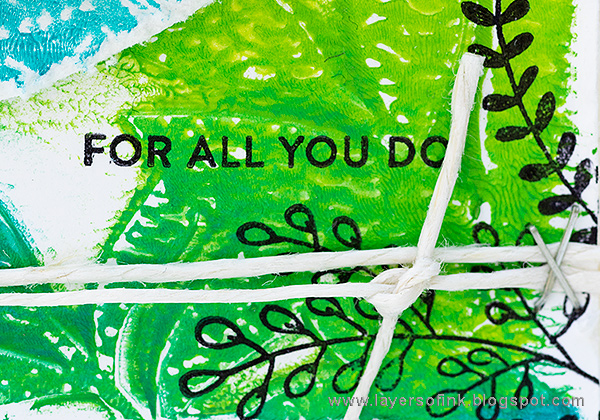
I tied a piece of twine around the card and it was done.
And now to the art journal page.
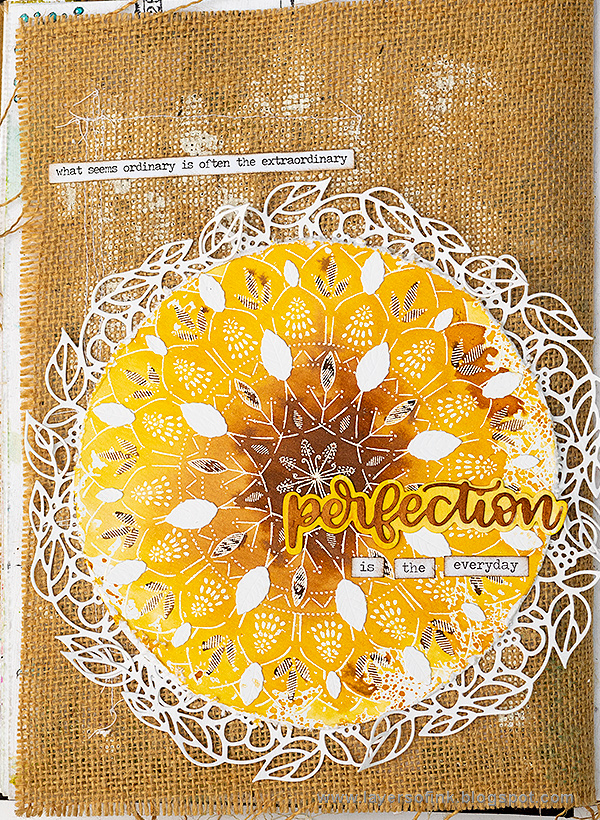
The Bohemian Lace stamp is so pretty and I wanted it to take center stage on a project. It would also look wonderful as the base of a circle-shaped card. After having inked the circle, I had a look in my Dina Wakley Media Journal to see which surface it would fit the best upon - there are cotton-rag watercolor, kraft, canvas and burlap pages in the journal. I decided on this burlap page, since I liked the look with all the texture in the background, and also the gesso that had leaked through from a previous project. There was even some stitching there already, which I did on the other side of this page.

The Bohemian Lace was white embossed it on watercolor paper. It is a large stamp, and as you can see, I used a Sizzix Cutting Pad as my stamping block.

Smear Vintage Photo Distress Ink in a small circle on a non-stick craft sheet and add Fossilized amber around it. Mist with water and press the stamped paper into the ink. I wanted some darker details, so before the ink was dry, I smeared Ground Espresso on the craft sheet and picked it up with a paint brush. I added it to the center and to some of the leaves. I used a plate to trace a circle around the design.
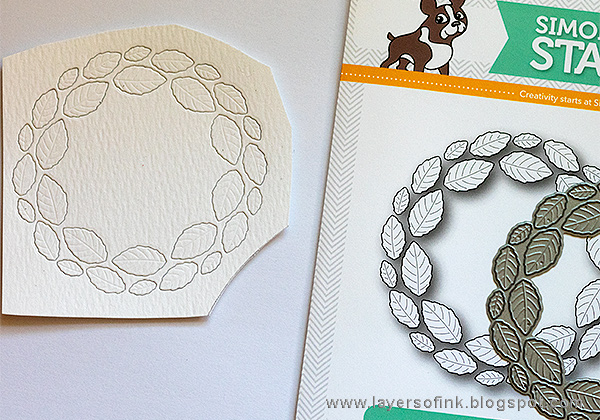
Die cut the Leafy Circle from watercolor paper.

Glue the leaves in a repeating pattern around the circle.

Die cut the pretty Flower Cluster six or seven times and place under the edges of the circle, so that they form a frame.
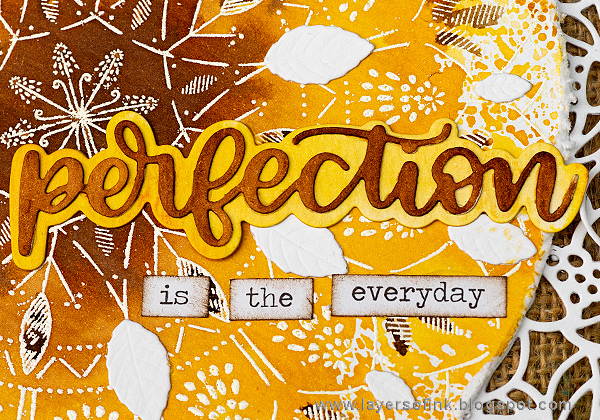
I also used the Perfection die from the Love release, and inked the pieces with the same Distress Inks as on the background.

The patterns in the Bohemian Lace stamp are very pretty and look great in white. The edges of the circle were distressed.
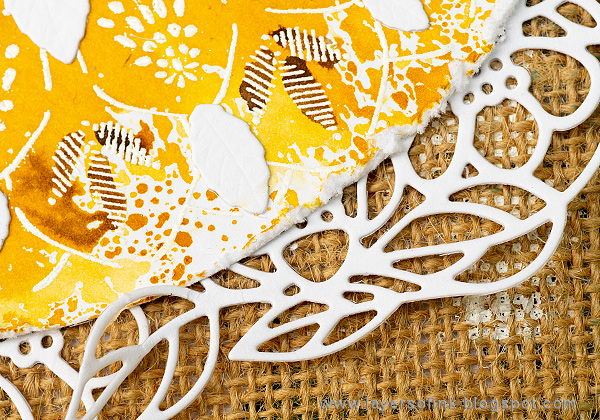
Try to let some of the leaves from the Flower Cluster overlap slightly with the circle.
I hope you enjoyed this post and that it gave you some inspiration. Of course there are prizes to be won too! On every stop of the hop a $25 Simon Says Stamp gift voucher will be given away. All you need to do is to leave a comment. The winners will be posted on the SSS Store blog on Wednesday. There is also a second blog hop tomorrow, with more inspiration.
As a special treat, there will be a surprise gift included with the order for anyone who orders something from the Sending Sunshine release. All you need to do is to use the code 'SUNSHINE'. The code will expire Sunday, 5/20 at 11:59 pm ET, so don't wait too long.
Your next stop on the hop is the very creative Gayatri Murali and I am sure she has something fabulous to share with you. If you get lost somewhere along the hop, this is the hop order:
Anna-Karin Evaldsson (you are here)
I hope you will have a lovely weekend!
Happy crafting!
Anna-Karin
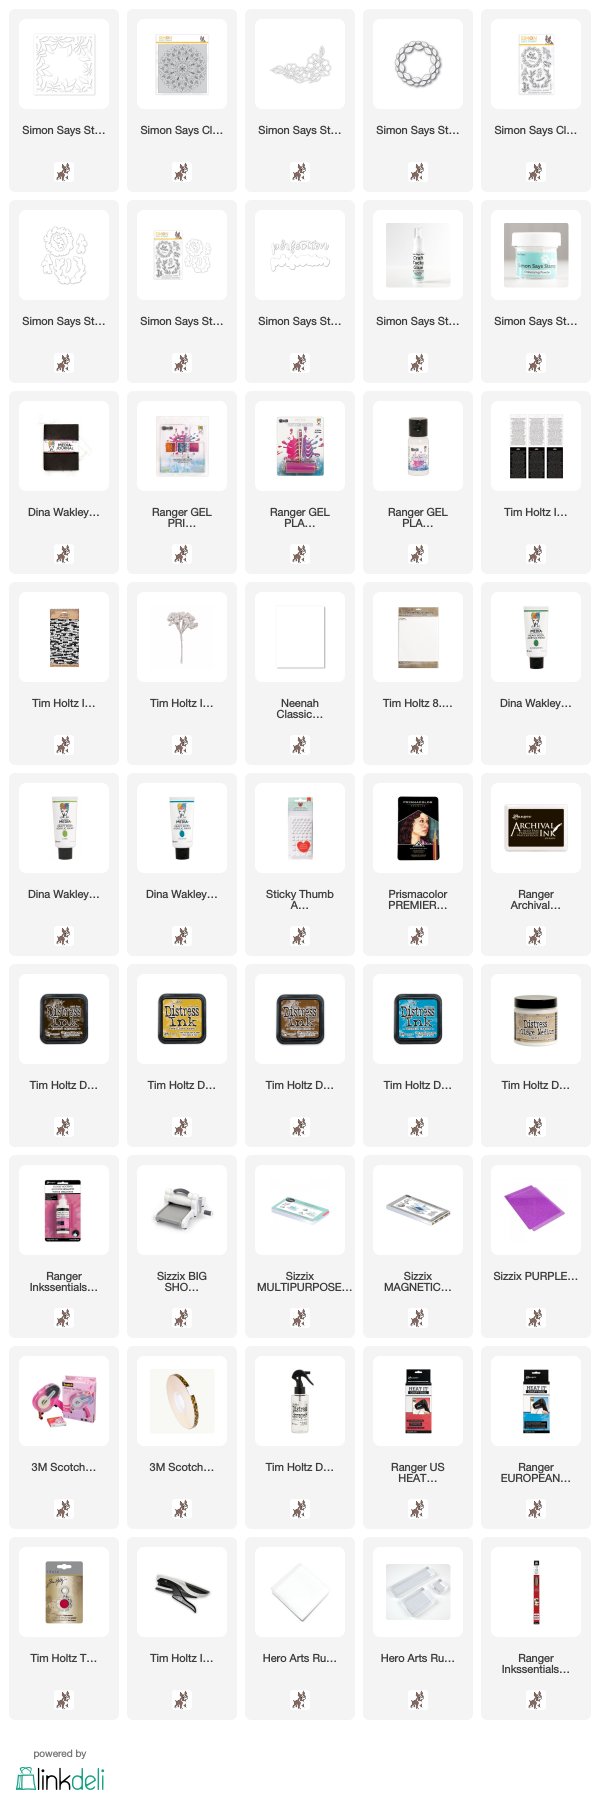
Supplies:
Supplies:
* Please note: the links are affiliate links, for which I receive a small percentage of sales generated by the link, at no extra cost to you.


Your work is always so lovely. FABulous projects!
ReplyDeletestunning cards!
ReplyDeleteWow, these are amazing. thanks so much for sharing such detailed information on how you made them!
ReplyDeleteBeautiful card and art journal page!
ReplyDeleteWow. I just purchased a Gel plate and I love the ideas you demonstrated. Your projects are amazing.
ReplyDeleteWow! You definitely spent a lot of time on the card. Thanks for using so many products, too!
ReplyDeleteyour creatively is astounding! To think to use the products in that way, and with the paint. So so pretty. I wish I had just a little bit of your talent. Thanks for sharing how you created such amazing art work!
ReplyDeleteWow! Awesome cards!!! Love so much your beautiful backgrounds and colouring!!!
ReplyDeleteI like your spin on the mixed media with the new release.
ReplyDeleteBoth projects are so fabulous! I just L*O*V*E your
ReplyDeleteart journal page. i think it is a stunner! And the
floral cluster die is my fave; I love how you made it
into a wreath around the circle. I am inspired to start
my art journal!!
Wow.... I have no words... Both projects so stunning! I need to get my gelli pressing thing out... I forgot I bought it!
ReplyDeleteLove your cards
ReplyDeleteYour cards are so interesting and lovely. I love all the colors and the designs.
ReplyDeleteThese projects are just awesome. Thank you for the detailed instructions!
ReplyDeleteVery lovely.
ReplyDeleteWow love the colors!
ReplyDeleteThis is so pretty! I love all of these color palettes. Each one feels like summer in a different way. Very pretty!
ReplyDeleteBeautiful cards and I love the colors you used especially the gel plate one. So pretty and I love all the details. Great job.
ReplyDeleteBeautiful cards and journal page, LOVE all the texture and thanks for sharing your process with the gelli plate!
ReplyDeleteSo artistic! Thanks for sharing your talent with us!
ReplyDeleteLove seeing different techniques. Thank you for sharing.
ReplyDeleteLove your projects. I need to get back to art journalling.
ReplyDeleteBeautiful, unique cards. I love the bold colors and the layouts are amazing.
ReplyDeleteVery nice cards and awesome techniques.
ReplyDeleteLove the projects. Thanks for sharing.
ReplyDeleteWow! I need to get a gel plate!! Your cards and layout are gorgeous!
ReplyDeleteAwesome card! Bright & Bold. The art journal was beautiful!
ReplyDeleteThe Bohemian Lace stamp is so beautiful.
ReplyDeleteThanks for sharing all your wonderful ideas!
ReplyDeleteThanks for sharing your process, interesting.
ReplyDeleteWow! What creative and unique cards!! Lovely.
ReplyDeleteWOW!! Fabulous creations! Love your color combos and the great layouts!!
ReplyDeleteI have not used my gel plate for quite a while because I always seem to make junk. I love your journal page.
ReplyDeleteSeriously Anna-Karin, you share such awesome techniques that would work for ANYTHING....cards, art journal pages, scrap booking pages, home decor, basically anything one can think of but it is your techniques and ideas that always get me thinking. I LIKE that! Thanks so much for sharing them all. Your card and art journal page are both amazing.
ReplyDeleteThank you so much for your sweet comment Teresa!!
DeleteThanks for sharing these cool techniques!
ReplyDeleteAwesome artwork. Thanks for sharing your wonderful art projects.
ReplyDeleteBeautiful work! I haven't seen anyone use a brayer for a long time. The colors you use are stunning as well as the dies. I like how you took the leafy die and spread the leaves out over your project. Thank you for sharing.
ReplyDeleteI truly enjoyed looking at all your fantastic projects - I have a Gelli press and need to use it more - the prints you got from the stencil are amazing! I like your style! :)
ReplyDeleteThere are so many great items in this release. I love to see how everyone used them. It does make it harder to choose.
ReplyDeletefabulous projects and inspiration for the new products!
ReplyDeleteThe texture you have added to your projects is fantastic! I would have never thought to use some of the new items together they way you did and it works together beautifully
ReplyDeleteWow! Gorgeous projects!!
ReplyDeleteBeautiful colours ! and I love this new release :)
ReplyDeleteVery interesting technique. Beautiful colors.
ReplyDeleteGorgeous backgrounds on your cards!!!
ReplyDeleteOh my, such detailed work. The results are stunning!
ReplyDeletethese projects are just gorgeous - thanks for the inspiration :)
ReplyDeleteBeautiful projects
ReplyDeleteWhoa! I found a new artist to follow. These projects are so amazing. I've just started mixing different mediums to create some journals and frames, but your use of this month's release is WOW. Thanks for sharing!
ReplyDeleteWow amazing and super cool projects!!
ReplyDeleteI'm seriously impressed; you made the items so versatile!
ReplyDeleteYou went to a lot of work, but you came up with beautiful creations!
ReplyDeleteAmazing projects and stunning results!
ReplyDeleteReally pretty cards!
ReplyDeleteI love all the layers in your card and colors, absolutely beautiful!!!
ReplyDeletewonderful organic looks...great use of the brayer.
ReplyDeleteAmazing cards! I love your choice of colors.
ReplyDeleteWow!~ You just kept going with this and gave us some beautiful ideas and techniques for creating with the new SSS release! The results are amazing!
ReplyDeleteThese are very interesting cards! :) Great job!
ReplyDeleteOh my goodness! So luscious.
ReplyDeleteStunning creations. Like the colors.
ReplyDeleteMelissa
"Sunshine HoneyBee"
Ahh wreath greetings is a gorgeous new set!!
ReplyDeletePretty flower cluster ismt favorite from this release
ReplyDeleteSo many new ideas, at least for me. Thanks for sharing all this information. Love the new SSS release.
ReplyDeleteVery cool! So much technique in everything you do. And you do it all. You're an inspiration!
ReplyDeleteGreat projects!
ReplyDeleteI love all the detail. Beautiful!
ReplyDeleteAmazing artistic design! Inspiring!
ReplyDeleteBeautiful projects with these fabulous new releases!
ReplyDeleteWow, stunning projects! You've created so much depth, texture and interest. You are truly gifted.
ReplyDeleteThanks for sharing your cards. You picked / used some of my favorite items from this release! :)
ReplyDeleteYour work is always amazing & today's post is one of my favorites! These are so gorgeous!
ReplyDeleteYour work is stunning!
ReplyDeleteGreat backgrounds on your cards.
ReplyDeleteI love your beautiful cards!
ReplyDeletebeautiful Technics one of a kind cards.
ReplyDeleteYour cards are so impressive! I have never used gel plates but may have to try them after your cards!
ReplyDeleteWow love who does it turned after all these steps. So pretty and amazing
ReplyDeleteGreat projects! I love all the texture and dimension in your card. I'm not familiar with a gel press, but you got amazing color with it.
ReplyDeleteWow great work and I love how you photographed how you did these, so pretty.
ReplyDeleteWow you are such a talented and gifted artist love both your card is gorgeous but that journaling page it’s such a piece of art really awesome. Makes me wanna buy all the supplies. Thanks for sharing and the chance to win.
ReplyDeleteLove your journal page.
ReplyDeleteI love your journal page. I have never done anything like that, I've only just started cards but have seen some amazing journal works. Thank you so much for sharing.
ReplyDeleteI always look forward to seeing your work. Your mixed media approach is fabulous. Love both projects! Your creativity blows my mind. Thank you.
ReplyDeleteSo very creative and I was fascinated by watching all the different steps, lots of new ideas here for me. Thanks so much.
ReplyDeleteGorgeous projects! You always use so many techniques to produce your beautiful cards and journal pages - I learn a lot from your posts!
ReplyDeleteLovely set of cards. These stamps are wonderful.
ReplyDeleteBeautiful colors and details on your cards!
ReplyDeleteLove the colors
ReplyDeleteWow....u put alot of thought n effort into ur creations! Very nice! I love this release!
ReplyDeleteYour art journal piece is perfection.
ReplyDeleteBeautiful piece. Love the
tropical feel of the card.
Great projects.
thanks for sharing
txmlhl(at)yahoo(dot)com
Wow! The layers, and textures you put together are beautiful!
ReplyDeleteLove the lush look of your card. And your journal page is intricately exquisite!
ReplyDeleteWhat awesome cards. Love your creativity and thanks for sharing your process.
ReplyDeletewow, lots of ideas! thank you
ReplyDeletewow wow WOW!!!! those are true pieces of ART. i am so inspired!! i am going to refer your blog to a friend as well- she has a similar style to yours.
ReplyDeleteI love that leafy circle die!
ReplyDeleteInteresting projects. First one is a very new technique for me.
ReplyDeleteThanks for inspiration.
Beautiful creations !
ReplyDeleteWow! what a lot of work, but such beautiful results.
ReplyDeletelove your techniques...I just bought gelli plate and gelatos. I think your techniques could be used on lots of surfaces and for lots of paperpieces. Thanks!
ReplyDeleteTFS your beautiful projects. You are an extremely talented artist and I appreciate your sharing so many process/technique ideas.
ReplyDeleteI loved the perfection card. I'm a fall color person and just loved those distress ink combo that you used. I can't wait to try them for myself.
ReplyDeleteOh wow, this is stunning! Love all the layering and details, it's so good to see all these products combined. Truly inspiring - thank you!!
ReplyDeleteWOW - what a fantastic technique you used to create your cards. I really like the bright, bold colors. TFS
ReplyDeleteI am in awe with the green card, looove leaves!
ReplyDeleteOH TOTALLY FUN!!!!! You know, I got a Geli Plate recently, & have yet to pull it out! You're INSPIRING ME!!! LOOOVE that you used Nina-Marie's Leaf Stencil with this too!!!! GORGEOUS WORK!!!! ;) THANK YOU FOR THE INSPIRATION!!!!!!!!!!!!!! :D
ReplyDeleteYou are so talented! Love your creations!!
ReplyDeleteSQUEAL!! LOVING the NEW RELEASE!! Your Projects are BEAUTIFUL!! THANKS for sharing the AMAZING Inspiration and have a FABULOUS WEEKEND!! =)
ReplyDeleteBeautiful cards. They are soooo detailed! WOW!
ReplyDeleteWow, so unique and pretty!
ReplyDeleteOh no, now I am going to have to invest in paint! :) your cards are gorgeous!
ReplyDeleteGreat work and lots of talent shown here.
ReplyDeleteSo many exciting things to try! Thanks for sharing how you made these; they're so unique!
ReplyDeleteI LOVE the green card.
ReplyDeleteYour artistry is absolutely stunning! Your card and journal page are so gorgeous...thank you for giving detailed directions on how you made them! Your awesome creativity is so inspirational!!
ReplyDeleteGreat work!
ReplyDeleteYou are the master of layering. These are so interesting. An that Bohemian stamp is wonderful.
ReplyDeleteGorgeous art panels - love the loose, layered look of them!
ReplyDeleteI love seeing the different techniques people use. These are great!
ReplyDeleteThese are both SO cool! Thanks for showing how you did them!!
ReplyDeleteSo many pretty things!
ReplyDeleteWow!! Fantastic projects!! Thanks for sharing the steps with us :)
ReplyDeleteLove your cards!
ReplyDeleteI love blog hops because they inspire me to create--thank you!
ReplyDeleteWow! Lots of beautiful cards!
ReplyDeleteBeautiful projects. thanks for sharing your techniques.
ReplyDeleteI absolutely adored your tutorial! Thank you so much for the inspiration...I have been wanting to experiment with many of the techniques you used in your darling project. Time to make a (very large) space on my table :)
ReplyDeleteFun to see the unique ways you used these new products!
ReplyDeleteBeautiful cards! Thanks for sharing!
ReplyDeleteI LOVE LOVE LOVE that blue and white with the background stamp!!!! 😃
ReplyDeleteGreat colour combos and some fun use of printing! :D
Great cards and thanks for sharing.
ReplyDeleteLinda D.
These are both Amazing!!! Gorgeous colors!!!
ReplyDeleteBeautiful, thanks for the inspiration!
ReplyDeleteLove both of your projects. Thanks for sharing your creations with the new release of Simon Says Stamp.
ReplyDeleteI like the color choices used.
ReplyDeleteBeautiful cards! I love how you used your gel plate to create different looks.
ReplyDeleteAll beautiful.... but the blue and green is my favorite. I am excited to try this technique, and I love the small sentiment stamped repeatedly.
ReplyDeleteVery spring/summer!
ReplyDeleteSince I don't do mixed media pages like this, I'm always fascinated how people who do think about supplies. I love how the first and second generation prints of the leaves turned out. Beautiful color choices on all levels of that one. The art journal page is also really fascinating. Thanks for sharing! I love being able to see the behind-the-scenes of pieces like this.
ReplyDeleteI love the way you used the different products together. Working with the gelli plate looks like a lot of fun. Thanks for sharing the step by step.
ReplyDeleteBoth of these projects are stunning, great work.
ReplyDeleteI love the Thank You Card the best. The combination of stamping on top of the gell print...perfect! Thank you for sharing your time & talent.
So many beautiful ideas! Gorgeous cards! The stencil is one of my favorites!
ReplyDeleteLove the color blending on your card. Beautiful color choices!
ReplyDeleteSuper cute cards.
ReplyDeleteWonderful pieces! I love the layers and textures!
ReplyDeleteWow !! Your both creations are simply stunning !!
ReplyDelete[margessw(at)icloud(dot)com]
Great projects !!
ReplyDelete