Pages

Monday, May 28, 2018

Sea Journey Etcetera Tag Tutorial

Hello friends! We had a fun weekend here. My dad visited and we did some outings, such as going to a lake to swim. Because of the unusually warm May weather, the water is already pretty warm. We also had a whole bunch of soccer related activities. 


This week at the Simon Says Stamp Monday Challenge Blog we have a Masculine theme. Don't miss the last project by our May guest designer Alison Bomber.

Layers of ink - Sea Journey Etcetera Tag Tutorial by Anna-Karin Evaldsson

I told the story of one of my relative's adventures at sea on a tag, using stamps, dies and words. The base is a Tim Holtz Medium Etcetera tag, which is very sturdy, almost like wood, and bigger than you might think (12 x 6.5 in). I don't always check the size of things when I order products and I was happily surprised to see how big the tags are. Lots of space!
Layers of ink - Sea Journey Etcetera Tag Tutorial by Anna-Karin Evaldsson

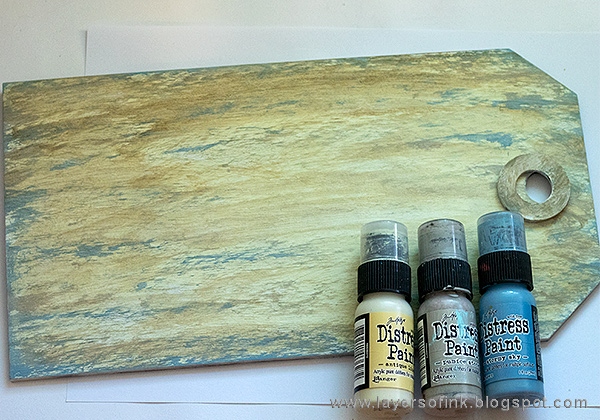
After giving the tag a coat of gesso, I painted it with Distress Paint, aiming for the look of an old painted and worn wood plank.

Layers of ink - Sea Journey Etcetera Tag Tutorial by Anna-Karin Evaldsson with Tim Holtz stamps

Some of the stamps were stamped on tissue paper and then adhered to the background - with one layer of glossy multi-medium below the tissue paper, and one on top. These were the images where I wanted the stamping to be as good as possible (the ship, map and journey word), while I wanted a more distressed look to the rest of the stamping and stamped directly on the background. All the stamps are by Tim Holtz.

Layers of ink - Sea Journey Etcetera Tag Tutorial by Anna-Karin Evaldsson

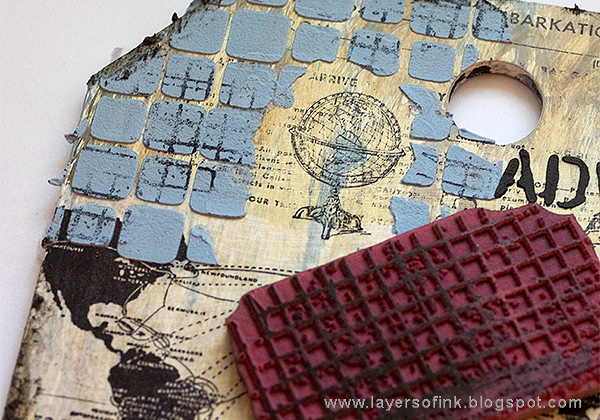
A little Faded Jeans paint was mixed into embossing paste and applied through a stencil. I also used black paint and paste through a word stencil, and smeared the left over blue paste under the ship as waves. I smeared the left-over black paste around the edges of the board, also giving the edges a rough feel.
Layers of ink - Sea Journey Etcetera Tag Tutorial by Anna-Karin Evaldsson with Tim HOltz stencils

When the paste was dry, I stamped it randomly with a grid stamp.

Layers of ink - Sea Journey Etcetera Tag Tutorial by Anna-Karin Evaldsson with Distress Paint

I painted the boat with Distress Paint, darkened the edges and dry brushed brown, white and silver paint on the paste areas. The background needed a little more red, and I stamped dots with Candied Apple paint.

Layers of ink - Sea Journey Mixed Media Etcetera Tag Tutorial by Anna-Karin Evaldsson

The tag was embellished with some idea-ology pieces and ephemera papers. Here you can see the silver dry brushing on top of the word.

Layers of ink - Sea Journey Etcetera Tag Tutorial by Anna-Karin Evaldsson

Alcohol ink was used to color the Gumdrop Hearts. I also used a whole bunch of die cut gears. They were die cut from a paper that had been misted with various Distress Spray Stains, also including metallic sprays.

Layers of ink - Sea Journey Etcetera Tag Tutorial by Anna-Karin Evaldsson

A big metallic gear was glued to the circle and I tied the tag with Linen Ribbon.

Layers of ink - Sea Journey Etcetera Tag Tutorial by Anna-Karin Evaldsson with Tim Holtz Sizzix dies

The relative in question was an electrician, which is why I stamped the bulbs here and there.

Layers of ink - Sea Journey Etcetera Tag Tutorial by Anna-Karin Evaldsson

The gears have a cool texture and some of them are very metallic looking. The ephemera tag was sanded, torn and inked.

Layers of ink - Sea Journey Etcetera Tag Tutorial by Anna-Karin Evaldsson

This stamp comes from the Traveling Friends set.

Layers of ink - Sea Journey Etcetera Tag Tutorial by Anna-Karin Evaldsson

By dry brushing on top of paste areas, you can easily increase the texture and make the paste look even more interesting.
Layers of ink - Sea Journey Etcetera Tag Tutorial by Anna-Karin Evaldsson

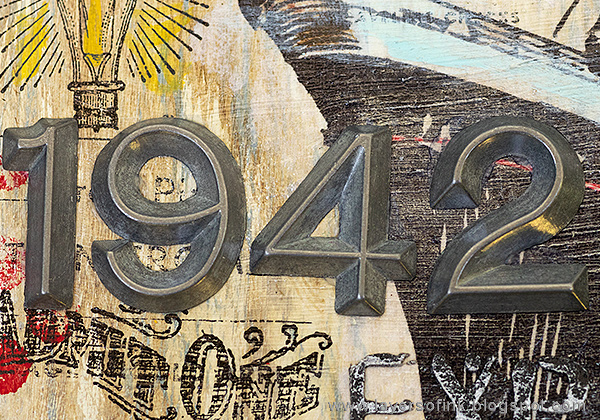
I like these metallic idea-ology numbers.
Layers of ink - Sea Journey Etcetera Tag Tutorial by Anna-Karin Evaldsson

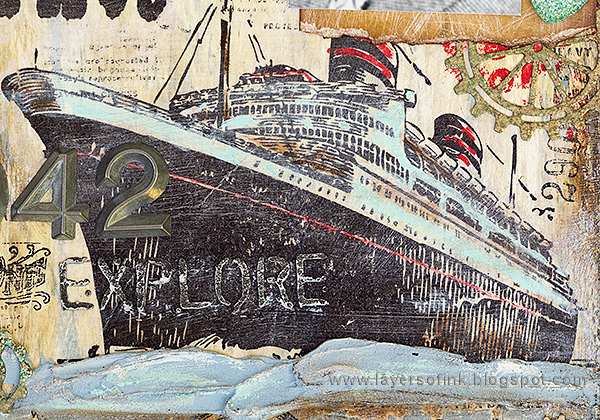
This ship stamp is a favorite of mine and I have used it quite many times before. I really like the perspective of the stamp and how the boat almost comes into the project.

Layers of ink - Sea Journey Etcetera Tag Tutorial by Anna-Karin Evaldsson

Here's a closer look at the texture of the waves under the boat.

I hope you will join us this week in our Masuline challenge. As always, you have a chance to win a $50 gift voucher to do some fun shopping at Simon Says Stamp. You have until next Monday 8am Ohio time. 1pm UK time, 2 pm CET to join in.


Don't forget to follow Simon Says Stamp on Instagram, they post great stuff daily. 


Do you use Instagram? If so please add #sssmchallenge so we can see your entries there too.


Thank you for taking the time to stop by my blog today!  

Happy crafting!

Anna-Karin

Supplies

* Please note: the links are affiliate links, for which I receive a small percentage of sales generated by the link, at no extra cost to you.


Monday, May 21, 2018

Inspired by a song

Hello everyone! I hope you had a good weekend! I had a really great weekend teaching workshops in the the north of Sweden, in a beautiful town called Piteå. The weather was lovely and the classes were such fun. I also took a wonderful mini-album class by Lena Holmström. She makes the most amazing things from old book and recycled items. 


It is Monday, and this week we are Inspired By A Song at the Simon Says Stamp Monday Challenge blog. Don't miss the lovely project by our May guest designer Alison Bomber.

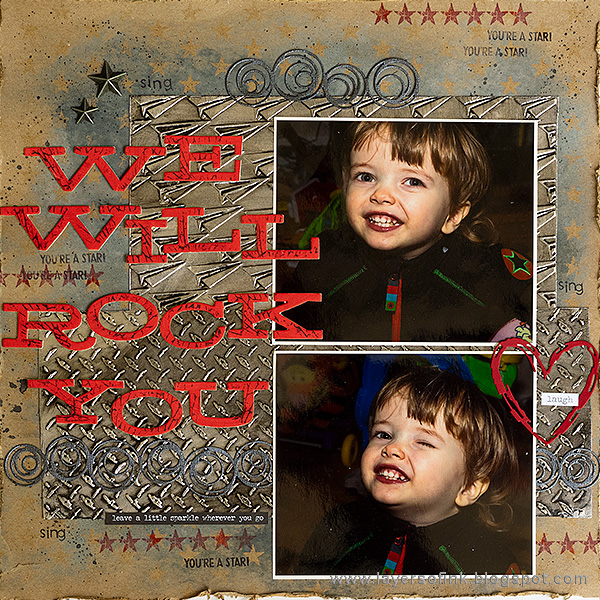
Layers of ink - Inspired by a song layout by Anna-Karin Evaldsson

I knew exactly which song to be inspired by this week, namely We Will Rock You by Queen, which is one of Leo's favourite song. He happened to hear this song when Anton watched the Pixels movie on TV some time list year and later we realized that he was humming it. At that time, he said very few words, but the tune was clearly recognizable. He still loves this song. I used photos from about the time that he heard it the first time. The journaling is on the back of the layout.

I wanted to use a title with a lot of punch, and die cut letters from mat board with Tim Holtz Billboard die. They were painted red and stamped with a crackle texture stamp. The heart die cut is the Sketch Heart by SSS.

Layers of ink - Inspired by a song layout by Anna-Karin Evaldsson

The background is Tim Holtz Motif cardstock, which has a pattern that will resist various media. I smeared Distress Oxides (Iced Spruce and Black Soot) on the background, and misted them with water. The splatters were done with Black Soot paint.

Layers of ink - Inspired by a song layout by Anna-Karin Evaldsson

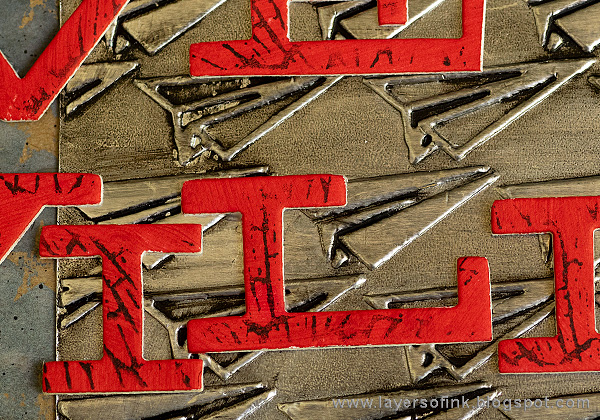
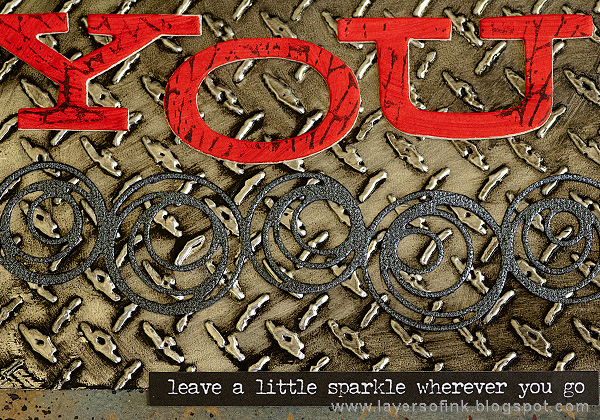
Ranger's foil tape sheets were adhered to cardstock and embossed in the Paper Airplanes and Diamond Plate embossing folders. I painted them black and then rubbed most of the paint away. Here you can see the crackle stamping on the letters better too.

Layers of ink - Inspired by a song layout by Anna-Karin Evaldsson

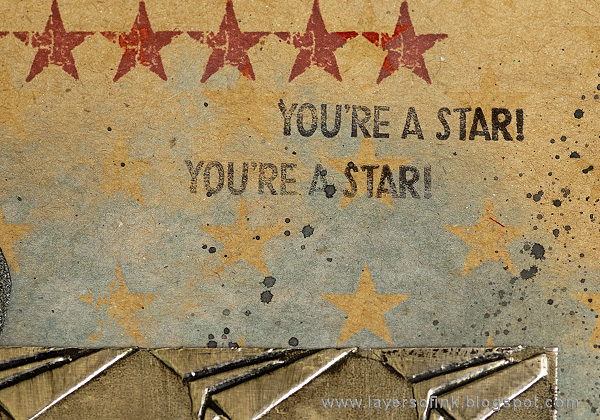
The stars were stamped with Red Geranium ink and the small sentiment comes from Simon Says Stamp Under the Sea Animals set.

Layers of ink - Inspired by a song layout by Anna-Karin Evaldsson

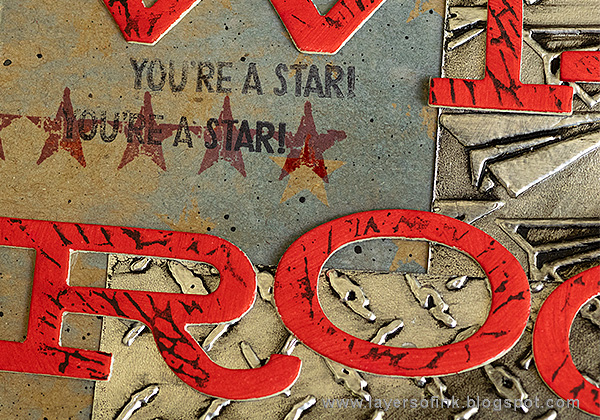
And more stamping.

Layers of ink - Inspired by a song layout by Anna-Karin Evaldsson

I also die cut the SSS Spinner Trail from Coal Shimmery Cardstock and glued it in three places.

I hope you will join us this week in our Inspired By A Song challenge. As always, you have a chance to win a $50 gift voucher to do some fun shopping at Simon Says Stamp. You have until next Monday 8am Ohio time. 1pm UK time, 2 pm CET to join in.


Don't forget to follow Simon Says Stamp on Instagram, they post great stuff daily. 


Do you use Instagram? If so please add #sssmchallenge so we can see your entries there too.


Thank you for taking the time to stop by my blog today!  

Happy crafting!

Anna-Karin

Supplies

* Please note: the links are affiliate links, for which I receive a small percentage of sales generated by the link, at no extra cost to you.


Thursday, May 17, 2018

SSS Sending Sunshine Blog Hop

Hello and very welcome to my blog! I am so happy to take part in the Simon Says Stamp blog hop to celebrate the Sending Sunshine release. If you are following along the hop, you came here from Heather Hoffman and I am sure she shared some wonderful card ideas with you.


The Sending Sunshine release is full of gorgeous stamps, dies, stencils and sequins. You can see the whole release here. It is a very versatile release and many of the products have a great summer feeling.

I made two projects for the blog hop, a card and an art journal layout, and both are tutorials. You can use the techniques for other types of projects too of course.

Layers of ink - Gel Printed Leaf Frame Tutorial by Anna-Karin Evaldsson for the SSS Sending Sunshine release blog hop

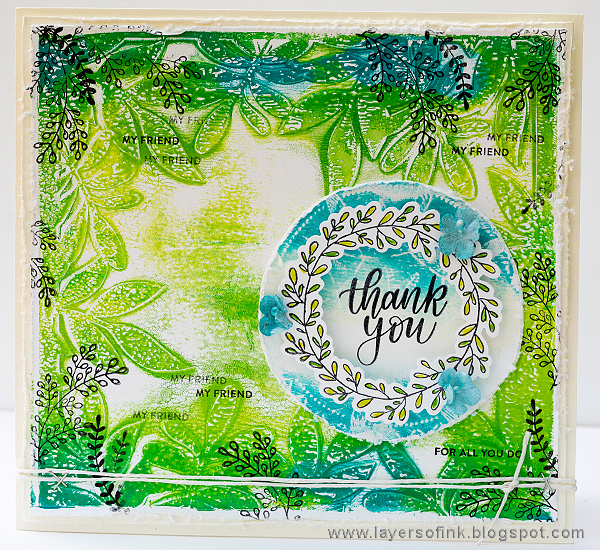
Let's start with the card, which is a spring time thank you card, but if you change the sentiments it could work for many themes. For the background, I used the Leafy Frame stencil, and the sentiments and wreath come from Wreath Greetings. I also used the Bohemian Lace stamp. The background and the circle were printed with my Ranger gel printing plate, and below you will see how easy it is to do.

Layers of ink - Simon Says Stamp Sending Sunshine Release Blog Hop by Anna-Karin Evaldsson

I used these stamps from the Sending Sunshine release: Bohemian Lace and Wreath Greetings. And the Leafy Frame stencil.

Layers of ink - Simon Says Stamp Sending Sunshine Release Blog Hop by Anna-Karin Evaldsson

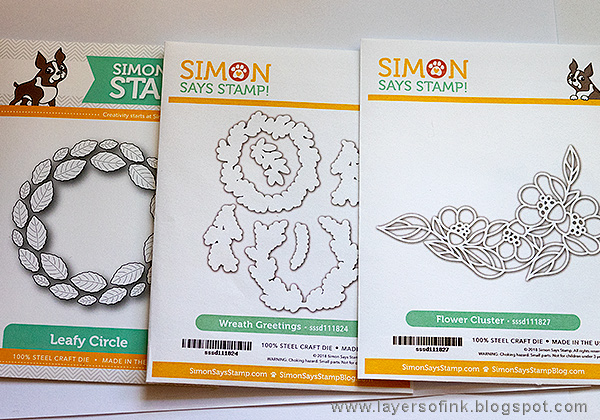
I used these three die sets for my projects: Leafy Circle, Wreath Greetings, and the Flower Cluster.

Layers of ink - Gel Printed Leaf Frame Tutorial by Anna-Karin Evaldsson with Ranger's Gel Printing Plate

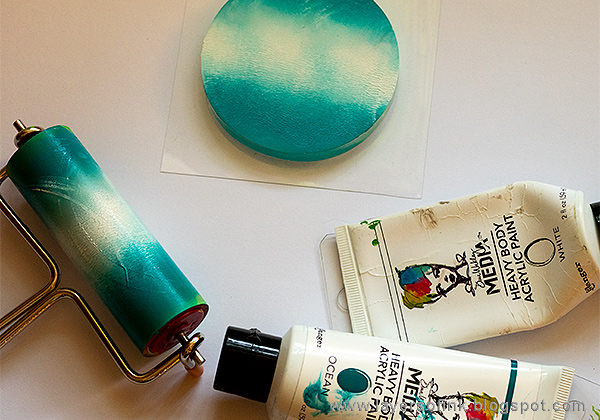
Start by adding a little bit of Dina Wakley's Lime, Evergreen and Ocean paint to the largest gel printing plate in the 3 Assorted Gel Printing Plates pack. I added the Ocean paint only to the edges. Roll out the paint with a brayer.

Layers of ink - Gel Printed Leaf Frame Tutorial by Anna-Karin Evaldsson

Press the Leafy Frame into the paint.

Layers of ink - Gel Printed Leaf Frame Tutorial by Anna-Karin Evaldsson

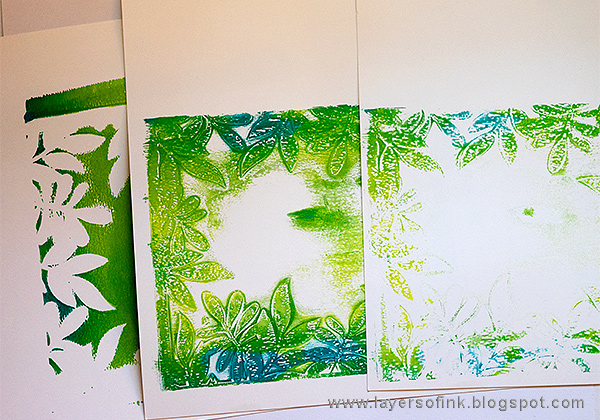
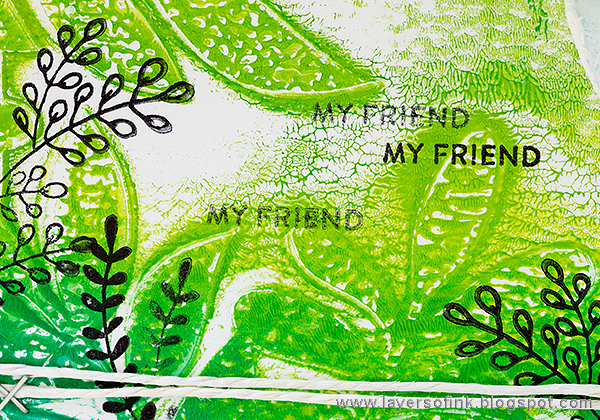
You can get lots of different prints from one application of paint. I used Neenah Solar White paper for the printing. First, I pressed a paper down on the plate without removing the stencil first - the paper to the far left. Secondly, I removed the stencil and pressed another paper on the plate - the print in the middle. Thirdly, I pressed a third paper to the plate - the print to the right. I actually liked the third print the best, but I wanted my card to have more color, so I used the middle one instead.

Layers of ink - Gel Printed Leaf Frame Tutorial by Anna-Karin Evaldsson

For the circle I added a little white in the middle and Ocean around it. I love the look of this yummy circle.


Then I pressed the Bohemian Lace stamp onto the circle and removed it before pressing the gel circle twice on white paper. I forgot to photograph this step, but here you see the first print (to the right), which I didn't use. I also stamped the stamp on paper before cleaning it. You need to clean acrylic paint off from stamps immediately.

Layers of ink - Gel Printed Leaf Frame Tutorial by Anna-Karin Evaldsson

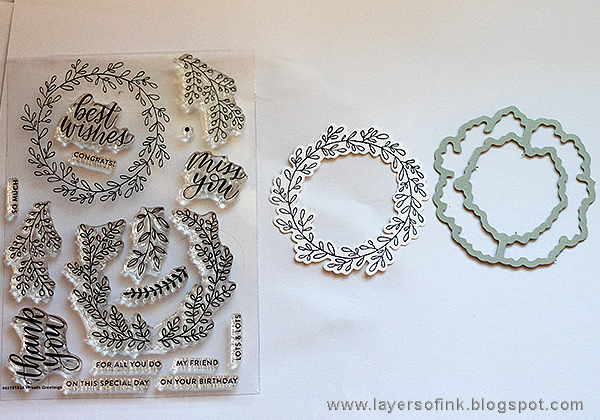
Stamp the wreath on white paper and die cut with the coordinating die. It is easiest to use the Sizzix Magnetic Platform for this.


Color with colored pencils. I used two shades of green on the leaves.

Layers of ink - Gel Printed Leaf Frame Tutorial by Anna-Karin Evaldsson

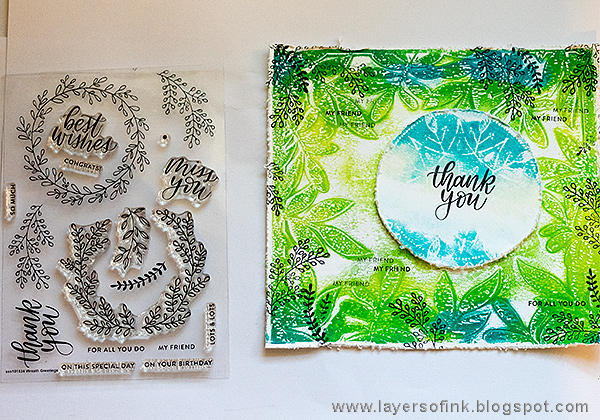
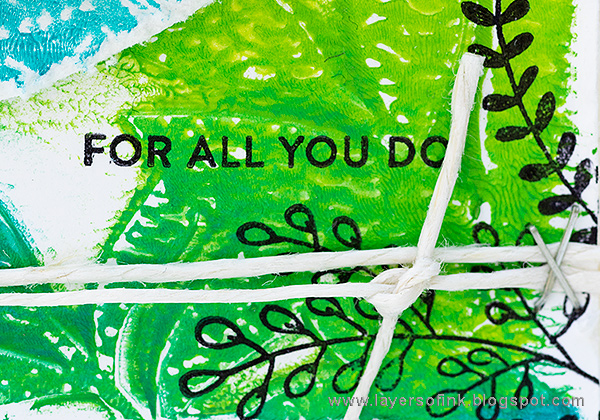
I stamped the main sentiment in the middle of my printed circle. Here you can also see the Bohemian Lace pattern on the circle. I also stamped more words on the background, as well as some leafy branches, all from Wreath Greetings

Layers of ink - Gel Printed Leaf Frame Tutorial by Anna-Karin Evaldsson

The edges were distressed and I layered the print on a piece of cream cardstock. Don't worry if the stamping isn't perfect. I distressed my edges before I decided to stamp, so there are patches missing here and there.

Layers of ink - Gel Printed Leaf Frame Tutorial by Anna-Karin Evaldsson

Adhere the wreath with foam dots and tuck three dyed Tim Holtz flowers into the frame.

Layers of ink - Gel Printed Leaf Frame Tutorial by Anna-Karin Evaldsson

This is my favorite part of the print, the fine crackle pattern, which I hadn't planned for.

Layers of ink - Gel Printed Leaf Frame Tutorial by Anna-Karin Evaldsson

I tied a piece of twine around the card and it was done.

And now to the art journal page.

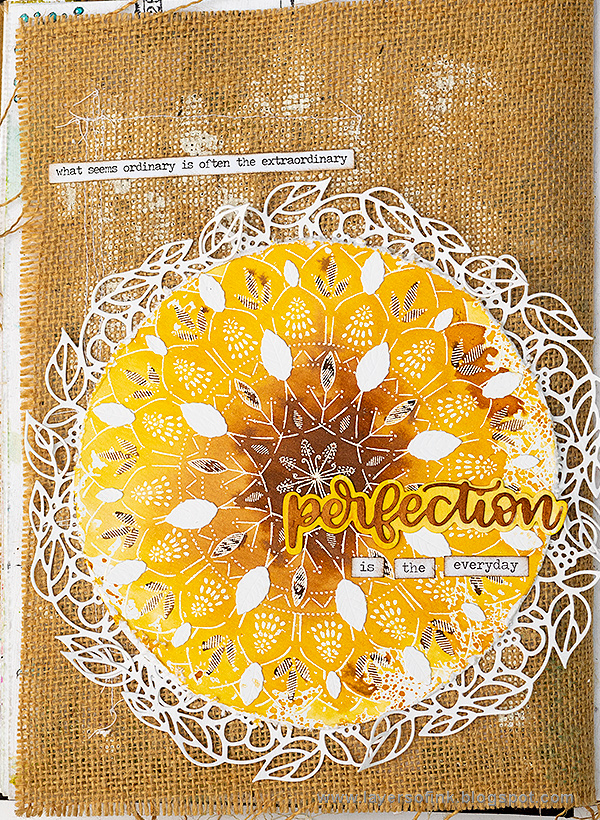
Layers of ink - Perfection Art Journal Page Tutorial by Anna-Karin Evaldsson for the SSS Sending Sunshine Release Blog Hop

The Bohemian Lace stamp is so pretty and I wanted it to take center stage on a project. It would also look wonderful as the base of a circle-shaped card. After having inked the circle, I had a look in my Dina Wakley Media Journal to see which surface it would fit the best upon - there are cotton-rag watercolor, kraft, canvas and burlap pages in the journal. I decided on this burlap page, since I liked the look with all the texture in the background, and also the gesso that had leaked through from a previous project. There was even some stitching there already, which I did on the other side of this page.

Layers of ink - Perfection Art Journal Page Tutorial by Anna-Karin Evaldsson for the SSS Sending Sunshine Release Blog Hop

The Bohemian Lace was white embossed it on watercolor paper. It is a large stamp, and as you can see, I used a Sizzix Cutting Pad as my stamping block.

Layers of ink - Perfection Art Journal Page Tutorial by Anna-Karin Evaldsson for the SSS Sending Sunshine Release Blog Hop

Smear Vintage Photo Distress Ink in a small circle on a non-stick craft sheet and add Fossilized amber around it. Mist with water and press the stamped paper into the ink. I wanted some darker details, so before the ink was dry, I smeared Ground Espresso on the craft sheet and picked it up with a paint brush. I added it to the center and to some of the leaves. I used a plate to trace a circle around the design.

Layers of ink - Perfection Art Journal Page Tutorial by Anna-Karin Evaldsson for the SSS Sending Sunshine Release Blog Hop

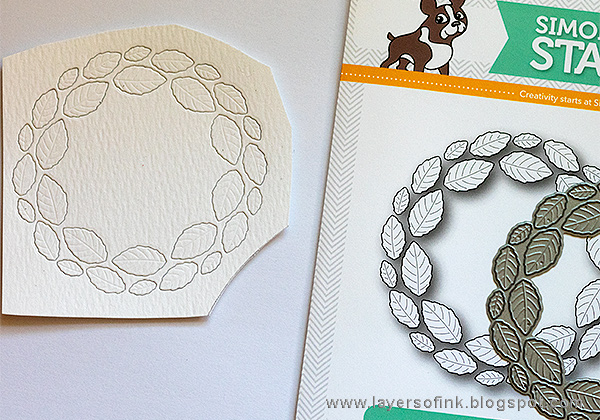
Die cut the Leafy Circle from watercolor paper.

Layers of ink - Perfection Art Journal Page Tutorial by Anna-Karin Evaldsson for the SSS Sending Sunshine Release Blog Hop

Glue the leaves in a repeating pattern around the circle.

Layers of ink - Perfection Art Journal Page Tutorial by Anna-Karin Evaldsson for the SSS Sending Sunshine Release Blog Hop

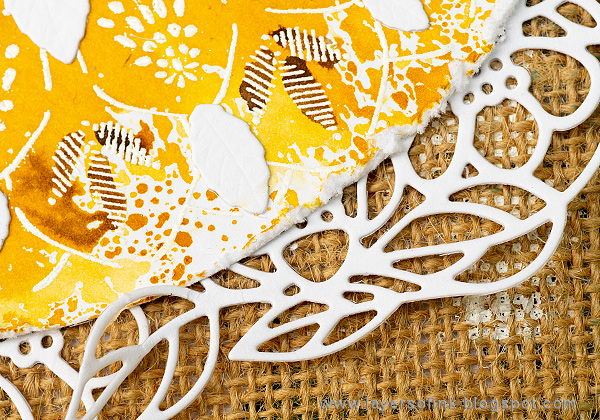
Die cut the pretty Flower Cluster six or seven times and place under the edges of the circle, so that they form a frame.

Layers of ink - Perfection Art Journal Page Tutorial by Anna-Karin Evaldsson for the SSS Sending Sunshine Release Blog Hop

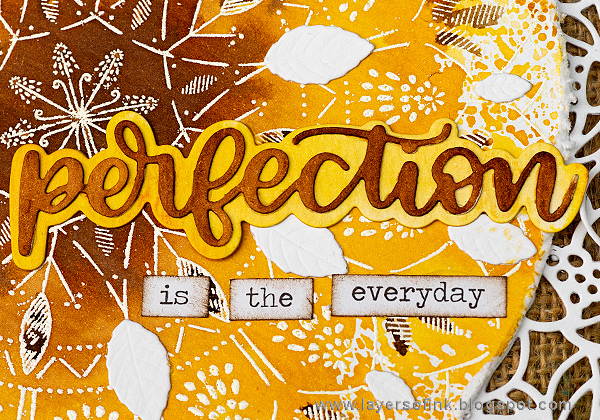
I also used the Perfection die from the Love release, and inked the pieces with the same Distress Inks as on the background.

Layers of ink - Perfection Art Journal Page Tutorial by Anna-Karin Evaldsson for the SSS Sending Sunshine Release Blog Hop

The patterns in the Bohemian Lace stamp are very pretty and look great in white. The edges of the circle were distressed.

Layers of ink - Perfection Art Journal Page Tutorial by Anna-Karin Evaldsson for the SSS Sending Sunshine Release Blog Hop

Try to let some of the leaves from the Flower Cluster overlap slightly with the circle.

I hope you enjoyed this post and that it gave you some inspiration. Of course there are prizes to be won too! On every stop of the hop a $25 Simon Says Stamp gift voucher will be given away. All you need to do is to leave a comment. The winners will be posted on the SSS Store blog on Wednesday. There is also a second blog hop tomorrow, with more inspiration.


As a special treat, there will be a surprise gift included with the order for anyone who orders something from the Sending Sunshine release. All you need to do is to use the code 'SUNSHINE'. The code will expire Sunday, 5/20 at 11:59 pm ET, so don't wait too long.

Your next stop on the hop is the very creative Gayatri Murali and I am sure she has something fabulous to share with you. If you get lost somewhere along the hop, this is the hop order:

Anna-Karin Evaldsson (you are here)

Thank you so much for taking the time to stop by here today!

I hope you will have a lovely weekend!

Happy crafting!

Anna-Karin

Supplies:

* Please note: the links are affiliate links, for which I receive a small percentage of sales generated by the link, at no extra cost to you.