Hello again! I have a second post for you today, and it is my first winter project of the year, a snowy deer canvas tutorial. Don't miss my Simon Says Stamp Monday Challenge blog post, which you'll find below this one.
I have two posts today, since I wanted to share one of the projects that I have made with the Tim Holtz exclusive stamp and stencil set released for Simon Says Stamp STAMPtember celebrations. I have had such fun with this versatile set, and will be back again tomorrow with one additional project. You can see all the STAMPtember exclusive products here.

When I saw the two deer and the two trees in the stamp set, I knew I wanted to make a snowy winter scene on a canvas. These elements are just perfect for some scenic stamping and this canvas is much easier and quicker to do than what it might look like. You could also use the same techniques on a card or do a mini version on a tag. I used a 5 x 7 in canvas board.

Here's a better look at the stamp set and stencil. I really like the images and words on the stamp set, and the stencil is so versatile with two patterns and one sentiment. I will use the stencil on tomorrow's project.

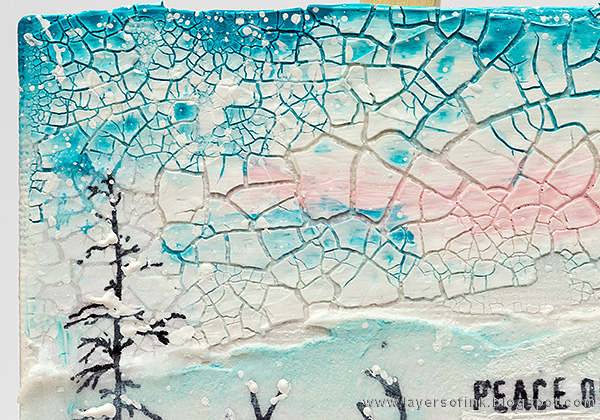
After coating the canvas with gesso, I smeared a layer of Opaque Crackle Texture Paste where I planned the sky to be. Cracks appear as it dries. Then I smeared Texture Paste for my snow, making sure to form it into rough hills of snow. It is easy to do with a palette knife.

Since it is really hard to get a good stamped impression on such a textured and uneven background, I stamped the images on tissue paper. At first, I was planning to add some trees from two other stamp sets too (to the right under the ink pad), but later decided to leave them out. Tear around the images instead of cutting since that makes them blend into the background better.

Carefully adhere the images to the canvas with Gloss Multi Medium. It is important to use gloss and not matte medium, since the gloss medium makes the tissue paper more transparent. Apply a layer of medium to the canvas, place the tissue image on top and carefully apply a second layer over the image. Some tissue papers disappear completely, others will show a faint outline. I used a piece I found on my desk and I don't think it came from my best tissue paper, since you can see it slightly here. No worries though, it will soon disappear.

Paint the canvas with slightly watered down Distress Paint, starting with Spun Sugar for the pink areas of the sky and ground. Use more water for the sky since that makes the paint run into the cracks. Try to paint soft hills of snow.

Make the white stronger by painting Dina Wakley's white paint - which is thicker than Distress Paint - on the areas meant to be white. I also added it to the branches of the trees and antlers of the deer by using a tooth pick. When you are done, mix a tiny bit of water into the paint and splatter it on the background to create the look of falling snow.

Crackle paste is a really fun texture for a sky and it is not the first time that I use it like this.

The splattered white paint adds a nice snowy effect and is very quick to do.

I really love the look of both these trees and the fact that they don't look like perfect fairy tale type of trees. Here you can see that I added white to the branches.

Deer are perfect for any winter or Christmas project and these are of a great size too.

The sentiment said 'winter wishes', but I tore the last part off.
I hope you enjoyed this project and thank you for watching.
Happy stamping!
Anna-Karin
Supplies:
|
* Please note: the links are affiliate links, for which I receive a small percentage of sales generated by the link, at no extra cost to you.


Great project and tips. I wondered how you got the stamping so crisp on the paste. The tissue paper blended in fantastically - can't even see it. Thanks for the ideas and inspiration.
ReplyDeleteWOW Anna-Karin, that is AWESOME! Well done and thanks for the great tutorial!
ReplyDeleteThis is fabulous Anna!
ReplyDelete