Hi everyone! I hope you had a good weekend. The blog has been a bit quiet the past week and it's because I am sick with a stubborn cold, probably the same thing that Leo had earlier. It is Monday and this week at the
Simon Says Stamp Monday Challenge Blog we have a
Treat Bag/Box theme.
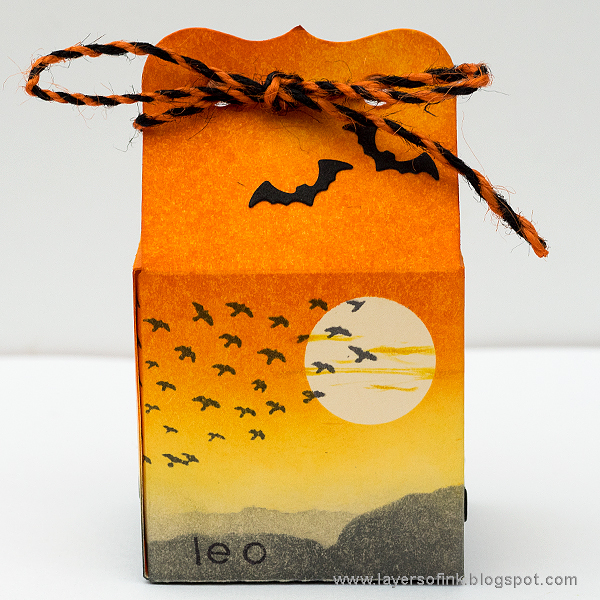
I made two inky Halloween treat bags for Anton and Leo. Inking a scenic background and adding some stamps is a favourite thing of mine and I had fun doing these. I bet they will be more interested in the contents, but the boxes can double as ornaments after the gifts is taken out. I took some step photos.
I used Lori Whitlock's Sizzix
Square Favor Box to die cut the box from manila cardstock. You need two pieces for each box.
I die cut a circle from
Eclipse Masking Tape and placed it on the box, as a mask for my moon.
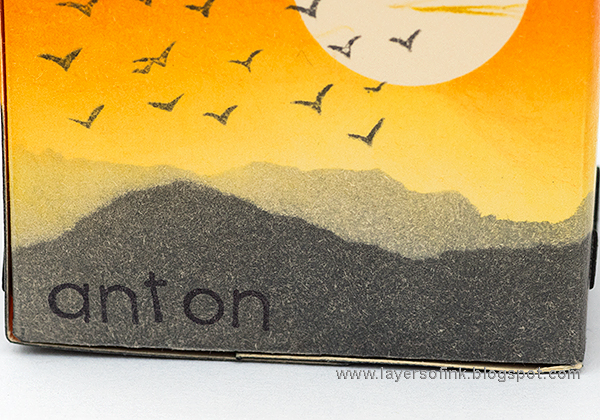
Then to the fun part, the inking. Start with the lightest shade (Mustard Seed) and gradually add darker shades of orange. The grey hills in the foreground were inked with Hickory Smoke and Black Soot. I tore pieces of printer paper and used as a mask.
Remove the masking tape and add some colour to it using Mustard Seed and a
craft nib.
The birds come from Hero Art's
The Birds stamp and die set. I love stamps of flying birds and this set is great for non-Halloween projects too. The birds were stamped with Watering Can ink and the sentiments and names with Jet Black Ink. I used the
Basic Lowercase Letters for the names. Apply
Wonder Tape or another strong adhesive to the flaps.
The
boxes are very easy to assemble. I also added some tape to the bottom flaps. Tie with
string or ribbon.
I like the look of the
birds flying in front of that big moon.
The hills were such fun to do and it is super easy. Just hold a torn piece of paper as a mask, and use a different piece for the more distant hills.
I die cut the bats with Tim Holtz
Halloween Mixed Media dies, from black Paper Leather. You could use black cardstock too.
On the sides of the boxes, there are more bats.
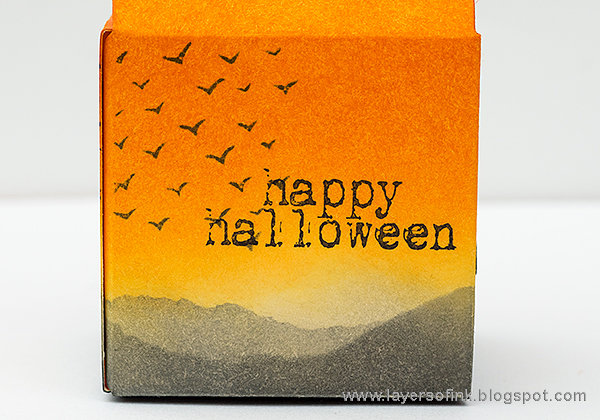
And some more birds and a sentiment, at the back.
Here you can see the closing mechanism.
Now I just need to find something to put inside these, for them to find on Halloween.
The streaks of colour over the moon add life to the scene.
I hope you will join us in our Treat Bag/Box challenge. As every week, you have a chance to win a $50 gift voucher from Simon Says Stamp. You have until Monday 8am Ohio time. 1pm UK time, 2 pm CET to join in.
Do you use Instagram ? If so please add #sssmchallenge so we can see your entries there too.


Thank you so much for visiting my blog today!
Happy crafting!
Anna-Karin
Supplies:


Fabulous treat boxes Anna-Karin, the whole background scene you created is gorgeous and I love the spooky bats! the kids will love these I'm sure :-)
ReplyDeleteHope you feel better soon xx
luv
Lols x x x
Your treat bags are deliciously spooky Anna-Karin, I just love the scenes you created and the detail on the moon makes them look very realistic. That looks like a very useful die too!
ReplyDeleteSorry to hear that you have been ill, I hope you feel better soon! xx
Your treat boxes are sweet! Love the little scenes you stamped on them, and the colors are luscious, Anna-Karin! I know you boys will be excited to get these!! Maura xx
ReplyDeleteStunning boxes for your sons, Anna-Karin! I love the blending and the way you added the "hazy-ness" to the moon! Clever!
ReplyDelete*mwah*
Steph
Simon Says Stamp!
Wow! These are both fantastic! Love the spooky scenes! Hugs, Chrisx
ReplyDeleteWow! These are both fantastic! Love the spooky scenes! Hugs, Chrisx
ReplyDeleteThese are almost CAS, but with a little bit of detail. I love the hills and the birds in the sky and how you did the moon. They are gorgeous. I hope you feel better soon!
ReplyDeleteAbsolutely fabulous! I adore the shading and the hills! Your blending of colors and making scenes are totally perfect! Hugs, Marzena
ReplyDeleteLove your beautiful boxes, Anna-Karin. The colors and scenes are gorgeous! :)
ReplyDeleteFabulously spooky treat boxes!
ReplyDeleteWishes
Lynne
So clever and gorgeous! Love these! ;-)
ReplyDeleteWhat a useful die, your decoration looks so professional and the personalization is a nice touch. I also like this type of bird stamp and have pinned it for my wish list--thanks!
ReplyDeleteThese little boxes are so fun, Anna-Karin! Love the evening sky you've created! The bats really do the trick! Hugs, Sandra
ReplyDeleteEvery time I visit your blog I learn something new! Beautiful colors, wonderful project as always! Barbara
ReplyDeletebeautiful and very cute treat boxes...there are going to be some very happy kiddos on Halloween....hugs kath xxx
ReplyDeleteSpooky cute & fun! Beautifully done!!
ReplyDeleteHave a blessed day,
Migdalia
Crafting with Creative M
So sorry to hear you're not feeling too well but hope that you are on your way to recovery! As always, these little treat boxes are just perfect and I'm sure Anton and Leo are going to be so happy to receive them! :)
ReplyDeleteYou hit it out of the park with this one! I love how these look so elegant, and yet they have that fabulous spook factor, too. I would've never paired such a gorgeous sunset with bats, but you are a visionary!
ReplyDelete