Pages

Thursday, October 31, 2013

12 tags of 2013 October

Hello everyone!! Today I am sharing my version of Tim Holtz 12 tags of 2013 October. I finished it last week, but didn't get a chance to post it until now.
 
12 tags of 2013 October - Layers of ink
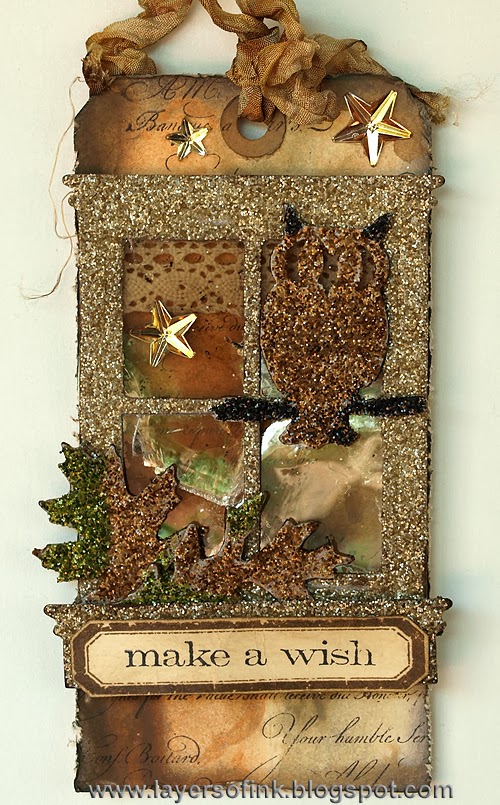
Instead of a Halloween tag, I made an autumn tag, using lots of Distress Glitter. I love Distress Glitter, and I am not always crazy about glitter. Apart from the great vintage shine, I really like that it doesn't end up everywhere. I used a great new die here, the Window & Window Box, and the little owl, which also appeared on my wax resist tutorial the other day.
 
The background was made same way as Tim made his with Distress Paint, but using neutral colours instead (Antique Linen, Walnut Stain and Frayed Burlap). I stamped it with my favourite script stamp.
 
The window was die cut from grungeboard, inked with Antique Linen and covered with Antique Linen Distress Glitter. I used mica sheets for the windows, which is my favourite material to use for windows. You can get a similar effect with a transparency and alcohol inks. I first applied Glossy Accents to only the owl's body, sprinkled it with Tarnished Brass glitter and then applied Glossy Accents to the branch and ears, sprinkling them with Black Soot.  
 
A piece of lace trim was used as a curtain and I adhered the window with foam dots.
 
The mirror stars were coloured with alcohol inks (Ginger and Espresso) to fit the colours of the tag. 

The leaves were covered with Peeled Paint and Tarnished Brass glitter and tucked into the window box.

Thank you for stopping by!

Happy crafting!

Anna-Karin

Supplies:
Surfaces: Ranger Manila Cardstock; Tim Holtz Idea-ology Grungeboard
Dies: Sizzix: Window & Window Box, Mini Owl & Crescent Moon, Mini Tattered Leaves
Stamps: Stampers Anonymous Tim Holtz: Simple Sayings, Classics #9
Ink: Distress Ink: Antique Linen, Walnut Stain; Archival Ink: Jet Black, Potting Soil
Alcohol ink: Adirondack: Ginger, Espresso
Paint: Distress Paint: Antique Linen, Frayed Burlap, Walnut Stain
Glitter: Distress Glitter: Tarnished Brass, Antique Linen, Peeled Paint, Black Soot
Embellishments: Tim Holtz Idea-ology: Mirror Stars, Crinkle Ribbon; US ArtQuest Mica; lace trim

Tuesday, October 29, 2013

Wax Paper Resist Tutorial

Hi everyone! Today I have a wax paper resist step-by-step tutorial to share, using my Sizzix dies in some really fun ways.
 
Wax Paper Resist Tutorial - Layers of ink
I came up with the idea for this tutorial while I was working on this card, using an intricate Thinlits die, which needed a sheet of wax paper between the die and the paper to die cut perfectly. I thought I could use the die cut wax paper for a great wax paper resist technique, inspired by a challenge I took part in a five years ago (thank you Daria!) and by my own wax crayon resist tutorial earlier this year.
 
By die cutting shapes from wax paper, you can get really cool resist effects, and it is a great way of getting even more out of your dies. This technique works best on coated paper. In my examples I used Ranger Specialty Stamping paper, which is a matte coated paper, and their glossy cardstock. Both work equally well, on ordinary cardstock the effect will not be as striking. Let's start!
 
Die cut the Moroccan card front - or any other die - from wax paper. I also die cut a tag from Specialty Stamping paper.  

Place your tag on a piece of printer paper and position the wax paper die cut on top. If your wax paper is double-sided, you can place another tag on top and get two in one go. My wax paper only had wax on one side, so I made sure that side was facing the tag. Place another printer paper on top and iron without steam. This transfers the wax to the tag.

Ink the tag with Distress Inks. I wanted to do an autumn tag and used Squeezed Lemonade, Wild Honey, Rusty Hinge and Vintage Photo. Mist a paper towel very lightly with water and wipe the tag off. This removes the ink from the wax impressions. Pretty cool isn't it?

Splatter with a little bit of water and dry with a heat gun. Stamp the tag with a script stamp and Rusty Hinge ink, holding the stamp in your hand for a more random impression. The wax will resist the ink. Wipe off as before (just make sure the ink is pretty dry first, otherwise you will smudge the stamping). Stamp with Potting Soil Archival ink, which will go on top of the wax.

Here you can better see how the wax impression resists the stamped text. I love the distressed look of the wax resist. The little heart was in my scrap box, die cut from grungeboard covered with sticky-back canvas. I inked it with Vintage Photo.

Ink another piece of Specialty Stamping paper with Squeezed Lemonade. Crumble up a piece of wax paper and place on top of the inked paper. As before, sandwich between two printer papers and iron without steam. This is the more traditional wax paper resist technique.

Ink with orange and brown shades of Distress Ink, which reveals the yellow wax resist pattern in the paper. This reminded me of leaves.

Die cut leaves from the wax resist paper.

Die cut a label from cream cardstock and ink with Antique Linen and Vintage Photo. Stamp with a sentiment stamp and Potting Soil ink.

Die cut an owl from grungeboard and ink with Vintage Photo. Stamp wings with a crackle stamp (check out this owl, using the same technique). Place a yellow paper behind the eyes. Coat the owl with Glossy Accents and sprinkle a little bit of Rock Candy glitter into the glue, for texture. Leave to dry before adhering to the project.

Wax Paper Resist Tutorial - Layers of ink
Adhere the label to the tag and layer leaves and a piece of twine under the owl.  
 
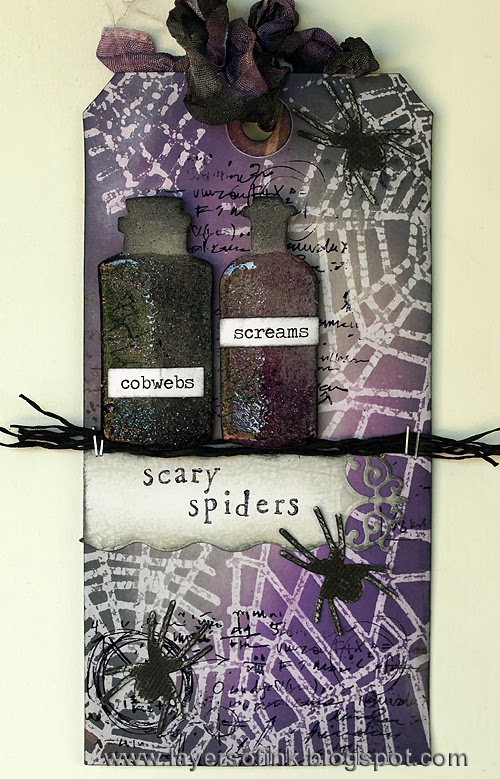
I made a Halloween tag too, because I wanted to do the technique with this spider web die:

Die cut the cobwebs from wax paper and a tag from glossy cardstock. Iron as explained above.

Ink with Pumice Stone, Dusty Concord and Black Soot and wipe the ink off the wax resist parts.
 
Stamp with a texture stamp and Black Soot ink and with a text stamp and Jet Black ink - or use Black Soot for both. If you use Black Soot for both, the text will look like it is underneath the web.
 
Die cut two bottles from grungeboard and ink one with Dusty Concord and the other with Black Soot. Stamp with a crackle stamp and Archival Jet Black ink. This is the same stamp that I used for the wings of the owl. Coat with Glossy Accents, except for the top, and sprinkle with a little bit of Rock Candy glitter.

Here you can better see the effect of the glitter sprinkled into the Glossy Accents.

Die cut a label from Specialty Stamping Paper. I placed a piece of wax paper between the paper and the die and even though I didn't iron this, some of the wax transferred to the die cut, which gave a cool effect when I inked it. A happy accident. Ink with Pumice Stone and Black Soot and stamp a sentiment with Jet Black ink.

Die cut spiders from black Color-Core cardstock and sand lightly. Dye crinkle ribbon with the same inks as used on the tag, but in Distress Stain form instead.

Wax Paper Resist Tutorial - Layers of ink
The finished tag. The bottles were adhered with foam dots. I placed Chit Chat stickers on the bottles and a few strands of paper twine underneath them, as a table.

By using other dies and colours, this technique can work for any type of project. I hope you enjoyed this tutorial! Thank you for looking!

Happy crafting!

Anna-Karin

Supplies:
Surfaces: Ranger: Specialty Stamping Paper, Glossy Cardstock; Tim Holtz Core'dinations Color-Core cardstock; Tim Holtz Idea-ology Grungeboard; wax paper
Dies: Sizzix: Moroccan Card FrontMini Owl & Crescent Moon, Mini Apothecary Bottles, Cobwebs, Tag & Bookplates, Long Labels, Trick or TreatFlower & Heart, Mini Tattered Leaves
Stamps: Stampers Anonymous Tim Holtz: Simple Sayings, Classics #9, The Chemist, Ultimate Grunge, Urban Tapestry, Fabulous Flourishes; Hero Arts Printer's Lowercase alphabet
Ink: Distress Ink: Antique Linen, Squeezed Lemonade, Wild Honey, Rusty Hinge, Vintage Photo, Black Soot, Dusty Concord, Barn Door, Spiced Marmalade, Pumice Stone; Ranger Archival Ink: Jet Black, Potting Soil
Stain: Distress Stain: Dusty Concord, Black Soot, Vintage Photo, Rusty Hinge
Glitter: Rock Candy Distress Glitter
Embellishments: Tim Holtz Idea-ology: Seasonal Chit Chat stickers, Crinkle Ribbon, Neutral Paper String; twine
Adhesive: Ranger Glossy Accents
Monday, October 28, 2013

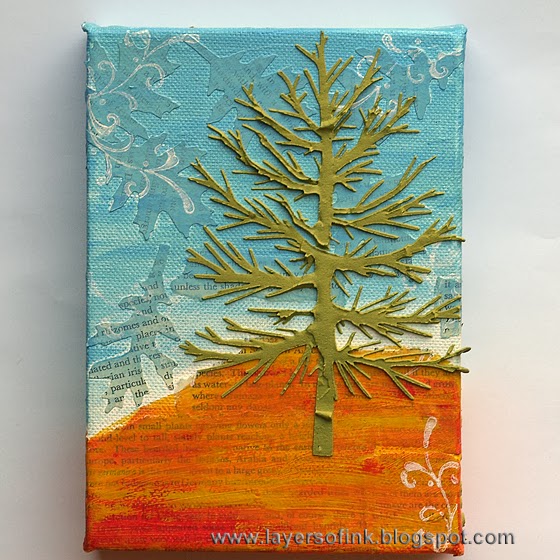
Savor The Beauty Canvas

Hi! This week anything goes at Simon Says Stamp Monday Challenge Blog! I am looking forward to seeing all the creations. 
 
Savor the Beauty Canvas - Layers of ink
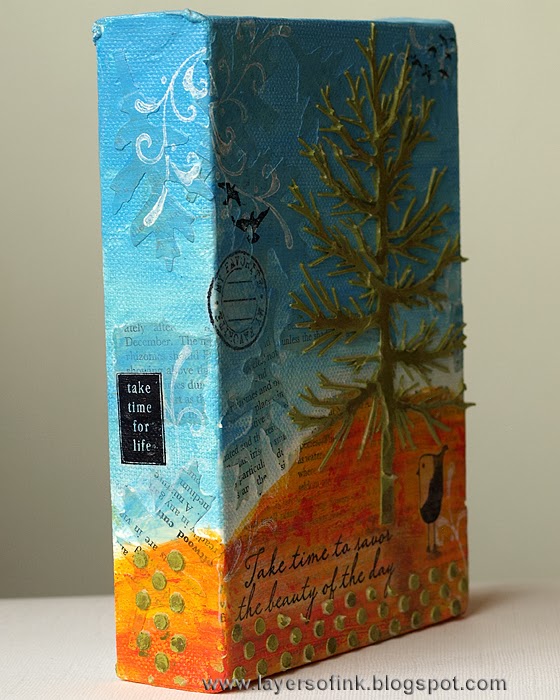
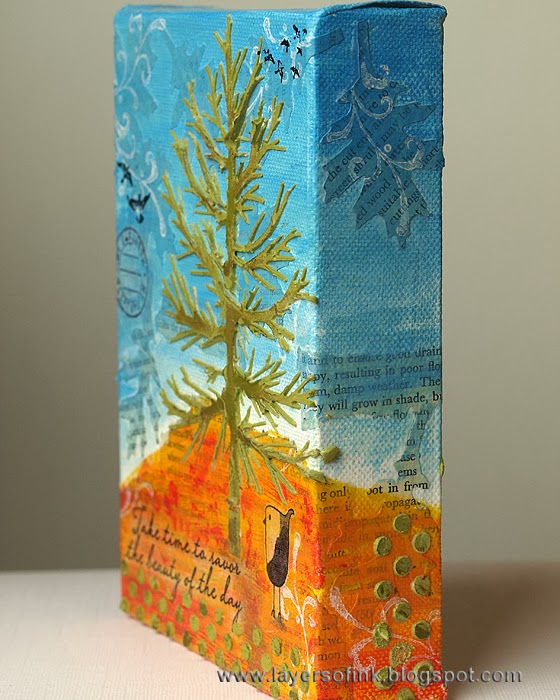
I sometimes have a hard time deciding what to do on anything goes challenges, but this week I knew I wanted to use the new Hero Arts Elegant Pine stencil. I LOVE this stencil, it is so intricate and the tree looks amazing. You might already know that I like trees, and this week I made a mixed media canvas (5 x 8 in) featuring this great pine tree. I took some step photos.
 
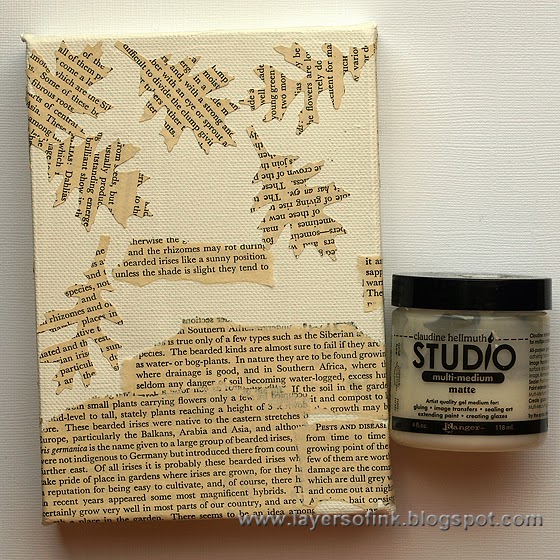
I first gave the canvas a coat of gesso, when it was dry I started by gluing down text paper. Some of the paper was die cut into leaves falling down the canvas, and the rest was torn into hills. I used multi-medium to glue them down. 

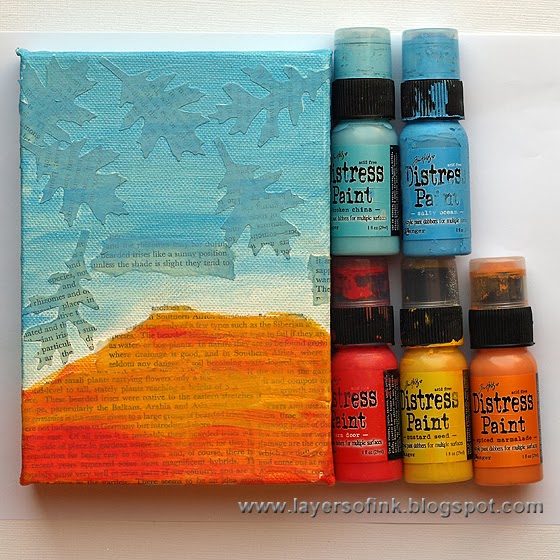
I painted the canvas with Distress Paint, watering them down first. You might want to give the canvast a light coat of gesso first, I forgot that for the sky, but did it for the ground part. I made the sky darker towards the top and the hill darker towards the front of the canvas.

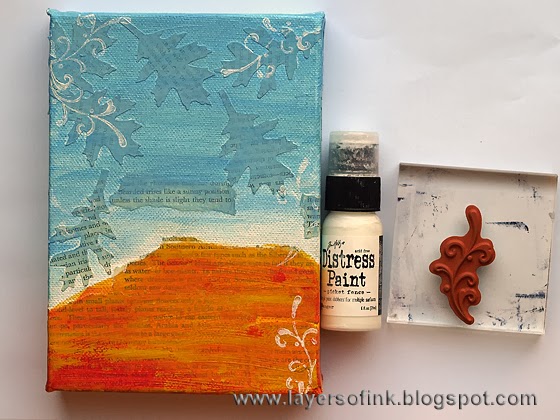
I stamped a few swirls with Picket Fence Distress Paint, to add some more movement. Always clean your stamp immediately after using it with paint.

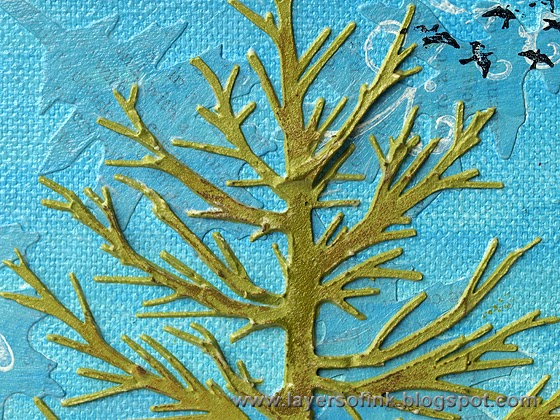
I mixed a little bit of green paint into white Embossing Paste. Don't add too much paint or the paste will lose its consistency. The paste was smeared through the stencil with a palette knife. Carefully lift the stencil and immediately wash it.

When the paste was dry, I dry-brushed a little bit of Forest Moss Distress Paint here and there, to give more colour variation to the tree. I also added just a very tiny bit of Walnut Stain.

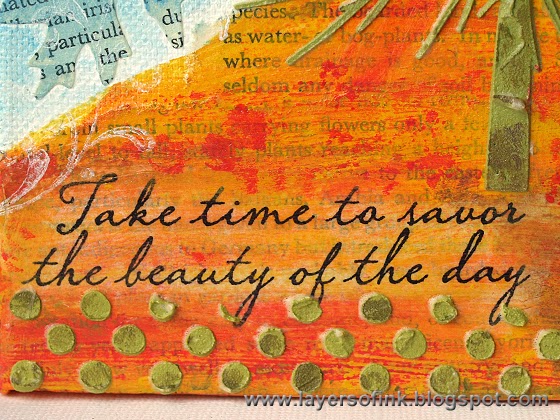
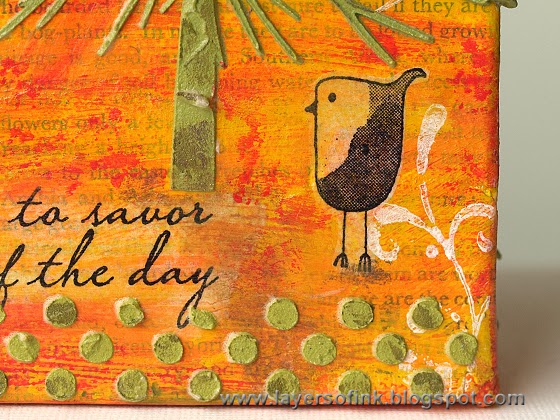
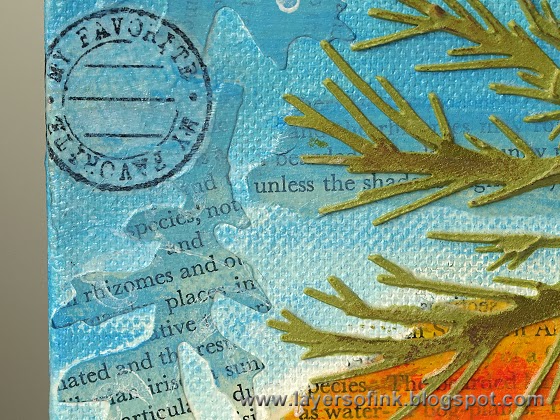
It can be hard to stamp on a canvas, because there is no solid support to press the stamp against, I didn't want to risk messing this up with incomplete stamping, so instead I stamped the sentiment and some images on tissue paper with Archival Jet Black. It was adhered to the canvas with multi-medium and become practically invisible. I also added some dots, using the same mix of paint and paste and a border stencil. Again, when these were dry, I dry-brushed darker paint on top.

My canvas had to have some birds, and I love this one from Hero Arts My Favorite set. It was also stamped on tissue paper. I also painted a shadow for the tree, to ground it into the canvas.

This stamp was also stamped on tissue paper. The flying birds were stamped directly on the canvas, because I didn't want them to look as perfect.

I extended the sky and ground onto the sides of the canvas. Here I also added another stamp, first stamped on tissue paper.

I left the other side plain, with just a few paste dots.

Join us this week and remember that anything goes! As every week, one random participant wins a $50 gift voucher from Simon Says Stamp.

50dollar_voucher_600px
 

Also, a little reminder, in case you might have missed it, Simon Says Stamp has a new blog. Make sure you are following it so that you don't miss out on the fabulous inspiration.


Thank you for the visit!

Happy crafting!

Anna-Karin

Supplies:
Surface: Canvas 5 x 8 in; old book paper; tissue paper
Dies: Sizzix: Mini Tattered Leaves
Stamps: Hero Arts: My Favorite AC030, Collage Friend AC022, Take Time to Savor G5374; Stampers Anonymous Tim Holtz: Mini Ornates
Ink: Ranger Archival Ink Jet Black
Paint: Distress Paint: Broken China, Salty Ocean, Mustard Seed, Walnut Stain, Peeled Paint, Forest Moss, Spiced Marmalade, Barn Door, Picket Fence
Stencil: Hero Arts: Elegant Pine, Borders
Medium: Claudine Hellmuth Multi-Medium Matte, Gesso; Wendy Vecchi Stampers Anonymous: White Embossing Paste

Saturday, October 26, 2013

CSI case file #95 - Mixed media double pager

Hello everyone! We have another wonderful case file for you at CSI:Color, Stories, Inspiration this week. Lots of opportunties with this one:
 
 
 My layout:
CSI case file 95 - Layers of ink
I thought the combo fit really well with these photos of my son in his christening dress, but more than that, I wanted to write the history of this dress. My grandfather was christened in it, as well as my mother and many other family members (not me unfortunately, someone had made a gift for my mom when I was born and I was christened in that dress instead). The dress was about 105 years old when these photos were taken.
 
From the evidence items I used: paint, distressing, flowers, and book pages, and from the testimony I was inspired to document an old memory.
 
CSI case file 95 - Layers of ink
He has so many different facial expressions on these photos, I wanted to use all of them, so I made a double pager. The background is mixed media starting with a layer of gesso on watercolour paper.  

The journaling is written on a bunch of tags tucked behind the photos. This is one of my favourite ways of adding a lot of journaling, partly since it is easy to just reach into the page protector and take out the tags to read. The border piece is Karen Burniston's new Banners & Borders set.

After applying gesso to the background with a palette knife, I pressed a leafy embossing folder into the gesso to create more texture. I painted the background with Distress Paints, mixing the paint to match the two blue colours in the palette. I watered down the paint and started with the lighter blue. The darker blue was painted in a band across the page and misted with water so that it started to drip down the page.

When the paint was dry, I stamped the background here and there with a dot stamp and French Ultramarine ink and with swirls and Blue Cornflower ink. I love Archival Inks and that they work so well on many different surfaces. French Ultramarine and Blue Cornflower ink was also sponged over two different stencils to add more detail to the background.

I applied light molding paste through two other stencils, this damask one is by Prima.

When the hearts were dry, I dry-brushed just a tiny bit of brown paint on top.
 
For the title I die cut a left over gelli print with Karen Burniston's Sassy Labels & Stitched Frames set. This stitching addition is so much fun. I planned for the stitches to be embossed, but wasn't thinking and placed the stitching die on the wrong side of the paper, so they are debossed instead. The title was stamped with alphabet stamps and Blue Cornflower ink. The blooms were die cut from Core'dinations cardstock, more leftover gelli prints and dictionary paper using the Holiday Greenery die by Brenda Walton. It particularly like the different leaves on this die.
 
You can see the impression of the embossing folder in the gesso better on this photo, it gives a great subtle texture.

Thank you for looking! I hope you will join us this week in the challenge!

Happy crafting!

Anna-Karin

Supplies:
Surfaces: Daler & Rowney watercolour paper; Core'dinations Tim Holtz Color-Core cardstock; dictionary paper
Dies: Sizzix: Banners & Borders, Sassy Labels & Stitched Frames, Holiday Greenery
Embossing folder: Sizzix: Garden Set
Stamps: Hero Arts: Flourish Background CG119, Tiny Ink Spots S5637
Ink: Ranger Archival Ink: French Ultramarine, Blue Cornflower
Paint: Distress Paint: Broken China, Salty Ocean, Chipped Sapphire, Mustard Seed, Peeled Paint
Medium: Golden Artist Colors: Light Molding Paste, Gesso
Stencils: Jenni Bowlin: Silhouettes; Prima: Damask 6 x 6; The Crafters Workshop: Spilled Hearts, Mini Cherry Blossoms

Friday, October 25, 2013

Creativity card

Hello stampers! Today I have a card to share made with the new Darkroom Door Creativity Quote stamp. I love this sentiment, and it will also work great if you just want to cut out a few of the words.
 
Creativity card - Layers of ink
The quote stamp fit perfectly inside the Window Frame stamp. I stamped the window with Potting Soil Archival Ink and cut away all the little windows, leaving me with a wooden frame. The sentiment was stamped with Fern Green ink on top of a scrap gel printed paper. It was layered on a piece of old book paper and kraft core cardstock. The frame was adhered with foam dots.

The background is also a gel print leftover that I found among my scrap papers. It was stamped with the Brick Wall and Sheet Music Background stamps.

A quick card, ready to be sent to a stamping friend!

Thank you for looking!

Happy Stamping!

Anna-Karin

Supplies:

Darkroom Door products:
Stamps: Creativity Quote Stamp, Window Frame, Brick Wall Background, Sheet Music Background

Other products:
Surfaces: Neenah Smooth Solar White cardstock; Tim Holtz Core'dinations Kraft-Core cardstock; cheesecloth; old book paper
Ink: Ranger Archival Ink: Fern Green, Potting Soil, Venetian Orange
Tools: Gelli Arts Gel Printing Plate

Wednesday, October 23, 2013

Horror Show Shadow Box

Hello everyone! Today I am sharing a little project on the Sizzix blog, an interactive Halloween shadow box, made with Brenda Walton's new Shadow Box die.

Horror Show Shadow Box - Layers of ink
I love the Shadow Box die and can think of so many different things to make with it. It reminded me of a puppet theatre, where you move the puppets by pulling on strings, so I a made a little scary scene for my son. We don't celebrate Halloween, but he loves scary stuff, and he'll probably want this out for quite a while. If you pull the strings on top, the creatures and skeleton move.

For more photo and info, head over to the Sizzix blog.

Thank you for stopping by!!

Anna-Karin