Pages

Sunday, April 30, 2023

Knitting Card Tutorial

Hello crafters! The month is coming to an end and May is starting tomorrow. May is one of my favorite months of the year, particularly since the nature turns bright green in May.

Please note: this post has affiliate links, for which I receive a small percentage of sales generated by the link, at no extra cost to you.
Layers of ink - Knitting Card Tutorial by Anna-Karin Evaldsson.

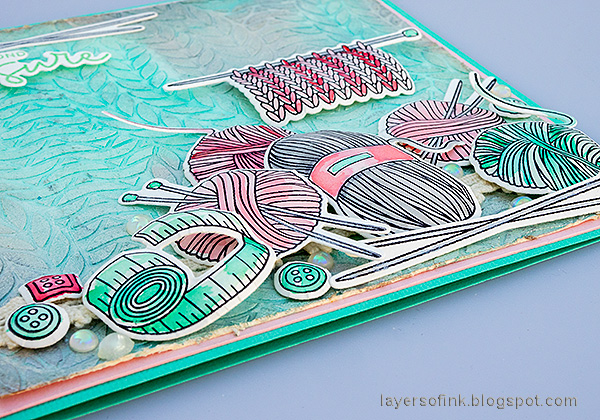
This is a card for someone who loves to knit and it was made with Simon Says Stamp new Beautiful Days release. The background shimmers, which might be hard to see here. I had fun coloring all the yarn and bits and pieces.

Layers of ink - Knitting Card Tutorial by Anna-Karin Evaldsson. Apply Texture Paste through the Simon Says Stamp Chunky Knit stencil.

Working on heavystock paper, start by applying Texture Paste through the Simon Says Stamp Chunky Knit with a palette knife.

Layers of ink - Knitting Card Tutorial by Anna-Karin Evaldsson. Apply Texture Paste through the Simon Says Stamp Chunky Knit stencil. Paint with gesso.

When it is dry, paint with gesso.

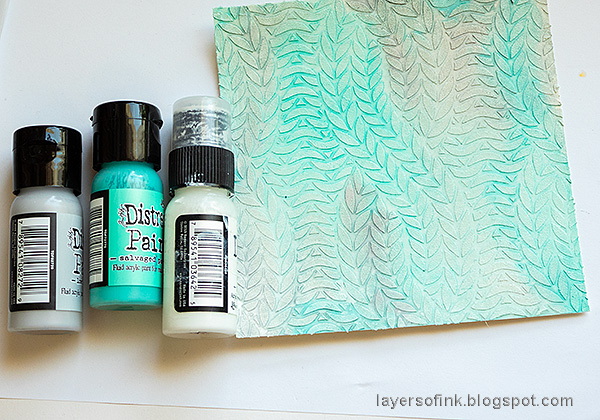
Layers of ink - Knitting Card Tutorial by Anna-Karin Evaldsson. Apply Texture Paste through the Simon Says Stamp Chunky Knit stencil. Paint with Distress Paint.

Paint with Distress Paint and mist with water to blend. Let dry.

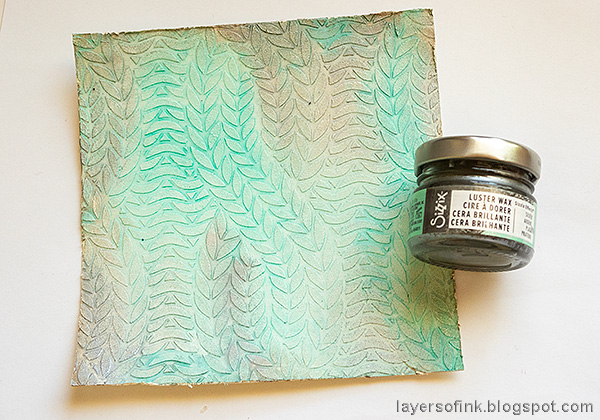
Layers of ink - Knitting Card Tutorial by Anna-Karin Evaldsson. Apply Texture Paste through the Simon Says Stamp Chunky Knit stencil. Apply Sizzix Luster Wax.

Add a little Sizzix Silver Luster Wax around the edges.

Layers of ink - Knitting Card Tutorial by Anna-Karin Evaldsson. Apply Texture Paste through the Simon Says Stamp Chunky Knit stencil.

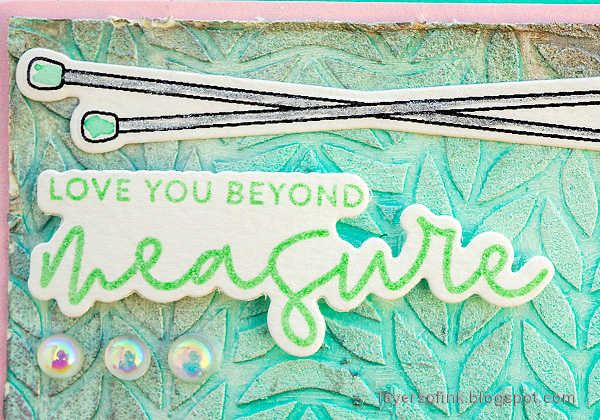
Dust the background with Turquoise Pearl Powder.

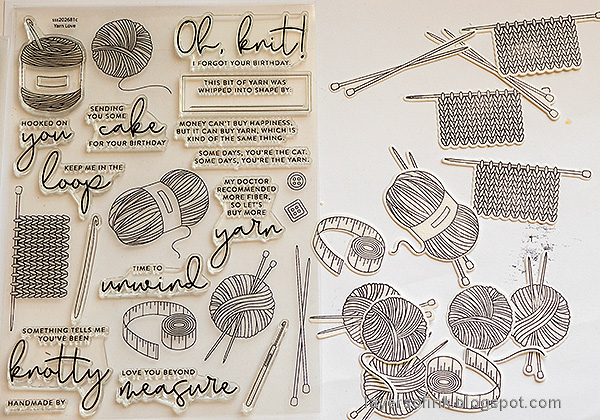
Layers of ink - Knitting Card Tutorial by Anna-Karin Evaldsson. Apply Texture Paste through the Simon Says Stamp Chunky Knit stencil.

Stamp the images from Yarn Love on watercolor paper and die cut with the coordinating dies. This is a stamp set where the coordinating dies are very helpful and speeds up the cutting process a lot. 

Layers of ink - Knitting Card Tutorial by Anna-Karin Evaldsson. Apply Texture Paste through the Simon Says Stamp Chunky Knit stencil.

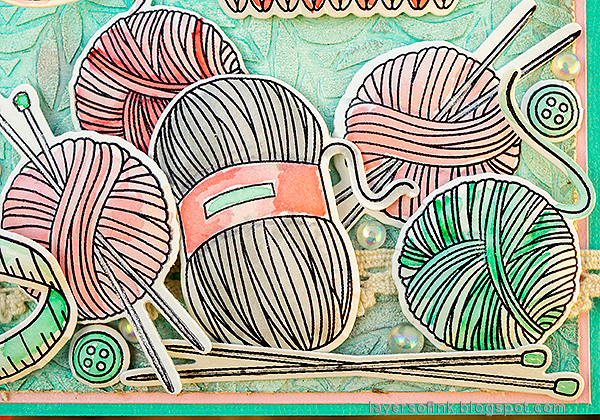
Watercolor the images with Distress Paint. Use a Tim Holtz Shaping Kit and the new Simon Says Stamp Place and Score Embellishment Wand.

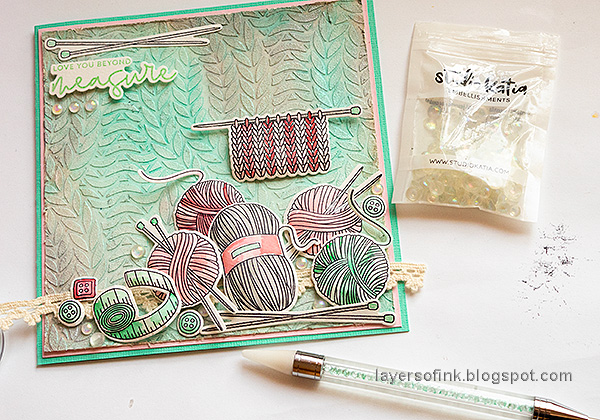
Layers of ink - Knitting Card Tutorial by Anna-Karin Evaldsson. Apply Texture Paste through the Simon Says Stamp Chunky Knit stencil.

Use the white tip of the wand to add the Studio Katia Iridescent Bubbles. The wand works wonderfully for this. 

Layers of ink - Knitting Card Tutorial by Anna-Karin Evaldsson. Apply Texture Paste through the Simon Says Stamp Chunky Knit stencil.

I used a silver gel pen to color the knitting needles. I had to check what that was called in English, in Swedish they are called 'knitting sticks'. The sentiment was stamped with Simon Says Stamp Saturated Spring ink and adhered with foam tape.

Layers of ink - Knitting Card Tutorial by Anna-Karin Evaldsson. Apply Texture Paste through the Simon Says Stamp Chunky Knit stencil.

The watercoloring was done loosely. 

Layers of ink - Knitting Card Tutorial by Anna-Karin Evaldsson. Apply Texture Paste through the Simon Says Stamp Chunky Knit stencil.

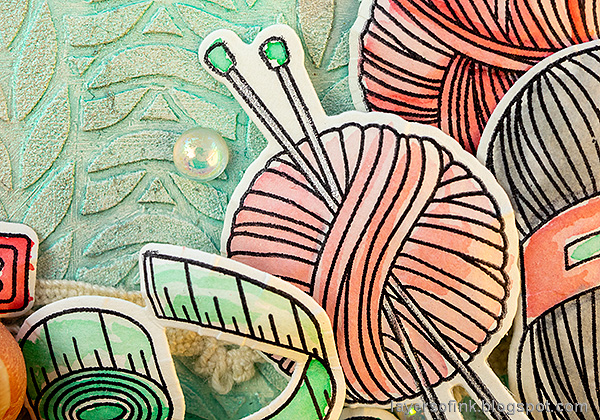
I placed Simon Says Stamp Pawsitively Perfect Foam tape in the center of the ball of yarn, so that they would keep their rounded shape. Some of have two layers of foam tape, a few even have three layers.

Layers of ink - Knitting Card Tutorial by Anna-Karin Evaldsson. Apply Texture Paste through the Simon Says Stamp Chunky Knit stencil.

I added Glossy Accents to the tips of the knitting needles.

Layers of ink - Knitting Card Tutorial by Anna-Karin Evaldsson. Apply Texture Paste through the Simon Says Stamp Chunky Knit stencil.

Here you can see the effect of the Luster Wax and the Pearl Powder better. It it is a lot more shimmery in real life.

Layers of ink - Knitting Card Tutorial by Anna-Karin Evaldsson. Apply Texture Paste through the Simon Says Stamp Chunky Knit stencil.

Change the color combo to fit the recipient of the card. 


Thank you for taking the time to visit my blog today!

Happy stamping!

Anna-Karin


Supplies:

* Please note: the links are affiliate links, for which I receive a small percentage of sales generated by the link, at no extra cost to you.

Thursday, April 27, 2023

Crocus in Pencil Tutorial

Hi friends! The spring flowers are flowering in the garden and we have some lovely purple crocus, which inspired this tag.

Please note: this post has affiliate links, for which I receive a small percentage of sales generated by the link, at no extra cost to you.

Layers of ink - Crocus in Pencil Tutorial by Anna-Karin Evaldsson.

My youngest son's favorite crocuses are the purple ones with bits of white and I tried to color these in a similar way. The flowers were colored with colored pencils, which acts as a resist when you color the rest of the tag with Distress Ink and Distress Oxide Ink.

Layers of ink - Crocus in Pencil Tutorial by Anna-Karin Evaldsson.

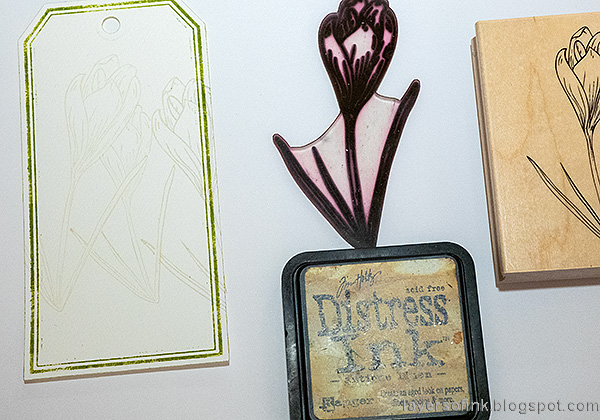
Die cut the tag from watercolor paper with Tim Holtz Framed Tags. Apply green Archival Ink to the die before die cutting, to get the frame.

Layers of ink - Crocus in Pencil Tutorial by Anna-Karin Evaldsson. Stamp with Simon Says Stamp Thoughtful Flowers.

Stamp the crocus from Simon Says Stamp Thoughtful Flowers with Antique Linen ink. Stamp it again on masking paper, cut out and place on the stamped flower. Stamp the smaller flower at the back with the Thoughtful Flower woodmounted stamp. Stamp the larger crocus one more time, to the right.

Layers of ink - Crocus in Pencil Tutorial by Anna-Karin Evaldsson.

Color the flowers with colored pencils. I used Faber-Castell Polychromos pencils. Add some grass. Blend with the white pencil and be sure to apply the white pencil to all the areas which you want to remain white. 

Layers of ink - Crocus in Pencil Tutorial by Anna-Karin Evaldsson. Color with Distress Ink.

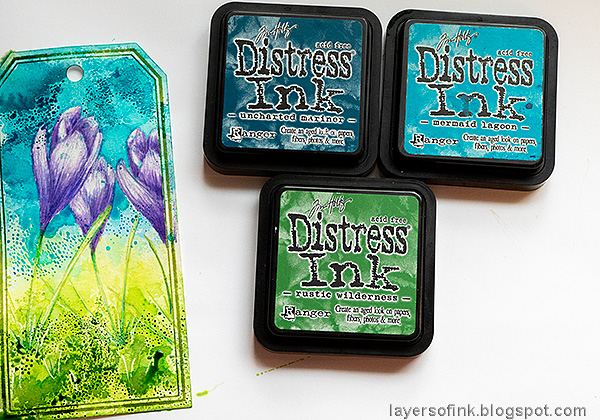
Smear Distress Ink on a non-stick craft sheet and mist with water. Press the tag into the ink. The pencil will resist the ink.

Layers of ink - Crocus in Pencil Tutorial by Anna-Karin Evaldsson.

When the tag is dry, repeat the process, using darker ink. Repeat again until you are happy with the look.

Layers of ink - Crocus in Pencil Tutorial by Anna-Karin Evaldsson. Color with Distress Oxide.

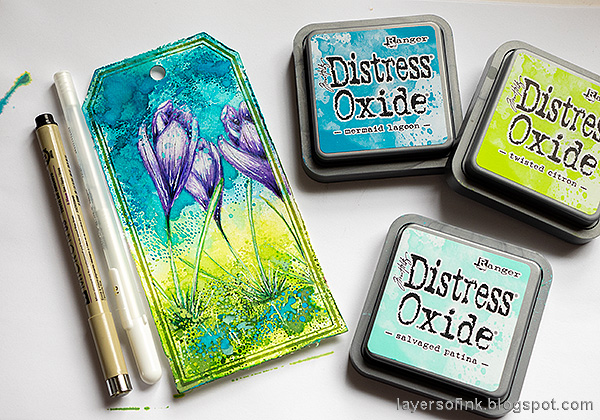
I added white highlights and lines to the flowers with a white gel pen and a few lines with a black pen. Next, I applied Distress Oxide Inks to the craft sheet and misted with water. Very lightly touch the paper to the ink to get Oxide Ink splotches here and there.

Layers of ink - Crocus in Pencil Tutorial by Anna-Karin Evaldsson.

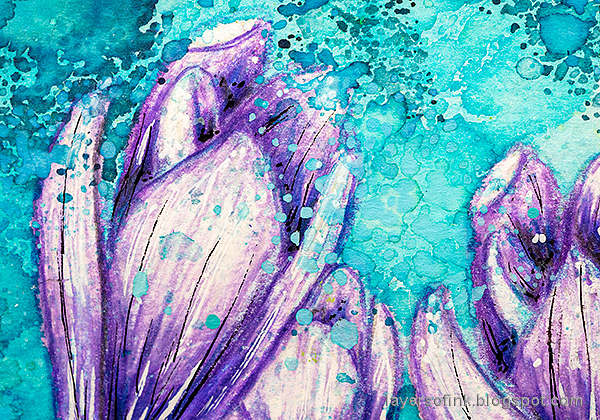
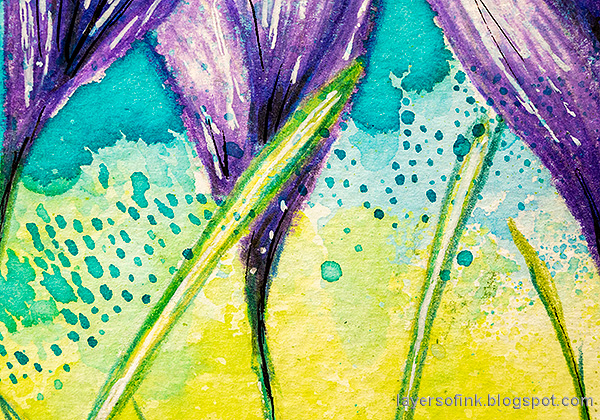
The Oxide Ink will remain on top of the flowers, adding these lovely splotches of blue.

Layers of ink - Crocus in Pencil Tutorial by Anna-Karin Evaldsson.

The white and black pen work adds interest to the flowers, but you can skip this step if you want to.

Layers of ink - Crocus in Pencil Tutorial by Anna-Karin Evaldsson.

Layers of ink - Crocus in Pencil Tutorial by Anna-Karin Evaldsson.

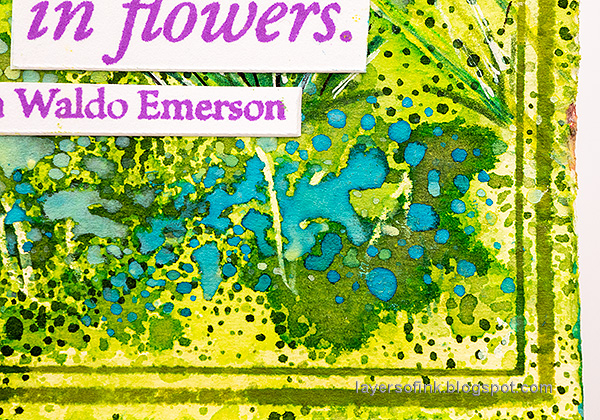
I hadn't planned to add blue to the grass area at first, but this ended up being my favorite part of the background. 

Layers of ink - Crocus in Pencil Tutorial by Anna-Karin Evaldsson.

The sentiment comes from Simon Says Stamp Laugh in flowers and was stamped with Simon Says Stamp Saturated Ink Amethyst ink.

Layers of ink - Crocus in Pencil Tutorial by Anna-Karin Evaldsson.

The May Arts Wrinkled Faux Silk Ribbon was dyed with Distress Ink. I hope you enjoyed this tutorial. You can of course use the same technique with different flowers or images. 


Thank you for taking the time to visit my blog today!

Happy stamping!

Anna-Karin


Supplies:

* Please note: the links are affiliate links, for which I receive a small percentage of sales generated by the link, at no extra cost to you.

Monday, April 24, 2023

Make your mark art journal

Hello friends! I hope you had a nice weekend! We had beautiful spring weather and went on a fun outing. It is so nice to be able to be out and about without a winter jacket.

Please note: this post has affiliate links, for which I receive a small percentage of sales generated by the link, at no extra cost to you.


This week our theme is Make Your Mark at the Simon Says Stamp Monday Challenge Blog. You can make marks in many ways: doodling, using stamps, stencil, die cuts and more. Don't miss the last project by our April guest designer Ann Chuang.
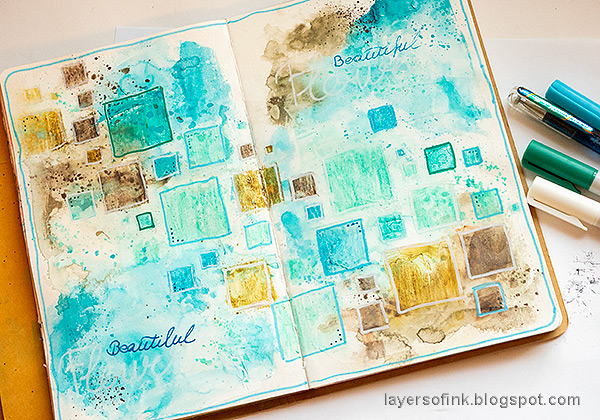
Layers of ink - Make Your Mark Art Journal Tutorial by Anna-Karin Evaldsson.

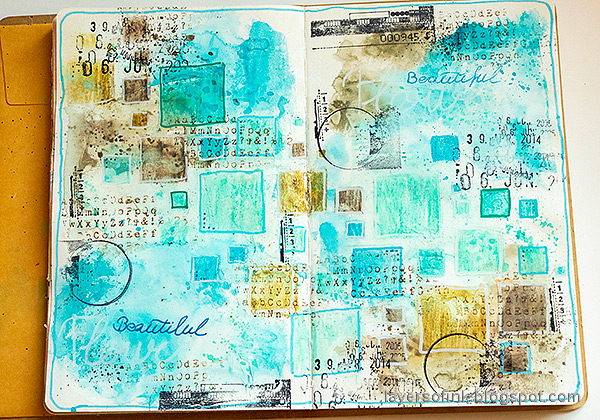
I created an art journal page this week and made marks with stencils, stamps, pens and paint. I started out with a double page in my Small Creative Journal and also used some very old paper from my pile of scraps.

Layers of ink - Make Your Mark Art Journal Tutorial by Anna-Karin Evaldsson. Paint with distress paint.

The page had been coated with gesso and I had used up some left-over paint on it, so it was ready to go.

Layers of ink - Make Your Mark Art Journal Tutorial by Anna-Karin Evaldsson. Add squares with Simon Says Stamp Mix and Match Squares stencil.

I started adding marks by scribbling with Distress Watercolor Pencils through Simon Says Stamp Mix and Match Squares Stencil.

Layers of ink - Make Your Mark Art Journal Tutorial by Anna-Karin Evaldsson.

Mist with water to blend and then add splatters with the pencils. Flick a paint brush against the tip of the pencil.

Layers of ink - Make Your Mark Art Journal Tutorial by Anna-Karin Evaldsson.

I draw an outline around the squares with Crafter's Companion Colorista Bold paint pens, wrote the word 'Flower' with a white paint pen, so that it would hardly be visible and added some more doodles, dots and writing.

Layers of ink - Make Your Mark Art Journal Tutorial by Anna-Karin Evaldsson.

Stamp the backgrounds with various texture and grunge stamps. The ones I used come from Tim Holtz Mini Glitch, School Desk and Ultimate Grunge.

Layers of ink - Make Your Mark Art Journal Tutorial by Anna-Karin Evaldsson. Die cut flower with Simon Says Stamp Morning Blossom.

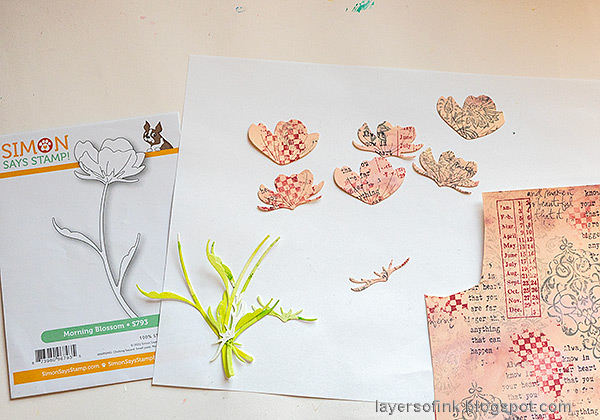
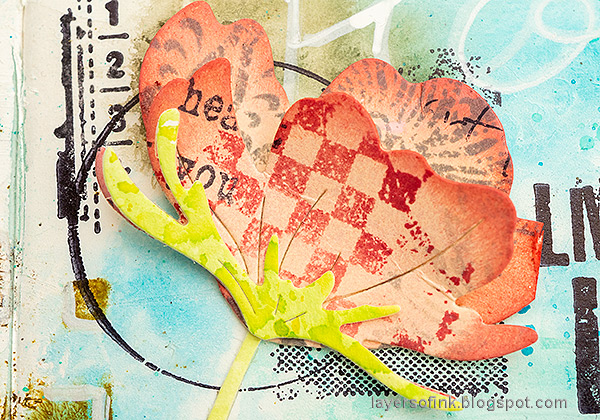
The flower was die cut with Simon Says Stamp Morning Blossom. The pink paper has been in my scrap box for perhaps 10 years. It is a part of a master board that I in South Africa, using Distress Ink and various Tim Holtz stamps. 

Layers of ink - Make Your Mark Art Journal Tutorial by Anna-Karin Evaldsson.

Ink the edges of the flower slightly with Abandoned Coral Distress Ink. Use Tim Holtz Shaping tool kit to add some shape to the flowers. If you are making a card, you can make the flowers more dimensional. I rarely add dimensional elements to my art journal, to keep the pages more or less flat.

Layers of ink - Make Your Mark Art Journal Tutorial by Anna-Karin Evaldsson. Tim Holtz Ultimate Grunge.

Don't worry about getting lines straight since we are aiming for a messy look.

Layers of ink - Make Your Mark Art Journal Tutorial by Anna-Karin Evaldsson.

The sentiment was die cut with Simon Says Stamp Capital B Beautiful die from white shimmer cardstock and a piece of watercolor paper that I found on my desk. 

Layers of ink - Make Your Mark Art Journal Tutorial by Anna-Karin Evaldsson.

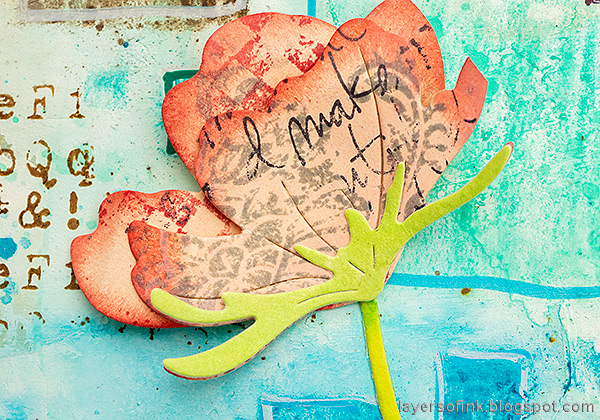
It was fun to use this paper that I made so long ago. And by accident the word 'make' ended up on this flower.

Layers of ink - Make Your Mark Art Journal Tutorial by Anna-Karin Evaldsson.

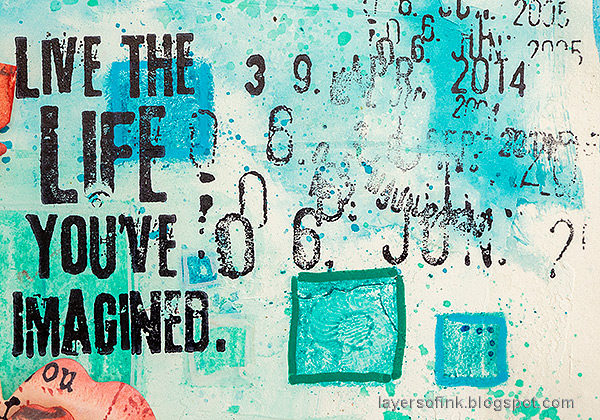
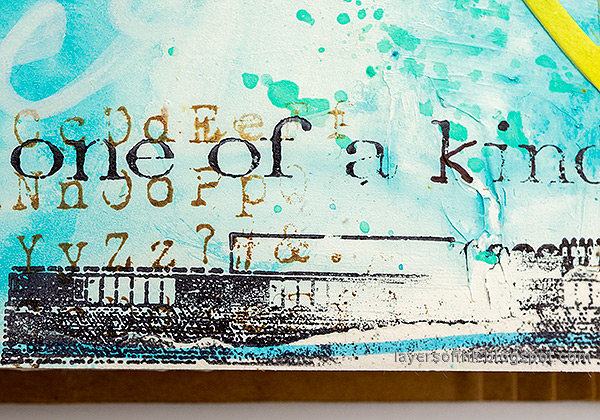
Sentiments were stamped on the background.

Layers of ink - Make Your Mark Art Journal Tutorial by Anna-Karin Evaldsson.

Paint pens are great when it comes to adding marks on acrylic paint backgrounds.

Layers of ink - Make Your Mark Art Journal Tutorial by Anna-Karin Evaldsson.


I hope you will join us this week in our Make Your Mark challenge. You have a chance to win a $25 gift voucher to do some fun shopping at Simon Says Stamp. You have until Monday 8am Ohio time. 1pm UK time, 2 pm CET to join in.


Do you use Instagram? If so please add #sssmchallenge so we can see your entries there too.


Thank you so much for stopping by here today! 

Happy crafting!

Anna-Karin

Supplies:

* Please note: the links are affiliate links, for which I receive a small percentage of sales generated by the link, at no extra cost to you.