Pages

Sunday, January 31, 2021

Water Stenciling Video Tutorial

Hi everyone! It is the last day of January and I hope you are well! Here we have a lot of snow and it is very cold, but also sunny. I took this winter's most beautiful walk today.

I have a video tutorial to share with you today, for a very quick and easy background technique with Distress Ink, a stencil and water.

Layers of ink - Water Stenciling Video Tutorial by Anna-Karin Evaldsson.

I made a tag, but the technique works for many different types of projects. Lots of fun elements on this tag, and the tiny envelope can be opened. There is a small card inside, which is also a fun idea for cardmaking. You can place an extra sentiment of message inside the envelope.

Let's jump right into the video. You can also find step photos below.


You can also watch the video on YouTube. You'll find the steps below too, including info on the rest of the tag.

Layers of ink - Water Stenciling Video Tutorial by Anna-Karin Evaldsson. Ink with Distress Ink.

Start by inking the tag with Distress Inks.

Layers of ink - Water Stenciling Video Tutorial by Anna-Karin Evaldsson.

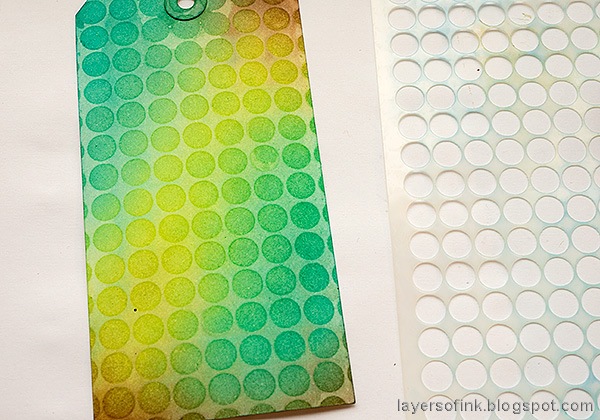
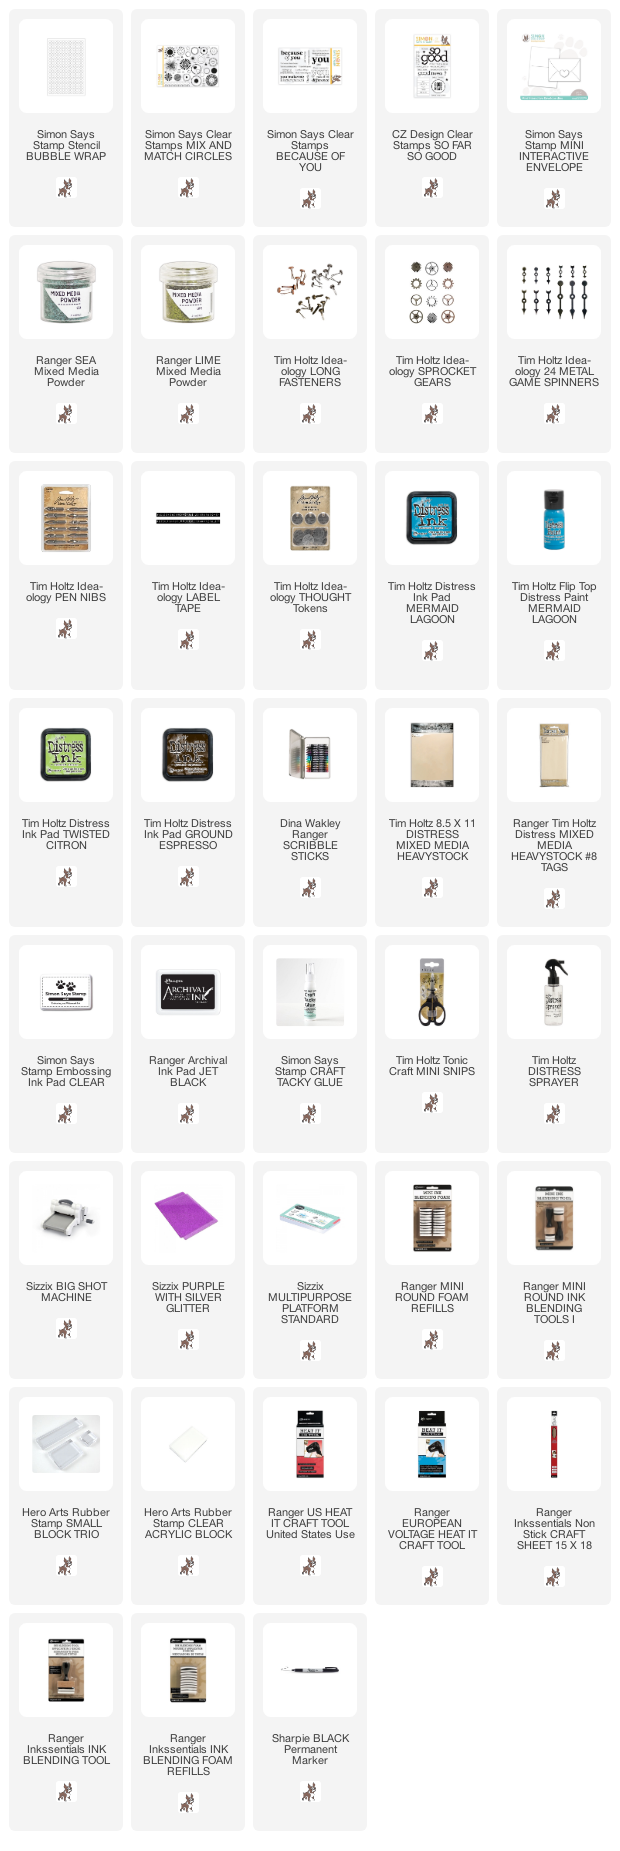
Mist the Simon Says Stamp Bubble Wrap stencil pretty heavily with water and place it on the tag.

Layers of ink - Water Stenciling Video Tutorial by Anna-Karin Evaldsson.

Remove the stencil and you get this ghost effect, where the dots look darker since the stencil removed some of the ink.

Layers of ink - Water Stenciling Video Tutorial by Anna-Karin Evaldsson. Die cut the Simon Says Stamp Mini Interactive Envelope.

Die cut the Simon Says Stamp Mini Interactive Envelope from scrap paper.

Layers of ink - Water Stenciling Video Tutorial by Anna-Karin Evaldsson. Stamp with Simon Says Stamp Mix and Match Circles.

Stamp and emboss circles from Simon Says Stamp Mix and Match Circles. I used Ranger's Mixed Media powders. Always be very careful when heat heat-embossing and never touch the melted powder.

Layers of ink - Water Stenciling Video Tutorial by Anna-Karin Evaldsson.

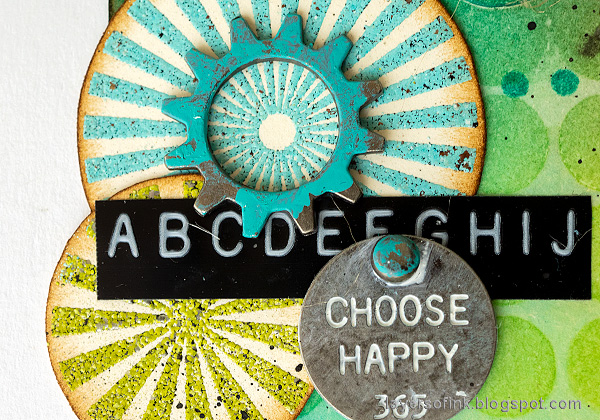
Cut the circles out and ink the edges. I also added some metallic idea-ology embellishments, such as this Thought Token.

Layers of ink - Water Stenciling Video Tutorial by Anna-Karin Evaldsson.

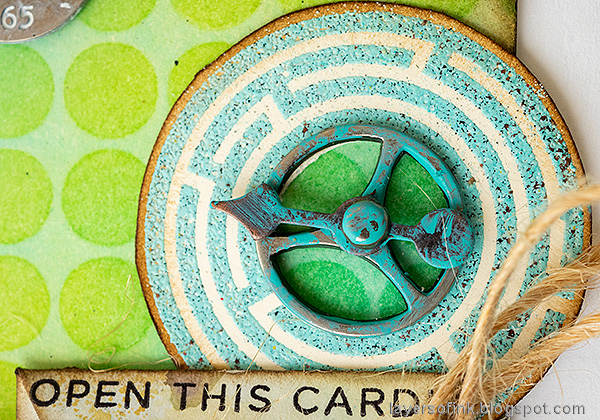
The labyrinth was cut out in the center too and I added a gear and a game spinner to it.

Layers of ink - Water Stenciling Video Tutorial by Anna-Karin Evaldsson.

I also splattered some black Scribble Stick on the background. 

Layers of ink - Water Stenciling Video Tutorial by Anna-Karin Evaldsson.

The tiny envelope was inked and assembled. For another project using the Mini Interactive Envelope die check out my Scrap Paper Envelopes.

Layers of ink - Water Stenciling Video Tutorial by Anna-Karin Evaldsson. Tiny envelope and card.

Inside the envelope is the little card with a stamped sentiment.

Layers of ink - Water Stenciling Video Tutorial by Anna-Karin Evaldsson.

And on the inside of the card I stamped these two sentiments from Because of You.

Layers of ink - Water Stenciling Video Tutorial by Anna-Karin Evaldsson.

Here you can see the effect from the stencil technique a little better. 

Layers of ink - Water Stenciling Video Tutorial by Anna-Karin Evaldsson.

The small dot border comes from Mix and Match Circles and the sentiment is from So Far So Good.

Layers of ink - Water Stenciling Video Tutorial by Anna-Karin Evaldsson.

I colored the tip of the pen nib with a permanent marker and added some paint to the rest of the nib.

Layers of ink - Water Stenciling Video Tutorial by Anna-Karin Evaldsson.

I hope you enjoyed this tutorial! I will see you again tomorrow. 


Thank you so much for taking the time to stop by here today! 

Happy crafting!

Anna-Karin

Supplies:

* Please note: the links are affiliate links, for which I receive a small percentage of sales generated by the link, at no extra cost to you.

Thursday, January 28, 2021

Ink Blocks Layout

Hi friends! I hope you are well. The snow is falling very heavily here and has been doing so since this morning. I have a scrapbooking page to share today, with stamped ink blocks. If you make the panels smaller, the design works great for cardmaking too. It is one of my favorite ways of using scraps.


Layers of ink - Ink Blocks Layout Tutorial by Anna-Karin Evaldsson.

I hadn't done a scrapbooking layout for a while and felt like using an childhood photo.This photo must have been taking on a bike outing sometime, since the basket with the picnic food is a bike basket.

Layers of ink - Ink Blocks Layout Tutorial by Anna-Karin Evaldsson.

I started out with these inky blocks. They were left-overs from testing various color combinations for a project I did about Dr. Jekyll and Mr. Hyde. You can easily create them from scratch. Smear Distress Inks on a craft sheet, mist with water and press squares of watercolor paper into the ink. Let dry. Continue with another layer of Distress Ink if you want more texture. For the really textured blocks, I finished with a third layer of Distress Oxide ink. Just dab the blocks into the ink so that it wouldn't get everywhere.

Layers of ink - Ink Blocks Layout Tutorial by Anna-Karin Evaldsson.

I used the pretty Darkroom Door Christmas Bush set to stamp the flowers. Ink with Distress Oxide ink to get a tone-on-tone effect. Mist lightly with water. I planned how to place the squares before stamping.

Layers of ink - Ink Blocks Layout Tutorial by Anna-Karin Evaldsson. Stamp with Simon Says Stamp Old Letter and Crackle Background.

Stamp the squares here and there with the Simon Says Stamp Old Letter Background and Crackle Background stamps, again using tone-on-tone colors.

Layers of ink - Ink Blocks Layout Tutorial by Anna-Karin Evaldsson. Stitch the blocks.

Distress the edges and stitch the squares to the background with a sewing machine. I also stitched a frame around them.

Layers of ink - Ink Blocks Layout Tutorial by Anna-Karin Evaldsson.

After placing out the photo, I stamped a whole bunch of sentiments on the blocks. This one comes from Simon Says Stamp Laugh In Flowers.

Layers of ink - Ink Blocks Layout Tutorial by Anna-Karin Evaldsson.

The title was die cut with the Chunky Happy die, from other pieces of scrap paper. I used soft grey colored paper for the frame and an inky piece for the letters.

Layers of ink - Ink Blocks Layout Tutorial by Anna-Karin Evaldsson.

The second part of the title was die cut with the Simon Says Stamp Archie Jr Solid set, from light colored inky paper.

Layers of ink - Ink Blocks Layout Tutorial by Anna-Karin Evaldsson.

I also added some sequins here and there.

Layers of ink - Ink Blocks Layout Tutorial by Anna-Karin Evaldsson.

The flowers on the darker blocks are less visible, but add a nice subtle texture.

Layers of ink - Ink Blocks Layout Tutorial by Anna-Karin Evaldsson. Simon Says Stamp Laugh In Flowers.

The sentiment comes from Simon Says Stamp Laugh in Flowers and the butterflies are from Thoughtful Flowers.

Layers of ink - Ink Blocks Layout Tutorial by Anna-Karin Evaldsson.

I like mixing darker and more textured blocks, with lighter blocks such as this one.

Layers of ink - Ink Blocks Layout Tutorial by Anna-Karin Evaldsson.

I was missing my parents and hoping that we'll be able to see them soon, when making this, so this sentiment from Stronger Together was perfect.


Thank you so much for taking the time to stop by here today! 

Happy crafting!

Anna-Karin

Supplies:

* Please note: the links are affiliate links, for which I receive a small percentage of sales generated by the link, at no extra cost to you.

Monday, January 25, 2021

Many Books Tag

Hello friends! I hope you had a good weekend! The snow is falling like crazy here. I have a book themed tag for you today, with techniques that can be used for cardmaking and art journaling too.


This week we have a Be On Time theme at the Simon Says Stamp Monday Challenge Blog. Don't miss the last project by our January guest designer Anita Rao

Layers of ink - Book Themed Tag Tutorial by Anna-Karin Evaldsson.

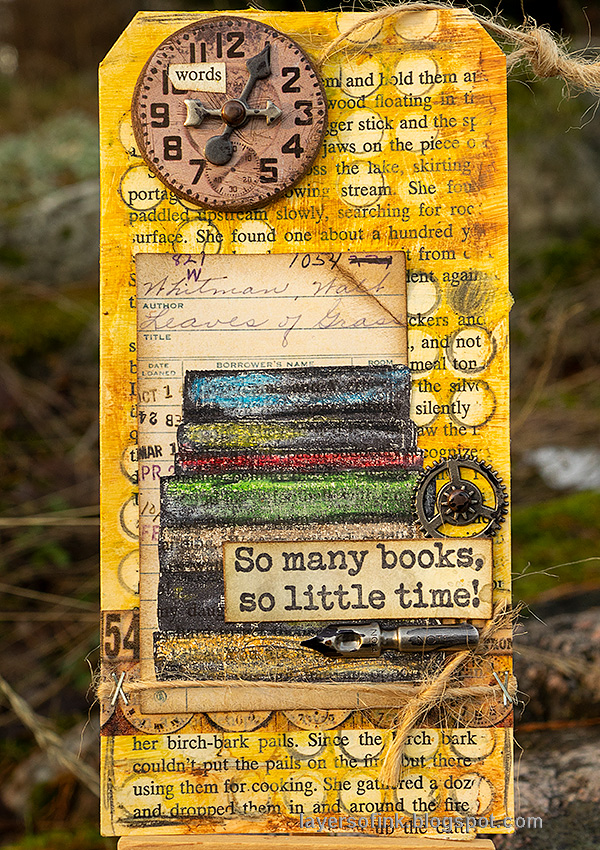
I like clock and time-related elements and when I was thinking of what to do for the challenge I came upon the Darkroom Door Bookworm set, with this great sentiment about time and books. As you probably know, I love to read and I also love to include words in my projects.

Layers of ink - Book Themed Tag Tutorial by Anna-Karin Evaldsson.

Tear an old book page and adhere it to a tag with Matte Medium. Add a layer of medium on top too.

Layers of ink - Book Themed Tag Tutorial by Anna-Karin Evaldsson. Color with Distress Crayons.

When dry, color with Distress Crayons in shades of yellow, orange and brown. Blend with your finger.

Layers of ink - Book Themed Tag Tutorial by Anna-Karin Evaldsson.

Place the Simon Says Stamp Bubble Wrap stencil over the tag and remove some of the color with a slightly moist paper towel. 

Layers of ink - Book Themed Tag Tutorial by Anna-Karin Evaldsson.

Place the stencil back and doodle around some of the circles with a black pencil.

Layers of ink - Book Themed Tag Tutorial by Anna-Karin Evaldsson. Stamp with Darkroom Door Bookworm.

Stamp the stack of books from Bookworm on another piece of old book paper and color with colored pencils. Some of the letters from the book paper will show through.

Layers of ink - Book Themed Tag Tutorial by Anna-Karin Evaldsson.

I found the word 'words' on a piece of book paper that I cut from the stamped stack of books and decided to use it as a small details. The Tim Holtz Junk Drawer Baseboard clock was sanded and inked. I used two game spinners as clock arms.

Layers of ink - Book Themed Tag Tutorial by Anna-Karin Evaldsson.

The combination of book paper, matte medium, Distress Crayon, stenciling and doodling gives depth to the background.


Layers of ink - Book Themed Tag Tutorial by Anna-Karin Evaldsson.

I used a permanent marker to quickly add ink to the pen nib.


Layers of ink - Book Themed Tag Tutorial by Anna-Karin Evaldsson.

Here you can also see the sense of depth in the background. It almost looks a little bit like beeswax has been used.

I hope you will join us this week in our Be On Time challenge. You have a chance to win a $25 gift voucher to do some fun shopping at Simon Says Stamp. You have until Monday 8am Ohio time. 1pm UK time, 2 pm CET to join in.

Don't forget to follow Simon Says Stamp on Instagram, where they post great stuff daily. 


Do you use Instagram? If so please add #sssmchallenge so we can see your entries there too.


Thank you so much for taking the time to stop by here today! 

Happy crafting!

Anna-Karin

Supplies:

* Please note: the links are affiliate links, for which I receive a small percentage of sales generated by the link, at no extra cost to you.

Saturday, January 23, 2021

Dry embossed floral card

Hello friends! I hope you are well. The sun was shining here today and I heard more birds than normally on my walk. There is almost a bit of spring in the air. I have a quick and simple dry embossed card to share with you.


Layers of ink - Dry Embossed Floral Background by Anna-Karin Evaldsson.

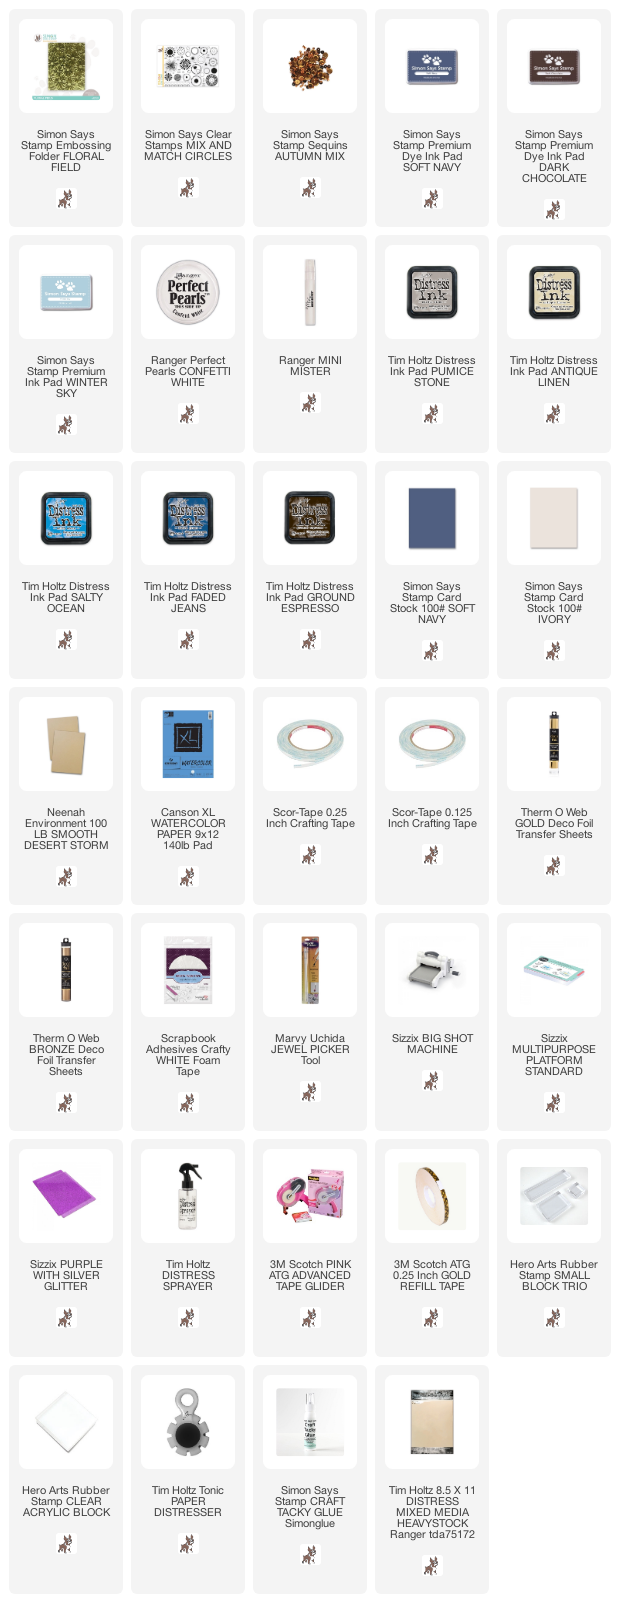
I have liked embossing folders since I got my very first one long ago. The texture effects is amazing and there are so many techniques that you can do. The 3-D embossing folders by Simon Says Stamp are wonderful and here I used the Floral Field folder. You can do the technique with any embossing folder. We are also going to use some foil on the card, which picks up the texture of the embossing beautifully.

Layers of ink - Dry Embossed Floral Background by Anna-Karin Evaldsson.

Ink the embossing folder with Distress Ink. Mist a piece of watercolor paper with water on both sides and then, if you want to, also add some homemade glimmer mist. Mix a tiny bit of Perfect Pearl powder into a mini mister and fill with water. For my Sizzix Big Shot I used this sandwich: Multipurpose Platform without any tab, embossing folder, one cutting pad. 

Layers of ink - Dry Embossed Floral Background by Anna-Karin Evaldsson.

These are two panels I ended up using on my card. The one to the right was inked with two shades of blue in the center of the folder and Ground Espresso around the edges.

Layers of ink - Dry Embossed Floral Background by Anna-Karin Evaldsson.

Distress the edges of the panel. Place a piece of Scor-Tape on the card.

Layers of ink - Dry Embossed Floral Background by Anna-Karin Evaldsson.

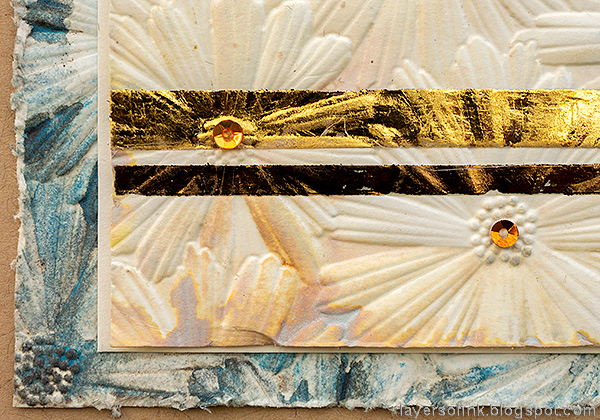
Press the matte side of foil on the tape and press. If you want a second strip, use a thinner piece of tape and a different shade of foil. I used Therm O Web Gold and Bronze.

Layers of ink - Dry Embossed Floral Background by Anna-Karin Evaldsson. Stamp with Simon Says Stamp Mix and Match Circles.

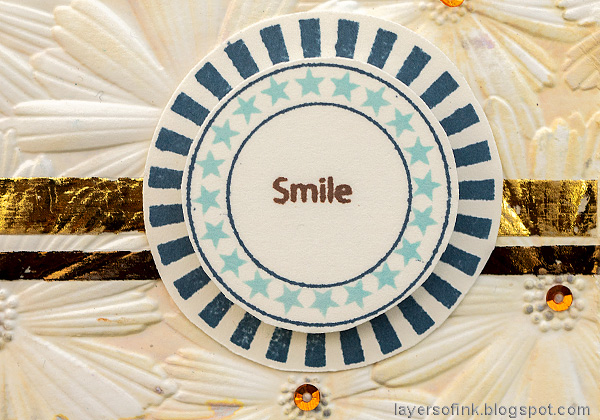
Stamp circles from the Simon Says Stamp Mix and Match Circles on heavystock paper. The circle set is designed so that many of the circles fit into each other and can be combined to create lots of different designs. For example, in the double open circle stamp, some of the other circles can be stamped inside the double circle. So the star circle is stamped between the two frames. The sentiments are also small enough to fit into most of the circles, or you could add a star or an an heart.

Layers of ink - Dry Embossed Floral Background by Anna-Karin Evaldsson.

Layer the circles with foam tape in between. 

Layers of ink - Dry Embossed Floral Background by Anna-Karin Evaldsson.

Distress the edges of the panels and mat the top one on cardstock to get even more dimension. Here you can see the Perfect Pearls setting into the embossed areas. The blue panel was matted on kraft paper and then on a folded piece of dark blue cardstock.

Layers of ink - Dry Embossed Floral Background by Anna-Karin Evaldsson.

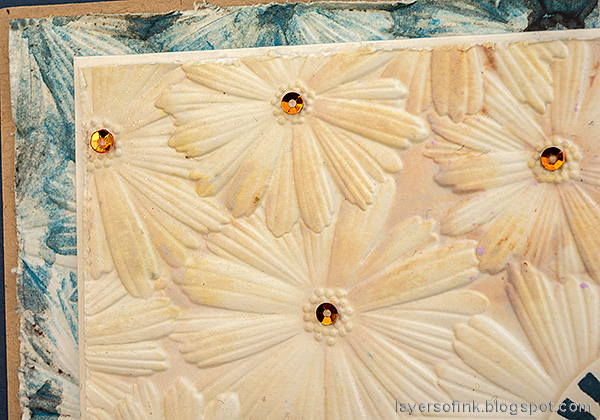
I glued sequins to all the flower centers for some extra bling. Here you can also see some of the shine from the Perfect Pearls.


Thank you so much for taking the time to stop by here today! 

Happy crafting!

Anna-Karin

Supplies:

* Please note: the links are affiliate links, for which I receive a small percentage of sales generated by the link, at no extra cost to you.