Pages

Tuesday, July 31, 2018

Blue Textured Wrapped Journal Tutorial

Hi all! Today I have a Sizzix tutorial which I can finally share with you. It was a birthday gift to my sister, so I had to wait for her birthday before sharing it.
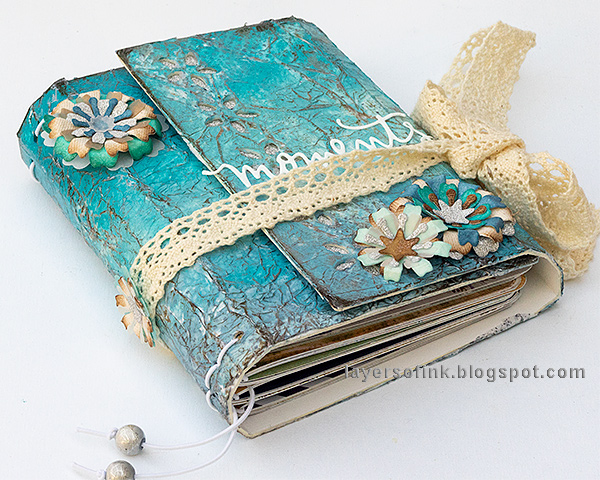
Layers of ink - Blue Textured Wrapped Journal Tutorial by Anna-Karin Evaldsson made with Eileen Hull Sizzix wrapped journal die.

I made a wrapped journal with lots of texture and some pretty flowers, using Eileen Hull's Book Club Chapter 2 collection. The journal can easily be customized to fit any theme. The wrapped journal is a nice and chunky size (4.7 x 5.1 in folded), and perfect as a gift.

Layers of ink - Blue Textured Wrapped Journal Tutorial by Anna-Karin Evaldsson

Start by die cutting the Wrapped Journal from mat board, placing the Floral Cutouts to the far right on the Wrapped Journal die, where there is a very useful space for Movers & Shapers dies. This step cuts a pretty flower border, in just one go. Use this sandwich: Extended Cutting Pad, die facing up, mat board, second Extended Cutting Pad. This is an XL die, but fits perfectly in the ordinary Big Shot or Vagabond.

Layers of ink - Blue Textured Wrapped Journal Tutorial by Anna-Karin Evaldsson with Eileen Hull Sizzix Book Club Chapter 2

The Scoreboards dies cut and score the mat board. Carefully, fold slightly along the score lines, to prepare the mat board.
Layers of ink - Blue Textured Wrapped Journal Tutorial by Anna-Karin Evaldsson

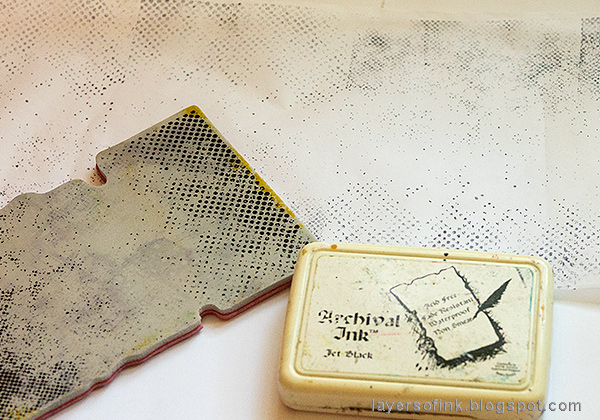
I wanted to create almost the look of leather and decided to use tissue paper. Stamp a piece of Tim Holtz Plain Collage Paper with his Halftone stamp. Make the paper slightly longer than the journal.
Layers of ink - Blue Textured Wrapped Journal Tutorial by Anna-Karin Evaldsson

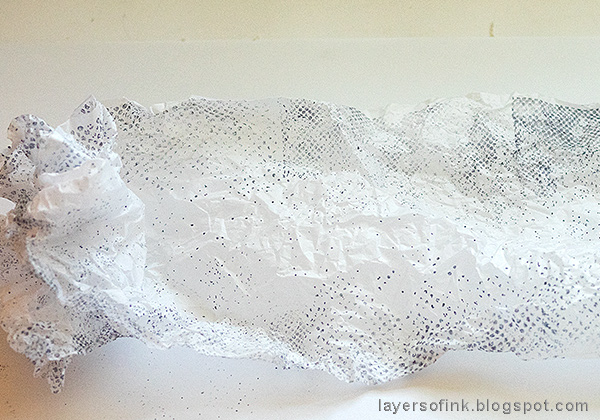
Crumble the tissue paper up.

Layers of ink - Blue Textured Wrapped Journal Tutorial by Anna-Karin Evaldsson

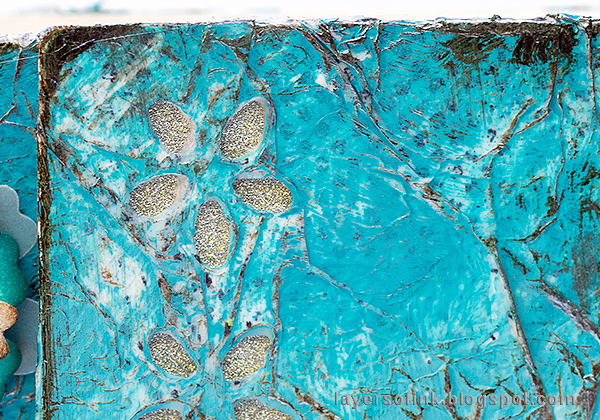
Adhere to the mat board with Matte Medium - one layer below and one above. Make sure to add crinkles to the tissue paper. If you want less texture, adhere it flat instead. Use a needle tool to remove the tissue from the flowers and holes.

Layers of ink - Blue Textured Wrapped Journal Tutorial by Anna-Karin Evaldsson

Paint with Distress Paint. I used three shades of blue/turqouise.

Layers of ink - Blue Textured Wrapped Journal Tutorial by Anna-Karin Evaldsson

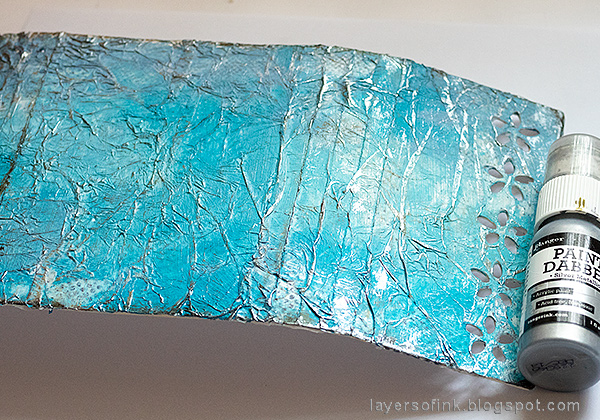
When the paint is dry, dry brush a little Ground Espresso on the cover, to increase the texture and give it a worn look.
Layers of ink - Blue Textured Wrapped Journal Tutorial by Anna-Karin Evaldsson

Dry brush silver paint, to make the cover shine.

Layers of ink - Blue Textured Wrapped Journal Tutorial by Anna-Karin Evaldsson

The Flowers & Leaves Journaling Cards die set die is so versatile and gives you many gorgeous flower and leaves in just one go. I only used the flower one. I die cut a whole bunch, from: vellum, cream paper, sticky-back canvas and silver Deco Sheet. Adhere the latter two to paper before die cutting.

Layers of ink - Blue Textured Wrapped Journal Tutorial by Anna-Karin Evaldsson

Ink the flowers with Distress Inks.

Layers of ink - Blue Textured Wrapped Journal Tutorial by Anna-Karin Evaldsson

Mist them with Wendy Vecchi Pearl Mica Spray for gorgeous shine.

Layers of ink - Blue Textured Wrapped Journal Tutorial by Anna-Karin Evaldsson

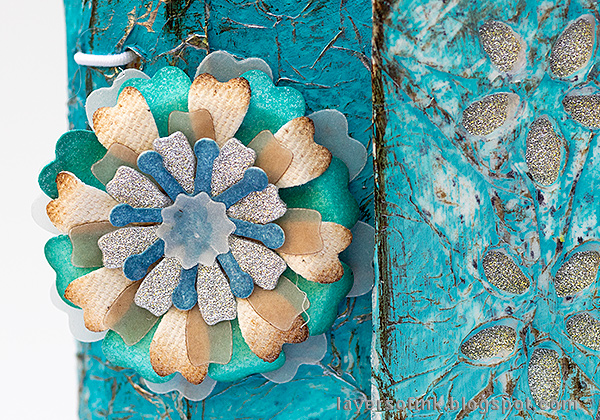
Use the Sizzix Paper Sculpting kit to shape the flowers. This gives them life.
Layers of ink - Blue Textured Wrapped Journal Tutorial by Anna-Karin Evaldsson

Layer the flowers and glue them together, or use a brad. I have leftover flowers for future projects too.

Layers of ink - Blue Textured Wrapped Journal Tutorial by Anna-Karin Evaldsson

The wrapped journal can be bound in different ways. I used an elastic string.
Layers of ink - Blue Textured Wrapped Journal Tutorial by Anna-Karin Evaldsson

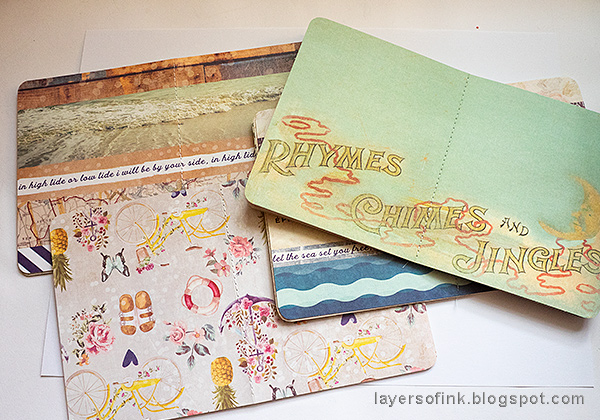
For the inside pages, I used a whole bunch of patterned papers, mainly by Prima, mixing neutral and more patterend papers. Cut papers for the inserts about 7.7 x 4.7 in (19.5 x 12 cm) and fold in half.  Arrange into four signatures. The amount of papers in each signature depends on the thickness of your paper. I used five sheets and stitched down the centers. You can also leave them lose or use stapels. 

Layers of ink - Blue Textured Wrapped Journal Tutorial by Anna-Karin Evaldsson

Tuck the signatures under the elastic cords. It is easy to remove and change the order of the signatures for the recipient.

Layers of ink - Blue Textured Wrapped Journal Tutorial by Anna-Karin Evaldsson

I tied a piece of lace around the journal as a closure and glued it to the spine. I also tied two blue beads to the elastic cords.
Layers of ink - Blue Textured Wrapped Journal Tutorial by Anna-Karin Evaldsson

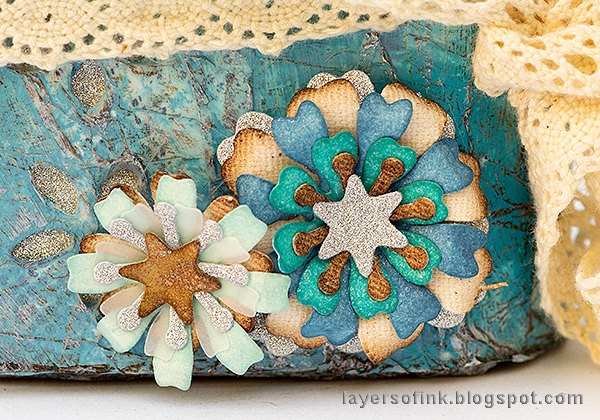
I added a piece of silver Deco Sheet under the flowers.
Layers of ink - Blue Textured Wrapped Journal Tutorial by Anna-Karin Evaldsson

Glue the dimensional flowers to the cover. I like the mix of materials in the flowers.
Layers of ink - Blue Textured Wrapped Journal Tutorial by Anna-Karin Evaldsson

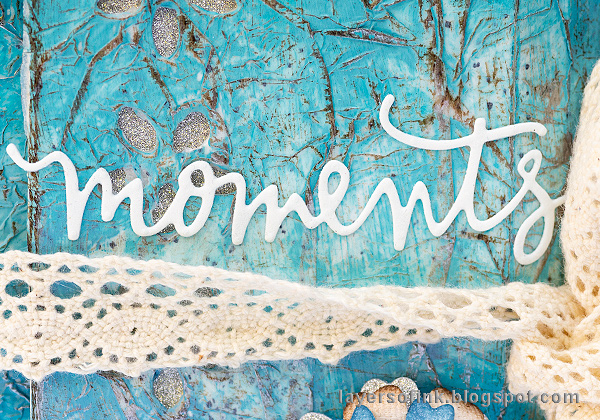
I used a die cut word from Eileen's Floral Arch and Words set, as a title for the journal.
Layers of ink - Blue Textured Wrapped Journal Tutorial by Anna-Karin Evaldsson

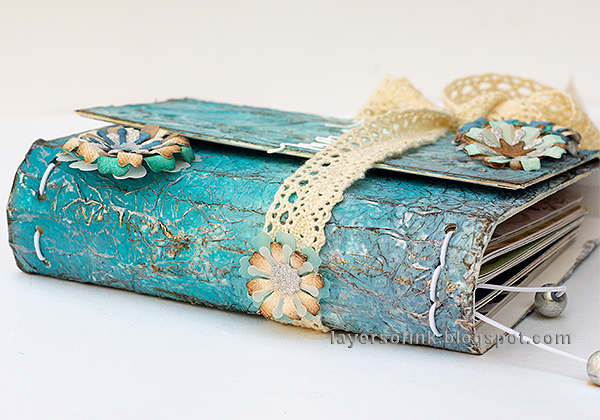
The Wrapped Journal is very chunky and feels nice to the touch. You can fold the top flaps both ways, but since I wanted the die cut flower border to show, this was the best way for this journal. If you have a look at my first wrapped journal, you'll see that I folded the cover the other way around there.
Layers of ink - Blue Textured Wrapped Journal Tutorial by Anna-Karin Evaldsson

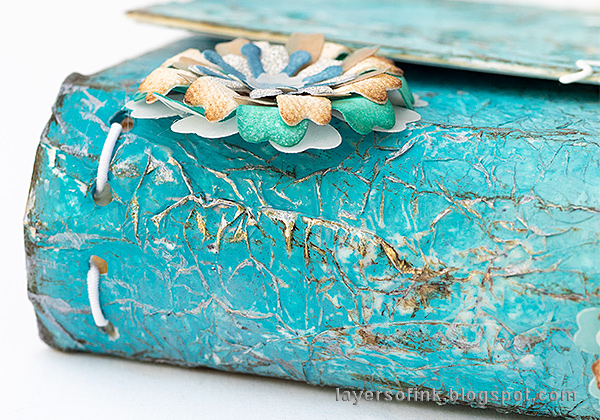
The brown and silver dry brushing adds a nice texture to the cover.

Layers of ink - Blue Textured Wrapped Journal Tutorial by Anna-Karin Evaldsson

You can also embellish the back, but I decided to keep it plain.

Layers of ink - Blue Textured Wrapped Journal Tutorial by Anna-Karin Evaldsson

In my first wrapped journal, I used only cream papers, but this one was meant for both photos, ephemera and notes, and I thought patterned papers would be fun.

Layers of ink - Blue Textured Wrapped Journal Tutorial by Anna-Karin Evaldsson

Here's a look at the journal from the top.
Layers of ink - Blue Textured Wrapped Journal Tutorial by Anna-Karin Evaldsson

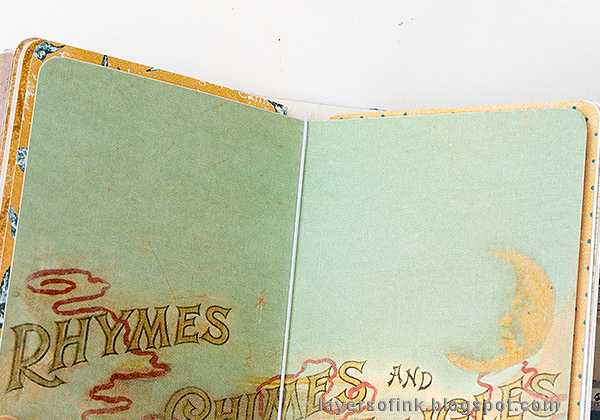
I used a mix of papers, including some baby themed papers, since I was planning that my sister would use the journal to collect photos and memories for her baby.

Thank you so much for looking at this post and I hope it inspired you to make some journals.

Happy crafting!

Anna-Karin

Supplies:


* Please note: the links are affiliate links, for which I receive a small percentage of sales generated by the link, at no extra cost to you.


Monday, July 30, 2018

African Night Watercolor Tutorial

Hello friends! The very warm and dry weather continues here. It is basically South African summer weather, but without the rain storms. We have been going to swim in the late afternoon when it cools down a little. The weather also inspired my project for this week's Simon Says Stamp Monday Challenge blog.


Thank you to everyone who hopped along with us in last week's Christmas in July blog hop. This week at the Simon Says Stamp Monday Challenge Blog we have a Wild Things theme. Fun! Don't miss the last project by our July guest designer Karolina Bukowska.

Layers of ink - African Night Watercolor Tutorial by Anna-Karin Evaldsson

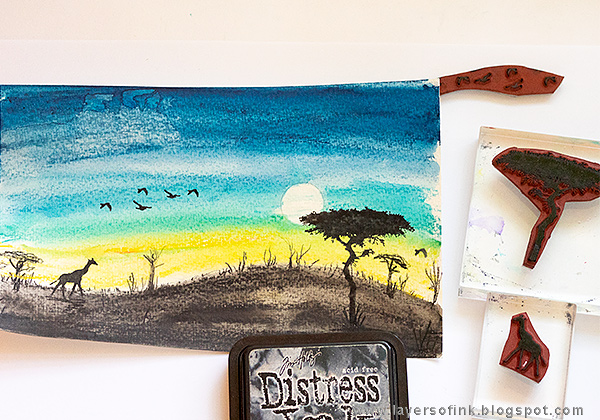
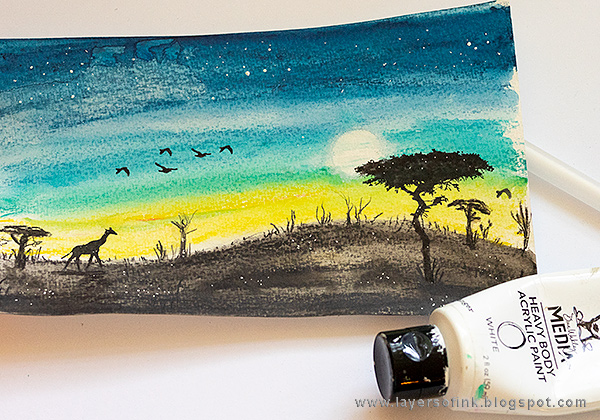
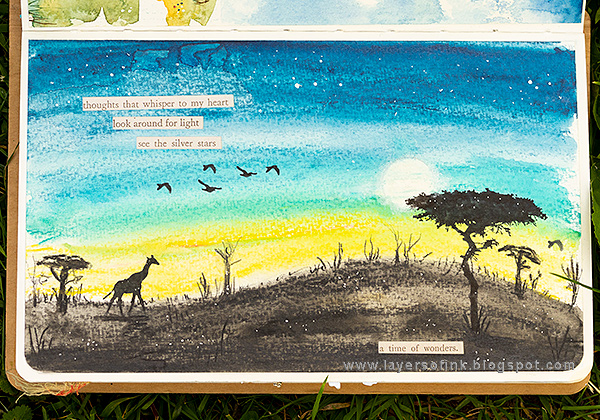
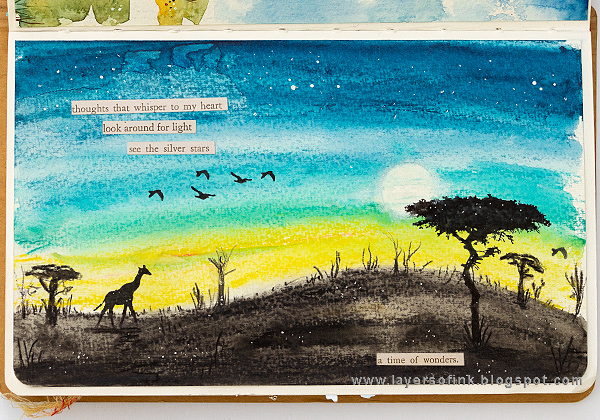
I was missing South Africa and made an African night scene in my art Dylusions Small Creative art journal. It was such fun to make and I actually made a whole bunch of little watercolor backgrounds. The stamps are by Darkroom Door. The background was colored with Dina Wakley's Scribble Sticks, and is very easy to do.

Layers of ink - African Night Watercolor Tutorial by Anna-Karin Evaldsson

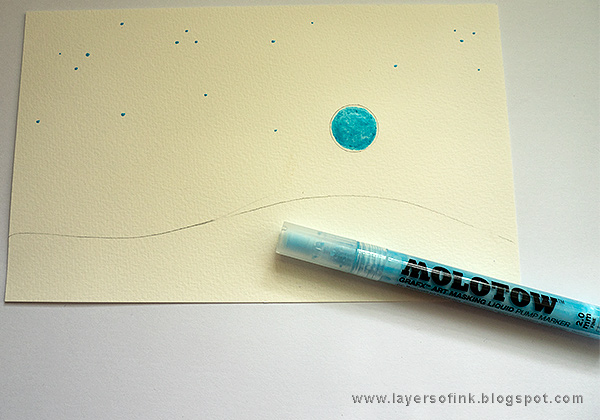
Start by sketching the outline of a hill on a piece of watercolor paper and add a moon with Molotow Art Masking Liquid. I also added stars, but if you will use Scribble Sticks like I did, you can skip the stars, since they will rub off. If you color the scene with ordinary watercolor paint or with Distress Ink, add the stars.

Layers of ink - African Night Watercolor Tutorial by Anna-Karin Evaldsson with Dina Wakley Scribble Sticks

Scribble over the scene with Scribble Sticks. You want to get a lot of pigment on the page. Go lightly over the moon, otherwise you will rub off the masking liquid. I used both Set 1 and Set 2 of the Scribble Sticks.

Layers of ink - African Night Watercolor Tutorial by Anna-Karin Evaldsson

Use a paint brush and clean water to dissolve the Scribble Stick marks and blend them. Before the background dried completely, I drew some trees, sticks and grass at the top of the hill with a black Derwent Inktense pencil. The Inktense pencils dissolve when water is applied, so if the background isn't completely dry, you get an immediate watercolor look. When the background is completely dry, you can add even more detail. Rub off the masking fluid.

Layers of ink - African Night Watercolor Tutorial by Anna-Karin Evaldsson with Darkroom Door African Trees stamps

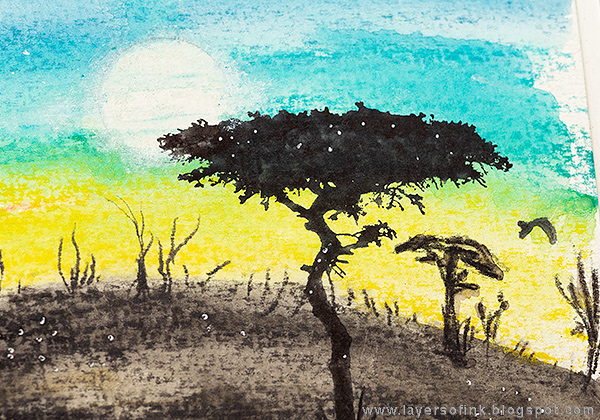
Ink stamps with Black Soot, mist with water for a watercolor effect and stamp. The stamps are all from the African Trees set. Add grasses, shadows and more trees with the black Inktense pencil. Dissolve some of it with water and a paint brush.

Layers of ink - African Night Watercolor Tutorial by Anna-Karin Evaldsson

Use a white gel pen and a little white acrylic paint to add stars to the sky and highlights to the ground. With a dry brush, add shine around the moon with the white paint.

Layers of ink - African Night Watercolor Tutorial by Anna-Karin Evaldsson

I looked for some Clippings Stickers that fitted my thoughts behind the page, and was happy with the combination of these three lines.

Layers of ink - African Night Watercolor Tutorial by Anna-Karin Evaldsson

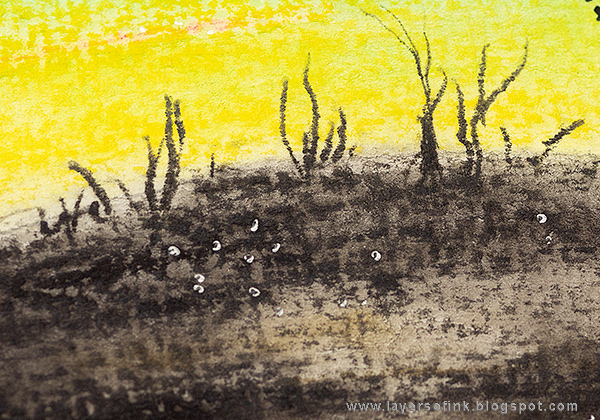
The smaller dots are from the white gel pen and the larger from the paint - applied with a tooth pick.

Layers of ink - African Night Watercolor Tutorial by Anna-Karin Evaldsson

There is a thin pencil line around the moon, from when I traced the moon with a coin. I left it in place, since I liked the effect.

Layers of ink - African Night Watercolor Tutorial by Anna-Karin Evaldsson

The grasses and drawn trees add interest and are easy to do.

Layers of ink - African Night Watercolor Tutorial by Anna-Karin Evaldsson

When you apply Scribble Sticks as thickly as I did here, some texture remains, which I liked for this page. If you don't want the texture, apply the Scribble Sticks more lightly.

Layers of ink - African Night Watercolor Tutorial by Anna-Karin Evaldsson


I hope you will join us this week in our Wild Things challenge. As always, you have a chance to win a $50 gift voucher to do some fun shopping at Simon Says Stamp. You have until next Monday 8am Ohio time. 1pm UK time, 2 pm CET to join in.


Don't forget to follow Simon Says Stamp on Instagram, they post great stuff daily. 


Do you use Instagram? If so please add #sssmchallenge so we can see your entries there too.


Thank you for taking the time to stop by my blog today!  

Happy crafting!

Anna-Karin

Supplies:

* Please note: the links are affiliate links, for which I receive a small percentage of sales generated by the link, at no extra cost to you.


Saturday, July 28, 2018

Altered Envelopes Tutorial

Hello everyone! I hope you are all well! Today, it is almost too warm to be outdoors here, so we are playing board games and crafting indoors instead. Anton made a wooden robot and Leo plays with clay.

I am happy to be back on the Sizzix blog today, as a blog team member, with an altered envelope tutorial.

Layers of ink - Altered Envelopes Tutorial by Anna-Karin Evaldsson with Sizzix Katelyn Lizardi Envelope Liners

I made one more elaborate vintage altered envelope and four simpler white envelopes. They were made using dies and stamps from Katelyn Lizardi's Envelope Liners collection, and more specifically the Envelope Liners A2 and A7, Envelope Corners, You've Got Mail sets. All these sets are very versatile and can also be used for other things than envelopes.

I had fun using some recent second hand finds to stage this photo.

You can find all the steps and close-ups on the Sizzix blog.

Thank you so much for stopping by here today!!

Happy crafting!

Anna-Karin

* Please note: the links are affiliate links, for which I receive a small percentage of sales generated by the link, at no extra cost to you.

Tuesday, July 24, 2018

Darkroom Door and Karen Burniston Blog Hop

Hi friends! We have another sunny day here and although we enjoy the warm weather, it needs to rain. The Darkroom Door Inspiration Team is teaming up with the Karen Burniston team for a fun blog hop. I am happy to take part in this fun hop! You should have arrived here from the very creative Shelly Hickox.


Both Darkroom Door and Karen Burniston will be giving away a prize packs, with winners randomly chosen from ALL of the blog hop comments received by Sunday, July 29th, 2014. Lots of chances to win some goodies, so just leave a comment on this post or any other blog hop post to enter!

Layers of ink - Charm Accordion Bird Card Tutorial by Anna-Karin Evaldsson

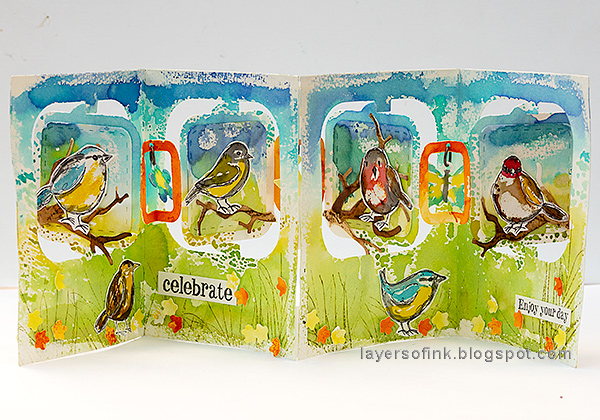
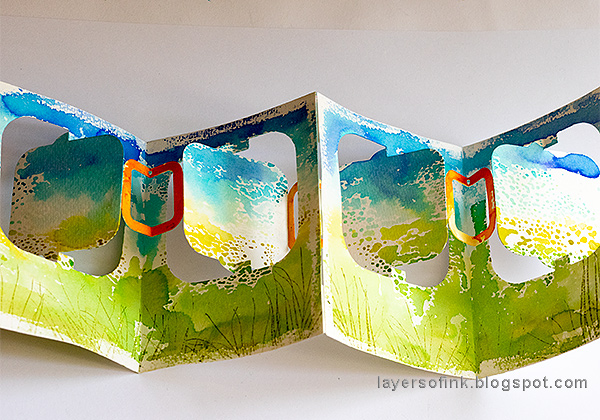
I made a fun garden birds accordion birthday card and really enjoyed combining Darkroom Door stamps with two great die sets from Karen Burniston. I used the Darkroom Door Garden Birds, Grevilleas and Birthday Sentiment sets, together with Karen Burniston's Charm Accordion and Tree Pop-up. The card is much easier to make than what it might look like. Let's start.

Layers of ink - Charm Accordion Bird Card Tutorial by Anna-Karin Evaldsson with Karen Burniston die sets

These are the two die sets that I used: the Charm Accordion and the Tree Pop-up, both have lots of fabulous little details. 

Layers of ink - Charm Accordion Bird Card Tutorial by Anna-Karin Evaldsson

Start by die cutting two Charm Accordion panel pieces, as well as the coordinating pieces that you see here - squares, charm frames and joints. I used watercolor paper.

Layers of ink - Charm Accordion Bird Card Tutorial by Anna-Karin Evaldsson

Apply a tiny bit of Distress Micro Glaze around the edges in particular, as well as here and there for clouds. If you don't want the resist effect, you can skip this step.

Layers of ink - Charm Accordion Bird Card Tutorial by Anna-Karin Evaldsson

Smear Distress Inks on a non-stick craft sheet. I lined them up, starting with the lighter Crushed Olive and below it Mowed Lawn. The blues were lined up with Tumbled Glass first (above the Crushed Olive), then Mermaid Lagoon and last Blueprint Sketch. This creates the look of a summer nature scene. Mist with water and press the paper into the ink. Repeat for the other pieces. Color the front of one of the panels too, for the front of the card.

Layers of ink - Charm Accordion Bird Card Tutorial by Anna-Karin Evaldsson

I have a thing for trees and this one, from the Tree Pop-up set is stunning. There are also leaves and flowers that you can use to turn the tree into a tree for any season. I was going to use only the branches.

Layers of ink - Charm Accordion Bird Card Tutorial by Anna-Karin Evaldsson

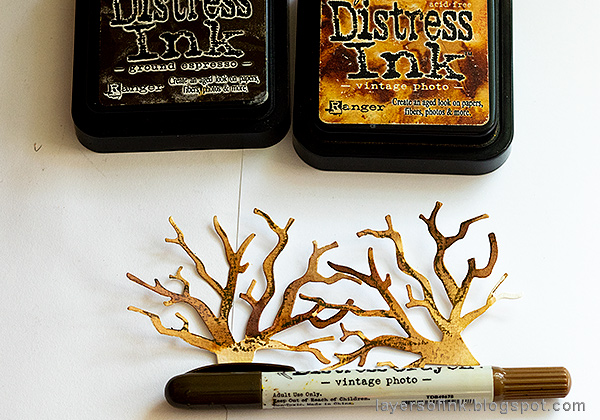
Smear Distress Inks on a craft sheet, mist with water and press the paper into the ink. When the ink was dry, I used a Distress Crayon to add texture.

Layers of ink - Charm Accordion Bird Card Tutorial by Anna-Karin Evaldsson

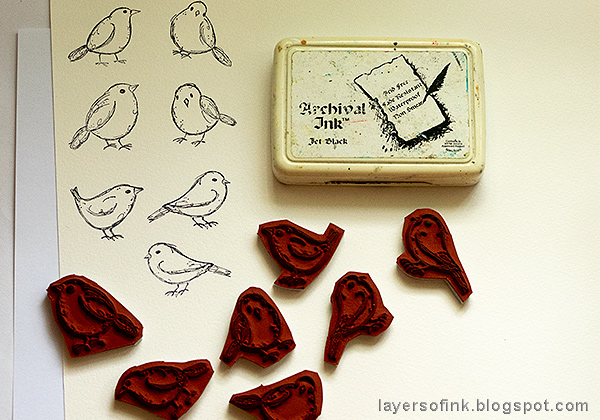
The Garden Birds set is designed by Godelieve Tijskens and the birds are adorable. They come in two sizes and I used the small ones. There are also three larger birds in the set. Stamp all the small birds on watercolor paper with a waterproof ink.

Layers of ink - Charm Accordion Bird Card Tutorial by Anna-Karin Evaldsson

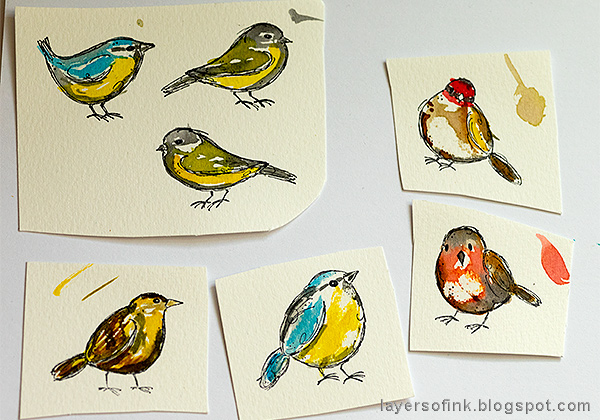
I used a bird book and colored the birds like real garden birds, using Distress Inks. Press the inks on a craft sheet to create a palette, mist with water at the edge of each ink color and then pick up with a paint brush. Misting with water at the edge only, makes it easier to vary the amount of water, so that you can get stronger and weaker shades of each color.

Layers of ink - Charm Accordion Bird Card Tutorial by Anna-Karin Evaldsson

When dry, use one of the Grevilleas stamps as grass. Mist the stamp with water after inking, for a watercolor look.

Layers of ink - Charm Accordion Bird Card Tutorial by Anna-Karin Evaldsson

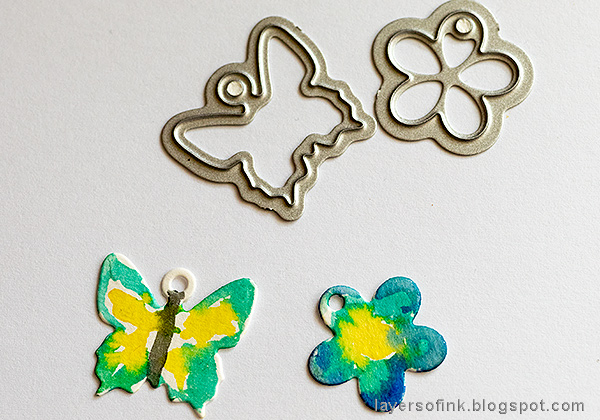
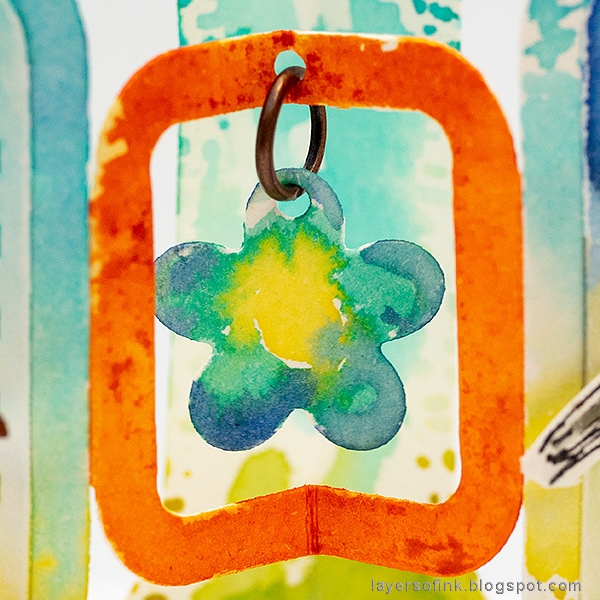
Die cut charms and paint them with Distress Inks. I also used a star, but forgot to include it here. Aren't the shapes cute?

Layers of ink - Charm Accordion Bird Card Tutorial by Anna-Karin Evaldsson

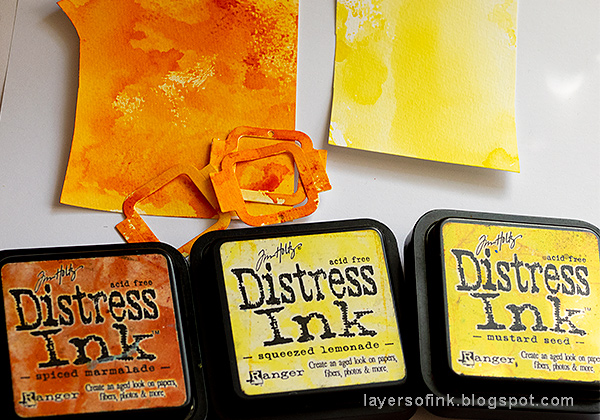
Color the frames with Spiced Marmalade and color two pieces of watercolor paper orange and yellow, using the same technique as above.

Layers of ink - Charm Accordion Bird Card Tutorial by Anna-Karin Evaldsson

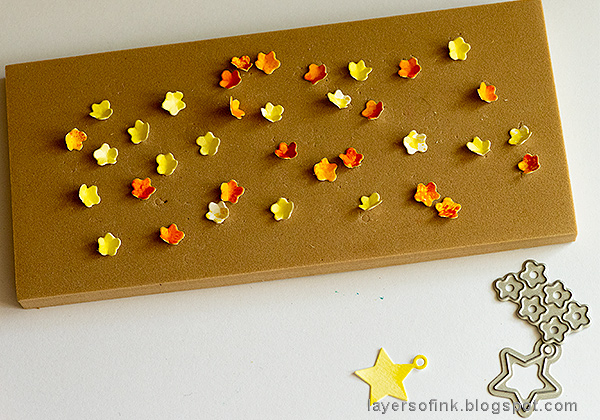
Die cut tiny flowers from the colored papers using the sweet flower die from the Tree Pop-up set. I love tiny flowers and these are so cute. Shape them a little with the Tonic Craft Tool set.

Layers of ink - Charm Accordion Bird Card Tutorial by Anna-Karin Evaldsson

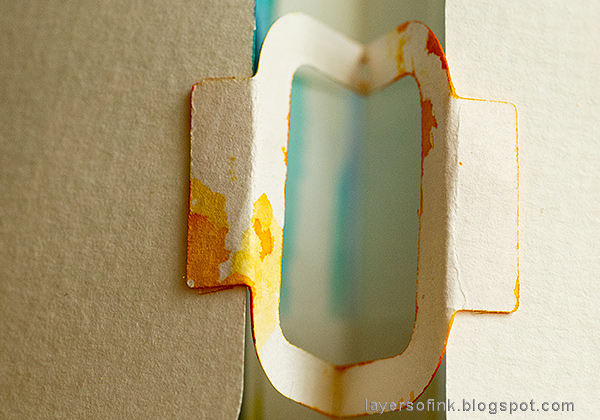
Condition the paper a little by folding along the score lines and then opening and closing each part of the card. Adhere the three charm frames as you see above.

Layers of ink - Charm Accordion Bird Card Tutorial by Anna-Karin Evaldsson

Use three or four joints at the back of the paper to adhere the two accordion panels together.

Layers of ink - Charm Accordion Bird Card Tutorial by Anna-Karin Evaldsson

Here's a look on the charm frames from the back to give you an idea of what the assembly looks like.

Layers of ink - Charm Accordion Bird Card Tutorial by Anna-Karin Evaldsson

You can die cut paper jump rings with the Charm Accordion set, but I used real ones instead.

Layers of ink - Charm Accordion Bird Card Tutorial by Anna-Karin Evaldsson with Darkroom Door Garden Birds stamps

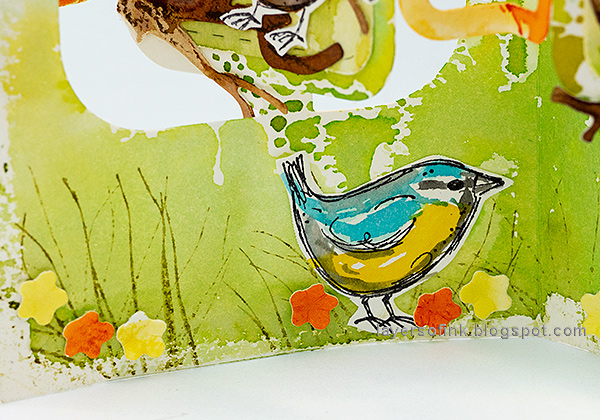
I layered a square panel on each larger panel and glued a branch and a bird on top. This is a Blue Tit.

Layers of ink - Charm Accordion Bird Card Tutorial by Anna-Karin Evaldsson

The Birthday Sentiment is full of great birthday sentiments. Stamp some of them and cut into strips.

Layers of ink - Charm Accordion Bird Card Tutorial by Anna-Karin Evaldsson

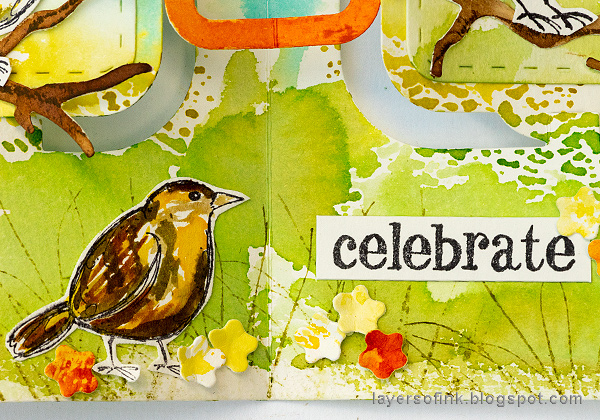
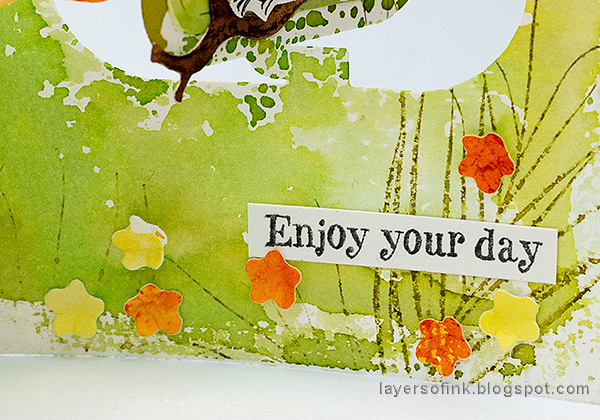
When you fold the card up, it creates a very cute little card which can easily be sent by the mail. The first bird then flips to the front as seen here. I added a sentiment and another bird to the front too.

Layers of ink - Charm Accordion Bird Card Tutorial by Anna-Karin Evaldsson

Here's a better look at the Distress Micro Glaze resist effect.

Layers of ink - Charm Accordion Bird Card Tutorial by Anna-Karin Evaldsson

You could also hang something else in the little frames, but the charms are really cute.

Layers of ink - Charm Accordion Bird Card Tutorial by Anna-Karin Evaldsson

The next bird in the happy little crowd. It's a Great Tit.

Layers of ink - Charm Accordion Bird Card Tutorial by Anna-Karin Evaldsson

The Garden Birds are really cute and I love the fine lines in the stamps. It's a European Robin.

Layers of ink - Charm Accordion Bird Card Tutorial by Anna-Karin Evaldsson

This is meant to be a European Goldfinch.

Layers of ink - Charm Accordion Bird Card Tutorial by Anna-Karin Evaldsson

The Grevilleas set is wonderful, and some of the stamps work great as grass.

Layers of ink - Charm Accordion Bird Card Tutorial by Anna-Karin Evaldsson

Glue the little flowers here and there using Distress Matte Medium.

Layers of ink - Charm Accordion Bird Card Tutorial by Anna-Karin Evaldsson

Glue a couple of birds in the grass too. You can never have too many birds on a card. :)

Layers of ink - Charm Accordion Bird Card Tutorial by Anna-Karin Evaldsson

Here's a peek at the star charm, which hangs in the middle, where the two panels join.

Layers of ink - Charm Accordion Bird Card Tutorial by Anna-Karin Evaldsson

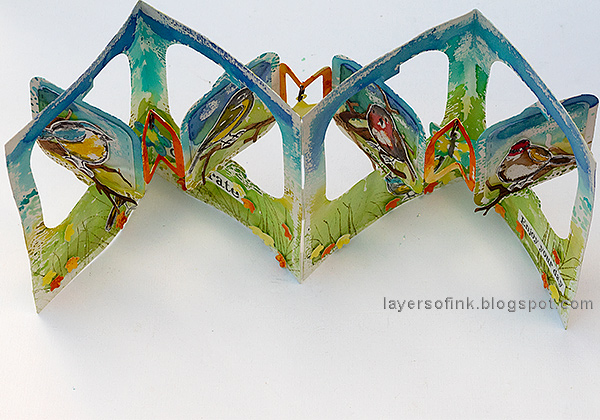
Here's a look at the card from above. I love interactive cards like these, which can also be displayed by the recipient.

Layers of ink - Charm Accordion Bird Card Tutorial by Anna-Karin Evaldsson

Your next stop on the hop is Mary Prasad who has more fun inspiration to share with you.
Hop list

Anna-Karin Evaldsson (you are here)

Thank you so much for stopping by here today! Don't miss all the inspiration along the hop!

Happy crafting!

Anna-Karin

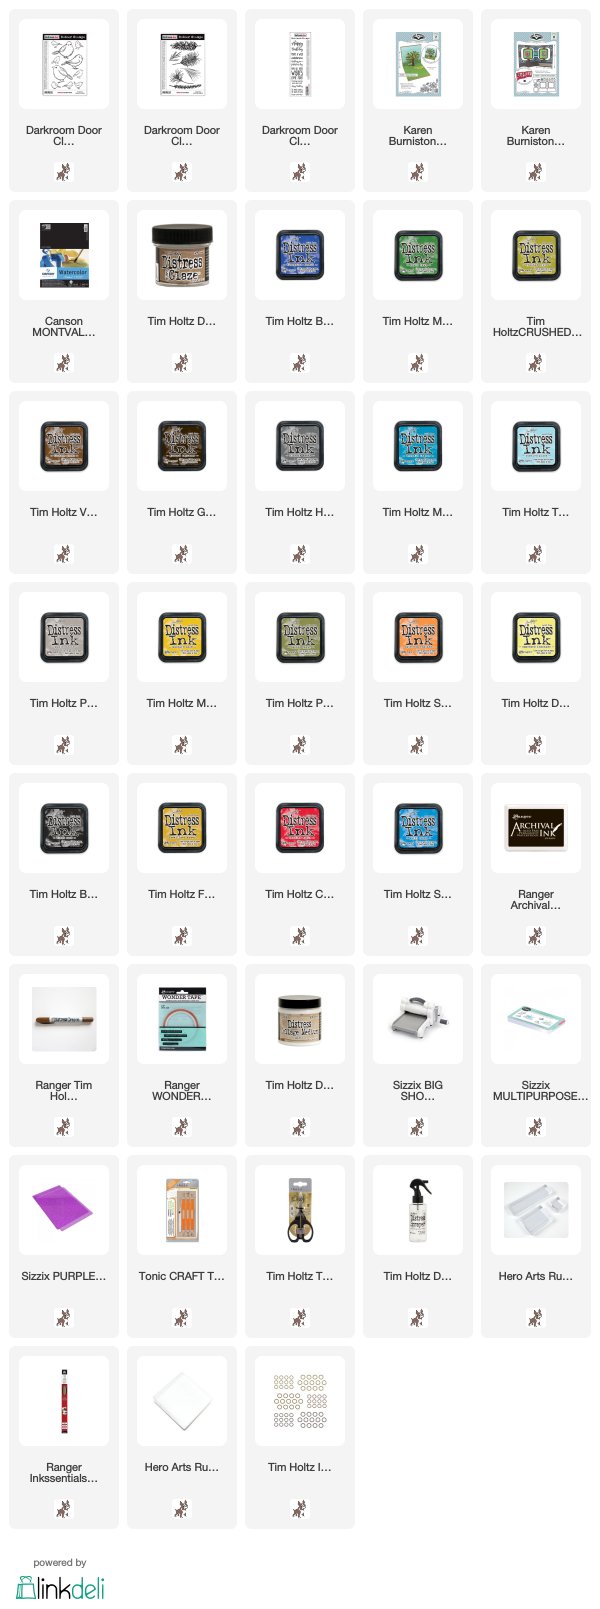
Supplies:

* Please note: the links are affiliate links, for which I receive a small percentage of sales generated by the link, at no extra cost to you.