Hello and welcome! Did you get some crafty time this weekend? I've been documenting the past week with photos and words, inspired by
Ali Edwards Week In The Life project. I suddenly realized that it was one of the last weeks with the routine we have now, before the start of the summer, and thought it would be fun to document it. I am hoping to put it all together in a mini-album some time next month.
I was thinking of birthdays and wishes and decided to make a layout for the boys, about wishes and following your dreams. Their birthdays are very close together and just a short while before this photo was taken. The photo was taken by Alet Gronewald from
Blessed Reflection Photography. Leo was feeling a little ill and didn't want to sit in Anton's lap, so there aren't many photos of the two of them together from this session. I like this one with the small feet and the bigger shoe. I took step photos while building up the mixed media background.
Start by die cutting Tim Holtz
Wildflowers and
Lace from watercolour paper. I used the Sizzix Precision Base Plate, since it helps to make perfect die cuts every time of even these intricate dies. Glue to Prima 12 x 12 watercolour paper with matte multi-medium. Then I coated it all with a layer of gesso.
When the gesso is dry, paint with watered-down Distress Paints. You can also mist with additional water so that they blend even more. Leave to dry.
To add texture to the background, stamp with the new
Newsprint stamp by Tim Holtz and Jet Black ink. I really like this stamp, with all the small words. Stamp stars with the same ink. The
Specks stamp was stamped with Fern Green on the grass area and Cornflower for the sky. The
birds were stamped with the same blue.
Add even more texture with stencils and white Texture Paste. I used two mini stencils from
set 8 and
set 9 and the
Industrial one.
Add shadows to the flowers with a Black Soot marker. Wipe with your finger or a cloth to blend.
Paint the dots with the same blue paints as you used for the sky. Later, I also added shadows to the dots.
Also add shadows to the number and the word 'lucky'.
For the journaling, which is tucked in behind the photo, I stamped a
Label Frame with Fern Green and die cut a
Stencil Number 2 in the corner. The stencil number die set includes numbers in four different sizes.
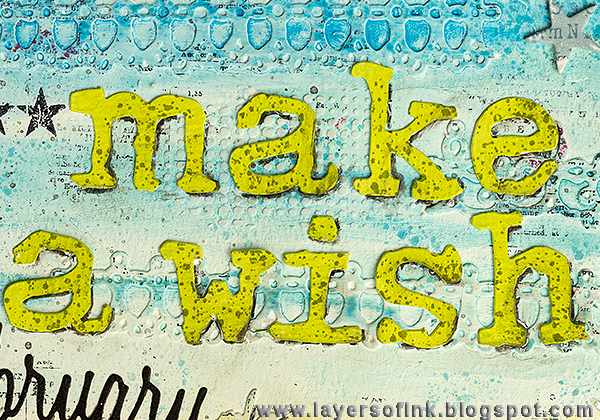
The title was die cut with the new
Tim Holtz Alphabet Typo Lower die. I love the shape of these letters. I painted them with Twisted Citron, stamped with the Specks stamp and added shading to make them blend with the background.
I also die cut three words from black kraft-core cardstock, using the
Calendar Words Script,
Adventure Words Script, and
Friendship Words Script.
I like how the birds peek through underneath the textured dots.
Finally, I splattered some black paint on the background with Black Soot and the
Distress Splatter brush.
Additional journaling was done with Small Talk stickers.
I die cut a few
Wildflowers in white and glued on top of the background ones. The number 2 was die cut with the
Alphabet Typo Upper from a piece left-over from a project I'll be posting tomorrow. The tiny
hearts and stars were die cut from the same piece.
I hope you will join us in our
Make a Wish challenge. As every week, you have a chance to win a $50 gift voucher from
Simon Says Stamp. You have until Monday 8am Ohio time. 1pm UK time, 2 pm CET to join in.
Do you use Instagram ? If so please add
#sssmchallenge so we can see your entries there too.


Thank you so much for stopping by today!
Happy crafting!
Anna-Karin
Supplies:


absolutely gorgeous layout Anna-Karin, the photo is adorable and I love all of the details, the colours and textures are perfect! very lovely :-)
ReplyDeleteluv
Lols x x x
I love your layout, Anna-Karin! Beautiful colors, texture and a real keepsake. I too love the little foot next to the big shoe. Adorable! Cathie
ReplyDeleteOne of most beautiful layout I have ever seen! I make my wish: I would like to create something special like this!
ReplyDeleteStunning layout, Anna-Karin! The photo is adorable, cutest baby toes!! :)
ReplyDelete*mwah*
Steph
Simon Says Stamp!
On a normal day I just look and enjoy all the beautiful makes by your hand at the SSS Mondaychallenge, but this one stood out so much; think it is a beautiful one! Love the colours and the way you used the die-cuts! (Something I like to do more, just like making LO's...but time and live...you know...) Thanks for another great inspiration piece! And for all the other inspiration you give!
ReplyDeleteHave a colourful week!
This is a truly beautiful layout. I like it a lot.
ReplyDeleteThis is a truly beautiful layout. I like it a lot.
ReplyDeleteI love this layout and your detailed steps to making it. It makes a perfect frame for the cute photo! It's so great to get your posts delivered by email again.
ReplyDeletebeautful layout Anna-Karin...those cute little toes are so adorable...hugs kath xxx
ReplyDeleteSuch a heart warming layout, Anna-Karin, I love the serene feel you've created with the wonderful photo and the soft colors!
ReplyDeleteI adore to see the way that you create your background! layout is fabulous , picture is so cute and your tutorial is so clever and interesting! Barbara
ReplyDeleteGreat step by step process, I always love to see how a beautiful project was made, what is behind, which techniques were used and how the artist received every results. Thank you for that. Hugs, Marzena
ReplyDeleteOh my, this is such a beautiful and adorable creation, Anna-Karin. The background you created is amazing. I love the super cute picture, too. :)
ReplyDeleteThis is so precious! As always, I think it's awesome that you use your talent in art to keep such a wonderful history of your family. Your art skills are equal to your photography skills and I loved the cute little feet in this!
ReplyDeleteGorgeous layout, Anna-Karin! You're amazing with creating stunning backgrounds. The picture really stands out. Love it! Hugs, Sandra
ReplyDelete