
Hello everyone! I have a long post for you today, a mini album tutorial made for this week's Simon Says Stamp Monday Challenge, Due Date. There are many different ways to interpret this challenge, but it of course made me think about babies and due dates, since mine haven't waited for their due dates.

I love making mini albums, it is such a wonderful way of capturing a lot of memories, but in a small size which is easy to handle and possible to complete relatively quickly. I wanted to make a little book, both for Leo and for myself, about the time from when I found out I was pregnant until he was home from the hospital. So many things happened during this period, especially with the move. Hero Arts new Wallet Album by Kelly Purkey was the perfect home for my memories. I love the clear elements, the size (the cover is 4.65 x 7 in folded) and the coordinating inserts. This is one of my favourite mini albums so far. I am glad that I made it. Let start.

I started out with Ranger's new mixed media paper, since I wanted to test how it would stand up to a technique involving a lot of water. The result was great. Mist the paper pretty heavily with water.


Here you can see the Wallet Album cover, with pockets on both sides and the Grid Booklet insert. I removed the staples from the insert. I also used the 4 x 6 and 3 x 4 pocket inserts. The latter two come with two inserts in a package, but I only used one of each, and will save the other two for another project. Some of my own baby photos are placed in a plastic 4 x 6 album, and the wallet system reminded me very much of that, the plastic even feels and smells the same.

Cut the cover paper to fit into the cover. I stamped the cover with a date stamp and a circle sentiment stamp using Mermaid Lagoon ink. Love this shade of blue and the Discover stamp will be well used by me. I also stamped the background with an Astronomy background stamp, using second and third generation stamping. It contains lots of dates and numbers, which fit with the theme.


The inserts of the album are a mini version of pocket scrapbooking, and I used Sizzix Life Made Simple dies to die cut 3 x 4 and 4 x 6 cards from the watercolour backgrounds I had made.

And some more. Later, I also die cut kraft cards to place behind the decorative die cut cards. Time to put everything together.

I added die cuts to the cover design, some on the paper, some directly on the plastic cover.

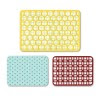
Aren't these icon stamps cute? You'll find stamps fitting many occasions in the set.

Here's my die cut title, with his name stamped with alphabet stamps underneath. 'You' is placed on the plastic, since I didn't want any dimensional shapes under the plastic cover.


I am not going to share every single spread of this album, since the post will be far too long then. The stamp at the top right is by Simon Says Stamp, and comes from a travel related set, but worked perfectly here.

I used a mix of sentiment and image stamps, most of them by Hero Arts.

I had fun documenting some of the things that happened while I was pregnant, such as this safari. These two are both babies, and I hope the rhino is still alive, because rhino poaching is a huge problem in South Africa. I stamped a lot of the pages with leaves from the Stamp Your Own Plant set, using second generation stamping and Fern Green ink.

Two elephants going to take a bath in a dam. I repeated the 'we are explorers' stamps in three places of the album. I also used a bunch of moving related photos, boxes, and more.

It is quick to just stamp a few impressions and add some die cuts to each page. I also hand wrote the journaling since that was quicker, not worrying about keeping it neat. When I make mini albums I usually finish the pages before binding the album, but here I bound the album first, partly to avoid having to keep order among lose pages. Since the album was already bound, some of the stamping ended up imperfect, which is exactly what I wanted here.

This is in the middle of the book, where the 4 x 6 insert is placed.

The words were stamped with the Kelly's Outline Letters set. Love those outline letters, and the little potty person placed inside the circle stamp.

All the die cut cards were stamped with the same Astronomy Background stamp, which brought the album together.

This is the 4 x 6 insert open, with another die cut and stamped card and one of my favourite photos of the two brothers.

The last page of the insert is to the left and then we continue with the grid booklet again. Anton picked out the cat for Leo and made the little stick family or four to the left.

All the tabs, tags and labels come from the same set of dies. I stamped them with sentiment and icon stamps, and left some for dates and journaling. I still need to add dates to many of the photos.

A close-up of the stick family. I try to photograph these types of arrangements quickly, since they often turn into something else pretty soon.

Anton also draw a picture of me on his white board, when I was still pregnant. He gave both me and Leo pretty prominent brains. :)

My first photo of Leo at the hospital.

These words were die cut from Coredinations Distress cardstock, using two different sets by Tim Holtz. They were leftovers from another project. I like having bits and pieces on my desk, and finding them to use on projects like this.

He was jaundiced and had to be on the blue light, and did not like the eye protection gear at all. I stamped a blue sun with a clock inside.

To the left is the last page of the 3 x 4 insert. We are nearing the end of the album and Leo is home from the hospital.

The light blue stamping was done with Sky Blue Archival Ink.

The last spread in the album. The Wallet Album cover has pockets at the front and back. I added more photos into the pockets, placed on die cut kraft cardstock. I also tucked some notes, labels from gifts, and other ephemera, into the pockets.


I placed a single photo on the back cover, together with a stamped and die cut sentiment. I like that the plastic covers protects whatever you place inside.
This was a long post! I hope you will join us this week in our due date challenge, as always, one lucky participant wins a $50 gift voucher from Simon Says Stamp.

Thank you for your visit today!
Happy crafting!
Anna-Karin
Supplies:


Beautiful mini book! the colors and ideas are just wonderful. Now I am feeling such a slacker when you created a whole mini book while the baby is still a baby! Wow!
ReplyDeleteWhat a beautiful album. fantastic pictures. wow. so lovely to see.
ReplyDeletekind regards, Dora
Work of art... labor of love. Just so wonderful Anna-Karin. VERY VERY SPECIAL. j
ReplyDeleteWowee! What a fun mini album!! Your boys are adorable beyond words :)
ReplyDelete*mwah*
Steph
Simon Says Stamp!
A darling mini album. I always get new ideas from how you use stamps and dies. I love how Anton gave you and his brother very large brains in his drawing :-)) Fantastic colors you used, too.
ReplyDeleteThis is an amazing album, Anna-Karin! It has so much detail in many ways! Leo will treasure this when he gets older! Hugs, Sandra
ReplyDeletestunning mini album! It's incredible, it's full of details, love your use of Sizzix dies! Pictures are so beautiful! BArbarayaya
ReplyDeleteWow... this is such a fabulous and precious creation! Love all the beautiful embellishments, colors and details you created. The photos are so cute and wonderful! :)
ReplyDeleteYou know that I'm a huge fan of your work Anna-Karin and this is just fabulous! There is so much detail and you can see that it's a real labour of love and it's been worth every single minute! Thanks as always for sharing these adorable photos of your boys...you have such a beautiful family! <3
ReplyDeleteWhat an amazing project and I love, love, LOVE the color scheme! I enjoyed your step-by-step details and I was curious about the Ranger Mixed Media paper, too, so I appreciated your feedback on that. Wonderful job and Leo is so lucky to have such a talented mom to chronicle his life!
ReplyDelete